09/2007
4-43
Phaser 8860/8860MFP Service Manual
REP 3.0.2, REP 3.0.3
Repairs and Adjustments
Initial Issue
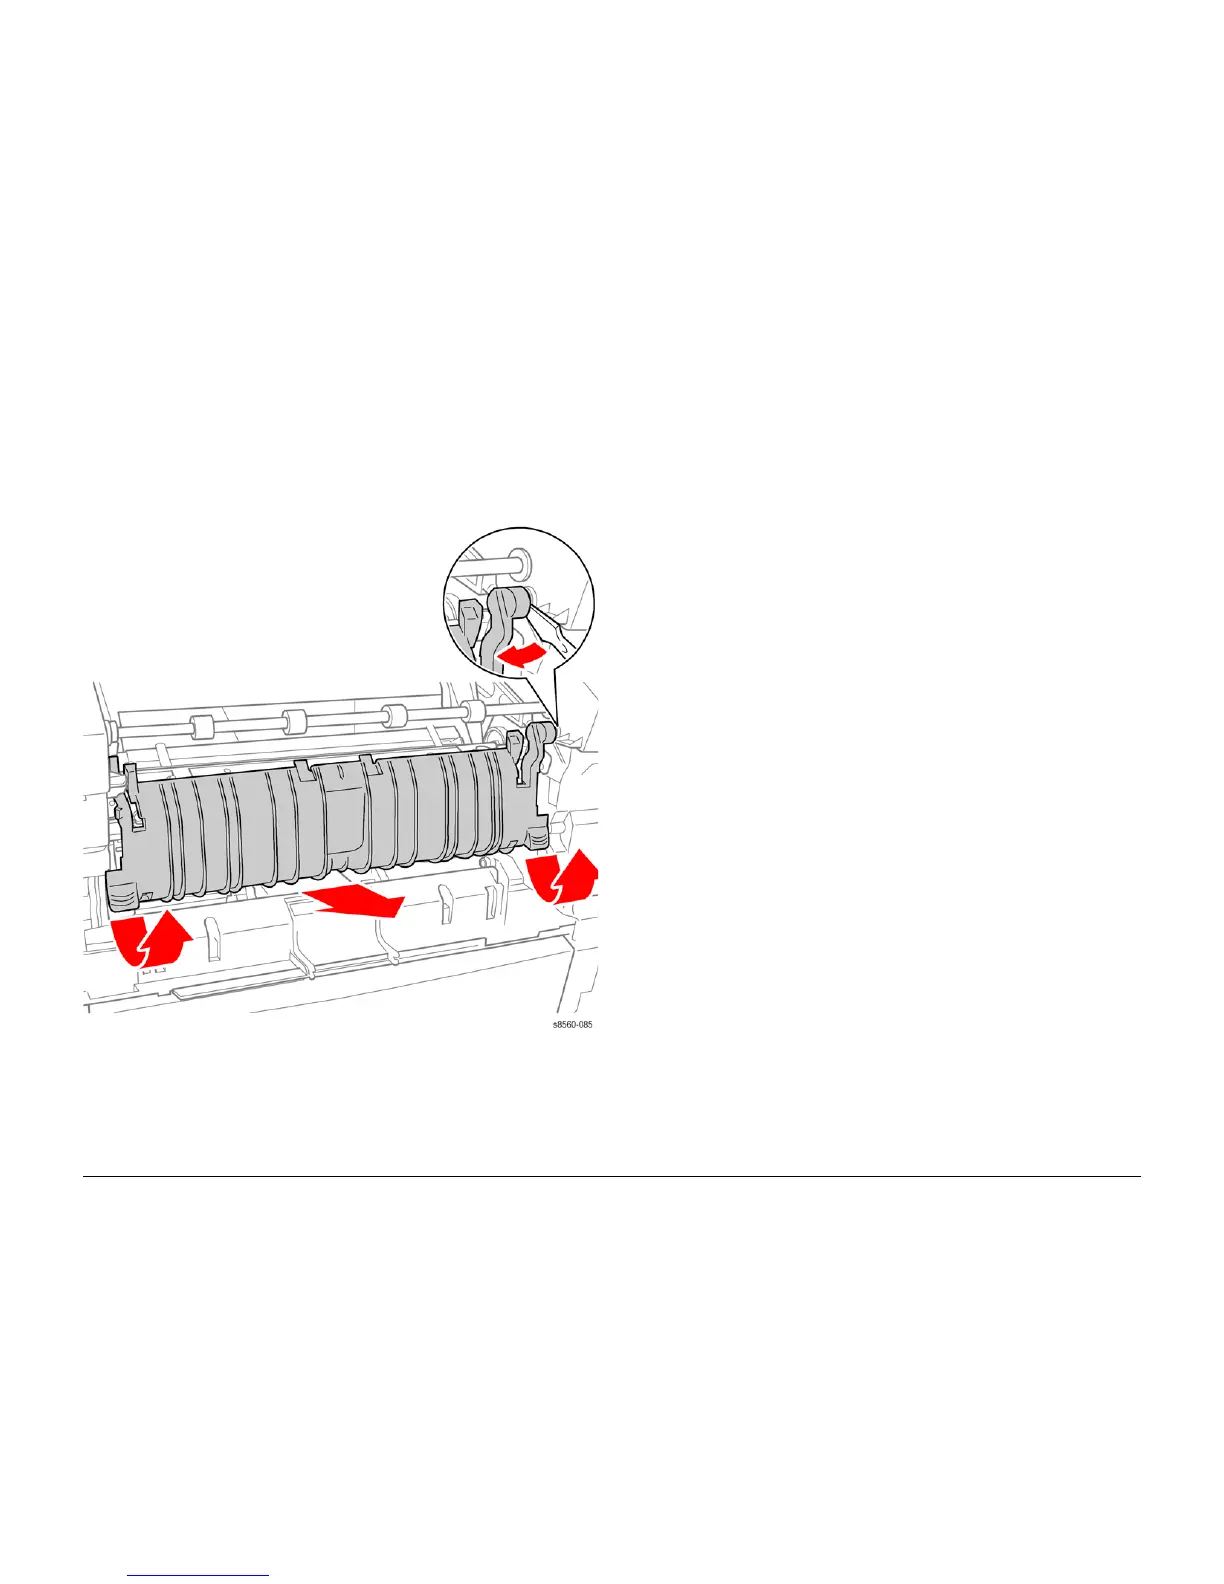
REP 3.0.2 Lower Duplex Guide
Parts List on PL 3.0
Removal
1. Open the Front Door.
2. Pull outward on the tabs at the bottom of the guide and let the guide swing free.
3. Pry inward, towards the center of the printer, on the right, upper retainer to release it from
the boss and remove the guide.
Figure 1 Removing the Lower Duplex Guide
REP 3.0.3 Take Away Roller
Parts List on PL 3.0
Removal
NOTE: These steps describe Take Away Roller removal for the 8860MFP. On 8860 models,
access the Take Away Roller by removing the Control Panel (REP 1.1.6). Afterwards, return to
this procedure and begin at Step 4.
1. Remove the Front Door (REP 1.0.1).
2. Remove the Scanner Assembly with attached DADF (REP 1.0.11).
3. Remove the Output Tray (REP 1.0.6).
4. Remove the Left Side Cover (REP 1.0.7 or REP 1.1.9 for the 8860).
5. Remove the Right Side Cover (REP 1.0.21 or REP 1.1.10 for the 8860).
6. Remove the Media Drive Assembly (REP 4.0.14).
7. Remove the Inner Simplex Guide (REP 3.0.1).
8. Remove the KL-Clip from the right end of the Take Away Roller shaft.
9. Remove the KL-Clip and bushing from the left end of the shaft. Slide the shaft to the left to
release the right end from the chassis. Rotate the shaft forward, and then remove it to the
right.