09/2007
4-11
Phaser 8860/8860MFP Service Manual
REP 1.0.20, REP 1.0.21
Repairs and Adjustments
Initial Issue
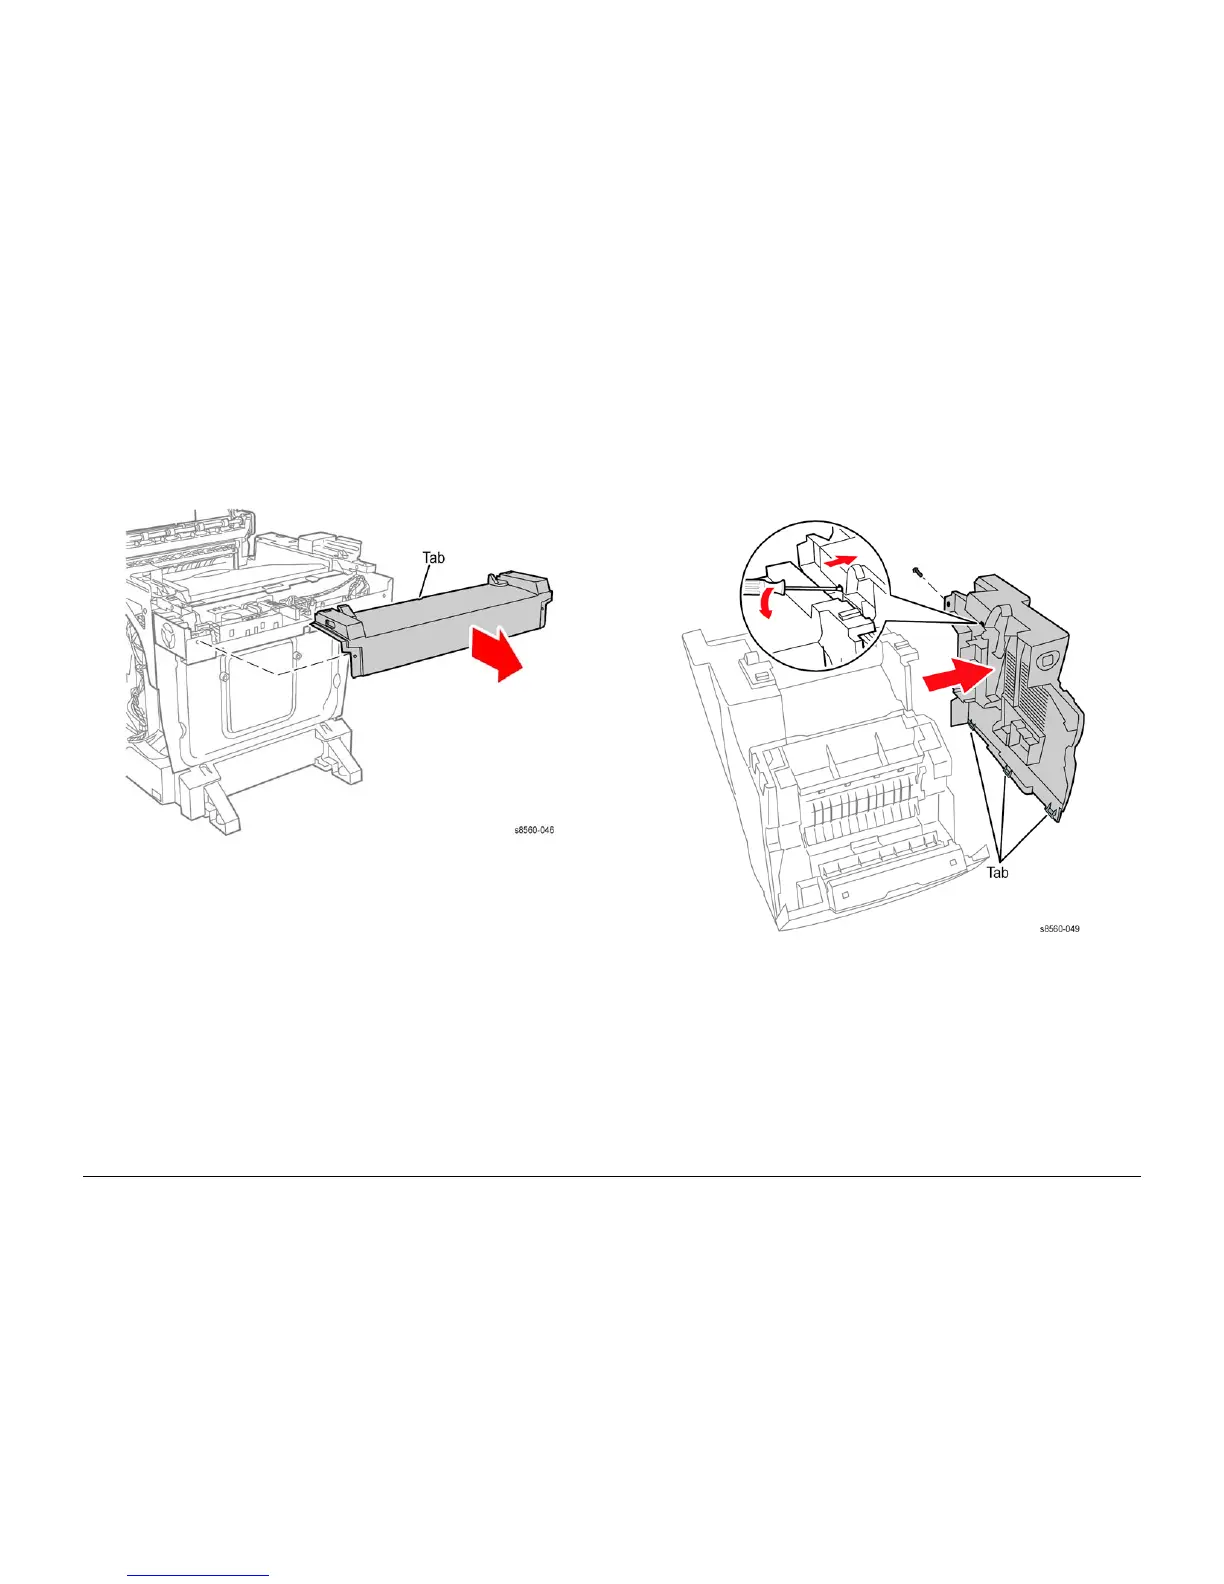
REP 1.0.20 Rear Cover (8860MFP)
Parts List on PL 1.0
Removal
1. Remove the Right Side Cover (REP 1.0.21).
2. Remove the Left Side Cover (REP 1.0.7).
3. Release the Tab that secures the Rear Cover.
Figure 1 Removing the Rear Cover
REP 1.0.21 Right Side Cover (8860MFP)
Parts List on PL 1.0
Removal
1. Remove the Scanner Assembly with attached DADF (REP 1.0.11).
2. Open the Front Door.
3. Remove the Output Tray (REP 1.0.6).
4. Remove the (metal, T-20) screw at the back of the system that secures the cover.
Figure 1 Removing the Right Side Cover
5. Release the tab near the top of the cover using a flat-blade screwdriver.
6. Release the tabs along the front of the cover that secure it to the Exit Module.
7. Pull outward at the front of the cover to release it from the frame.
Replacement
Insert the 3 tabs, located along the bottom edge of the cover, into the slots provided in the
frame before snapping the cover into place.