09/2007
4-35
Phaser 8860/8860MFP Service Manual
REP 2.0.13
Repairs and Adjustments
Initial Issue
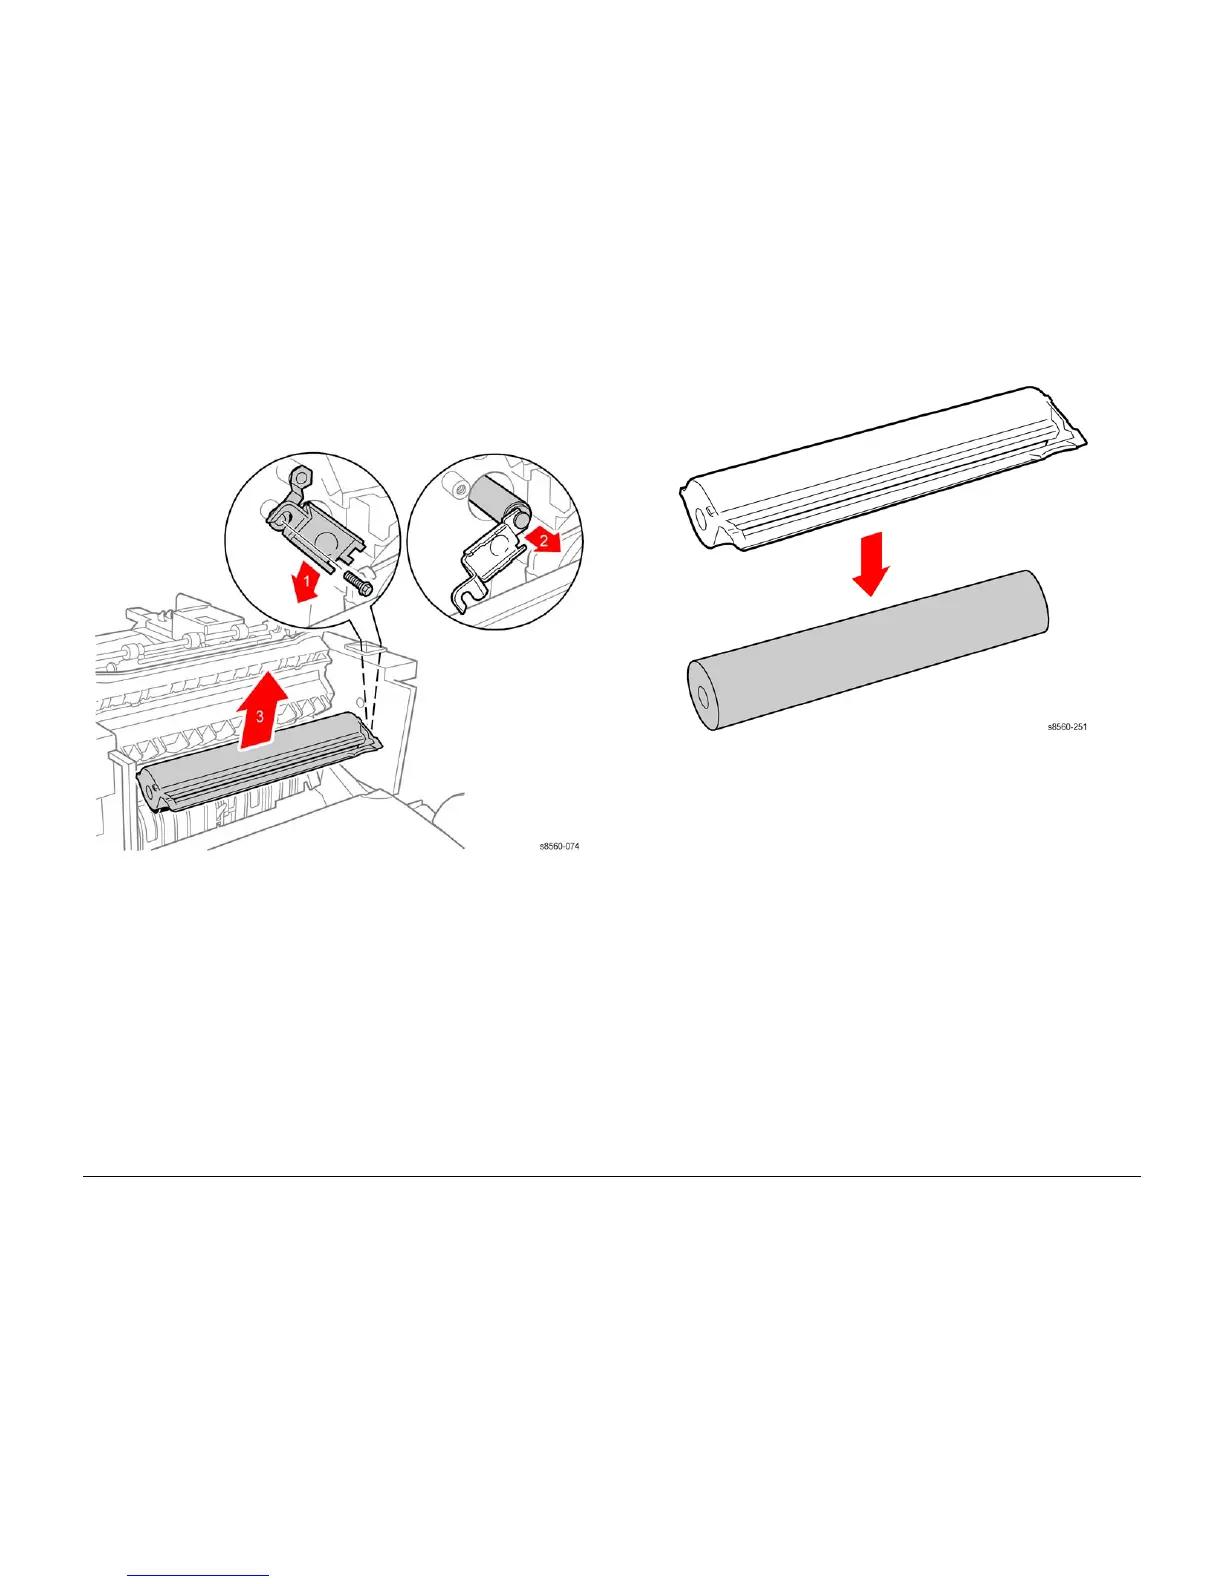
Figure 1 Removing the Transfix Roller Shaft Restraint
10. Hold the Transfix Roller and Stripper Blade with one hand, engage the end of the Transfix
Roller Shaft with the Transfix Roller Shaft Restraint and pull the shaft out of the Stripper
Carriage Assembly.
11. Lift the Stripper Carriage Assembly and Transfix Roller up and out of the chassis.
12. Remove the Transfix Roller from the Stripper Carriage Assembly.
Figure 2 Removing the Transfix Roller
Replacement
NOTE: Make sure the I/O Board Ground Straps are properly positioned and the I/O Board is
behind the chassis retainers before installing the 2 I/O Board screws.
 Loading...


