Fuel pump assembly
6-9
Removing the fuel pump assembly
Cover the fuel components using a rag to pre-
vent fuel from spilling out.
1. Disconnect:
• Quick connector “1”
See “Disconnecting the quick connector”
(6-1).
Checking the fuel strainer
1. Check:
• No air leakage
Air leakage Replace.
a. Connect the leakage tester “1” to the
fuel inlet “a”.
b. Block the fuel outlet “b” using a rubber
plug “2”,
and then apply the specified
positive pressure. Replace the fuel
strainer if the specified pressure can-
not be maintained for 15 seconds or
more.
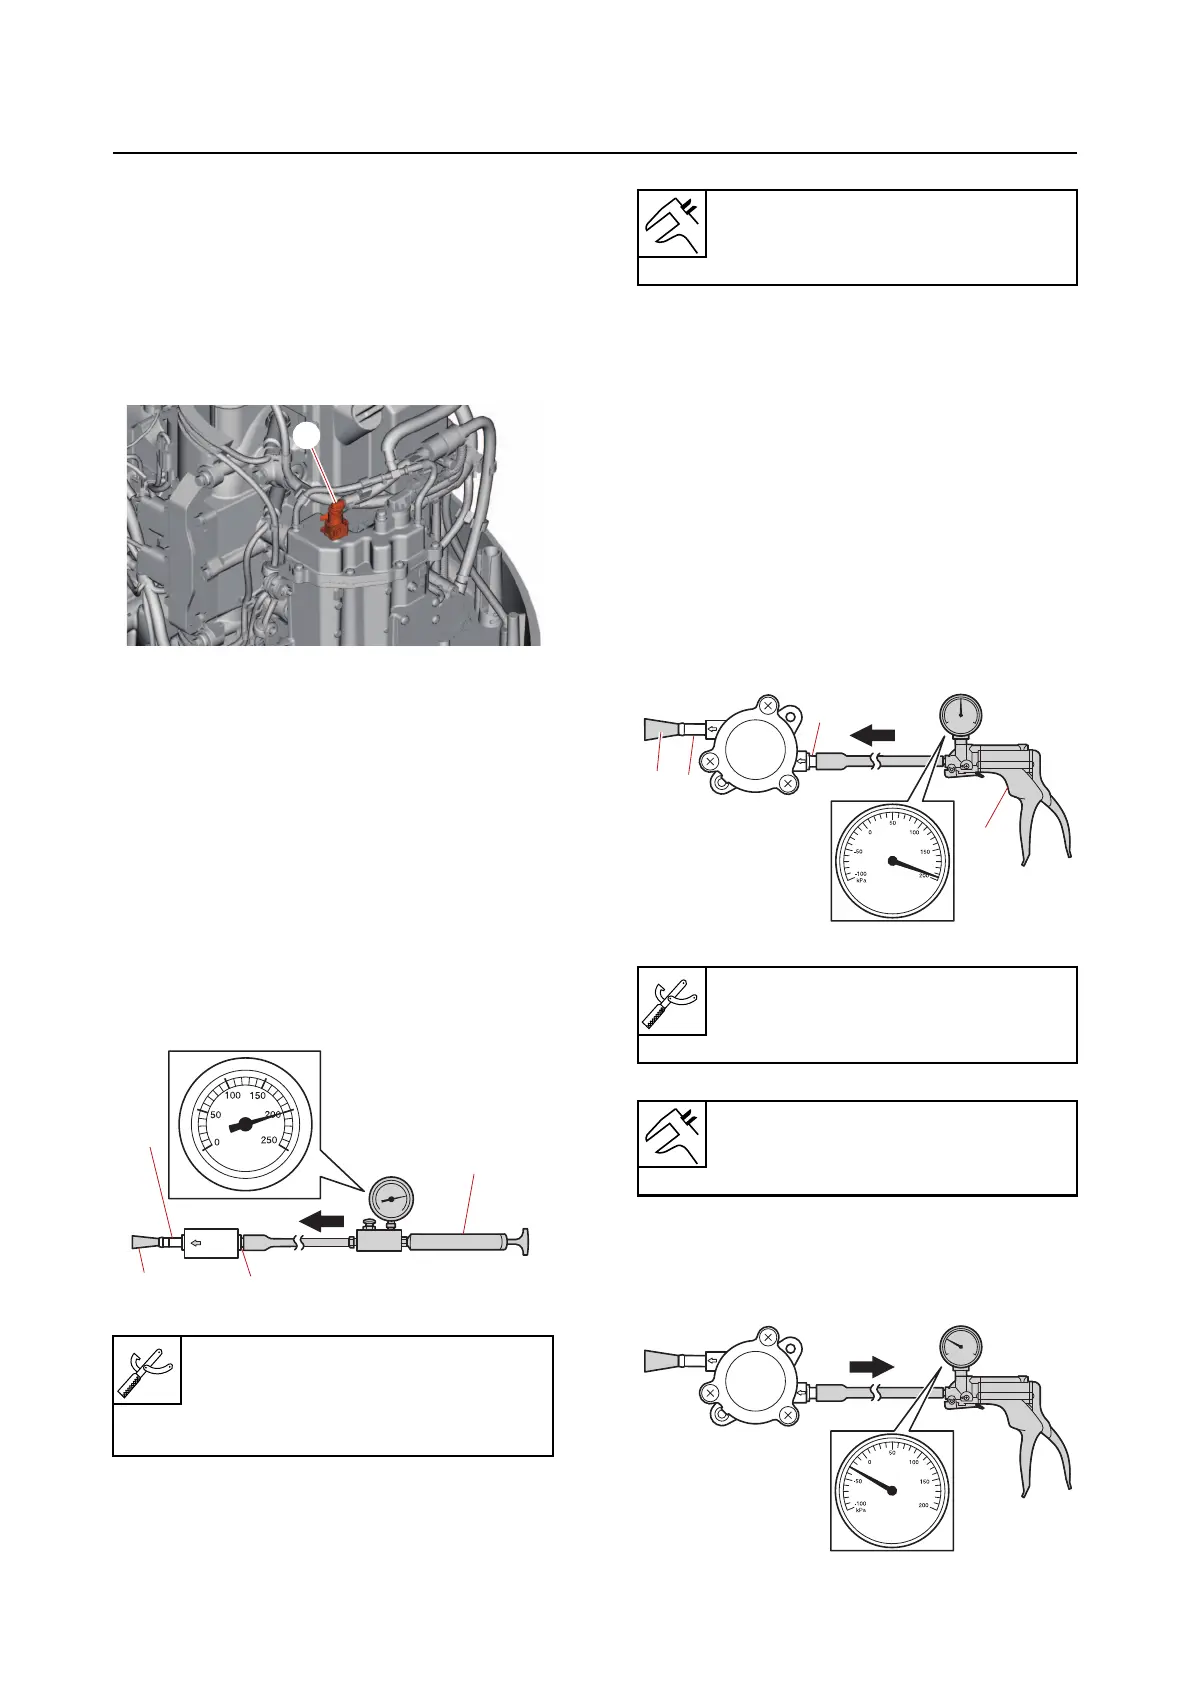
Checking the fuel pump assembly
1. Check:
• No air leakage
Air leakage Disassemble and check th
e
fuel pump. See “Disassembling the fuel
pump assembly” (6-10).
a. Connect the special service tool “1” to
the fue
l pump inlet “a”.
b. Block the fuel pump outlet “b” using a
ru
bber plug “2”, and then apply the
specified positive pressure. Check
that there is no air leakage.
c. Apply the specified negative pressure,
and then check that there is no air
leakage.
Leakage tester “1”
90890-06840
Leakage tester “1”
(commercially available)
1
1
a
b
2
Holding pressure (positive pres-
sure)
200.0 kPa (2.00 kgf/cm², 29.0 psi)
Vacuum/pressure pump gauge set
“1”
90890-06945
Fuel inlet holding pressure (positive
pressure)
196.0 kPa (1.96 kgf/cm², 28.4 psi)