Drive shaft and lower case
8-18
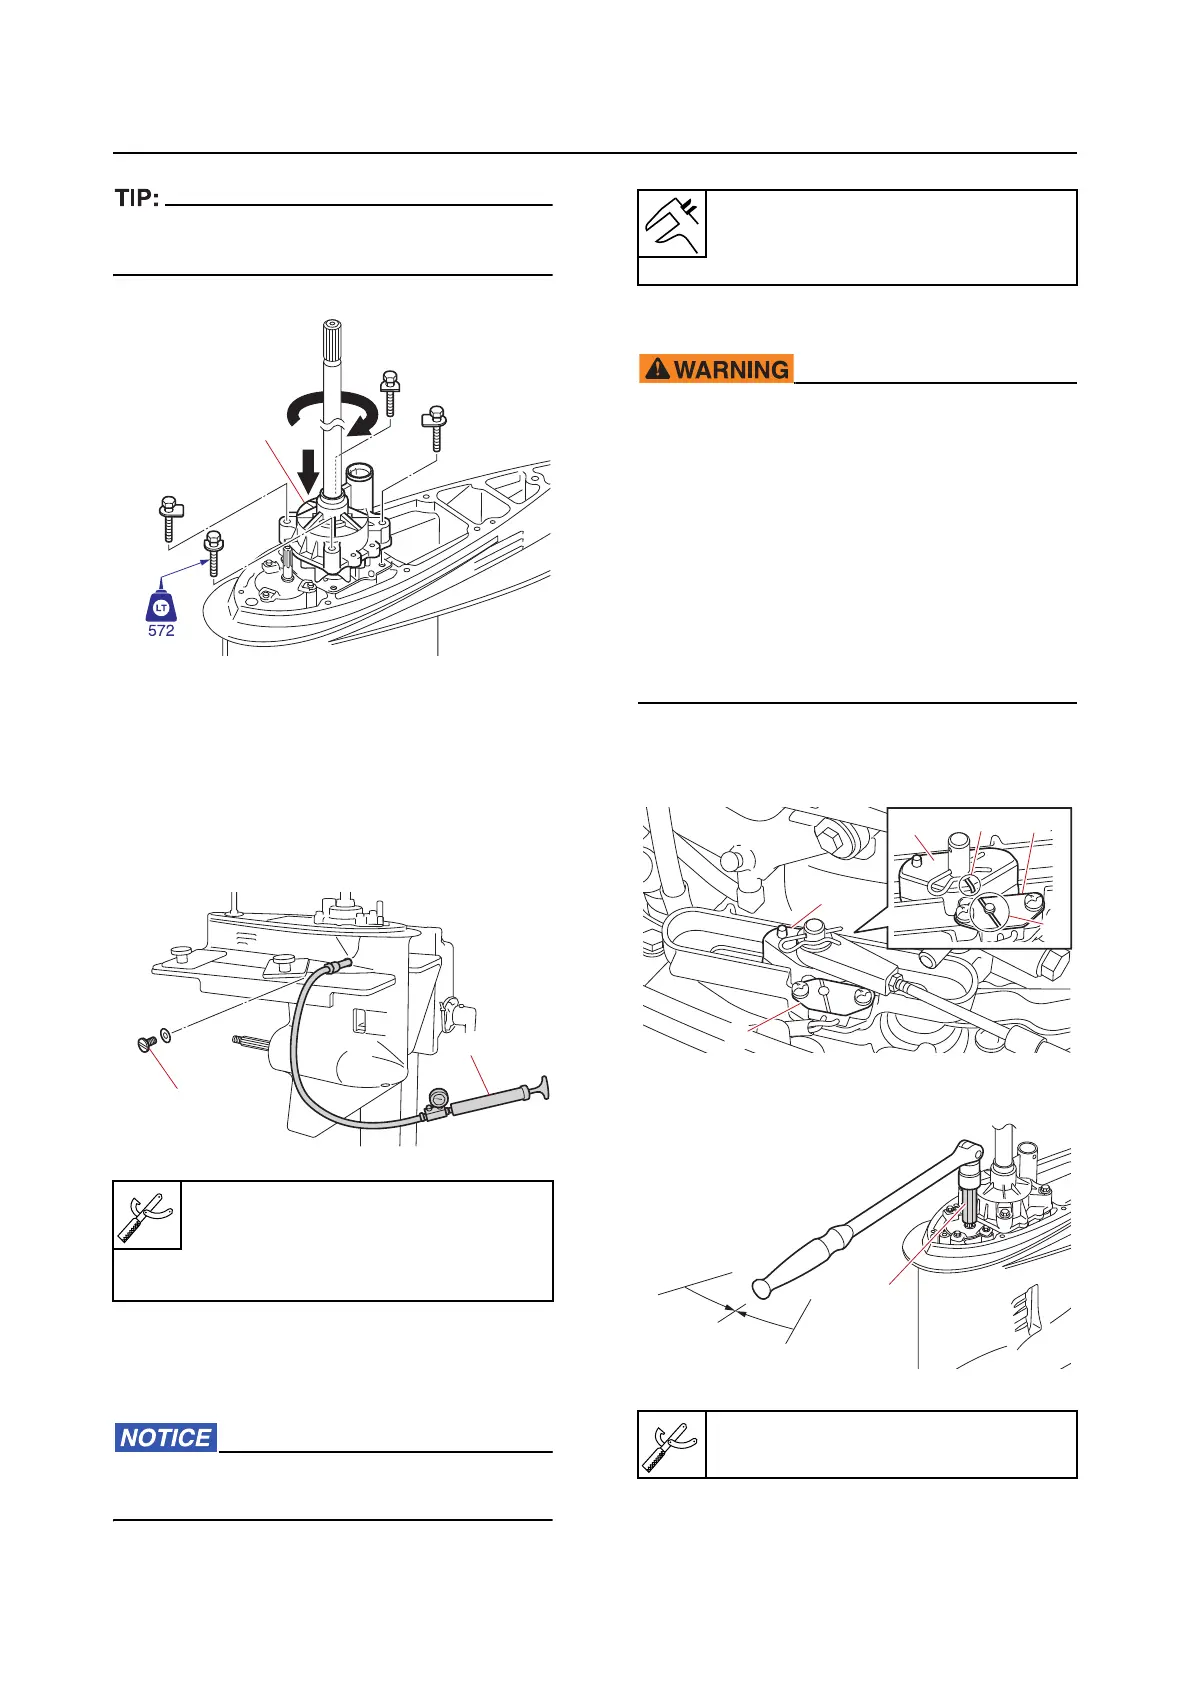
While turning the drive shaft clockwise, push
the water pump housing down to install it.
Checking the lower unit for air leakage
1. Check:
• No air leakage
Air leakage Repair
the location of the
leak.
a. Remove the oil level plug “1”, and then
install the leakage tester “2”.
b. Apply the specified pressure. Check
that the pressure
is maintained in the
lower unit for 10 seconds or more.
Do not overpressurize the lower unit. Oth-
erwise, the oil seals could be damaged.
Installing the lower unit
• Make sure to disconnect the battery ca-
bles from the battery, and remove the clip
from the
engine shut-off switch.
• When installing the lower unit with the
power unit installed, make
sure to sus-
pend the outboard motor. Otherwise, the
outboard
motor could fall suddenly and
result in severe injuries.
• When loosening or tightening the propel-
ler nut, do not hold the propeller using
your hands.
1. Check that the mark “a” on the bushing “1”
is aligned with the mark “b” on the plate “2”.
2. Set the gear shift to the N position.
Leakage tester “2”
90890-06840
Leakage tester “2”
(commercially available)
1
1
2
Lower unit
Holding pressure
68.6 kPa (0.69 kgf/cm², 9.9 psi)
Shift rod socket “1”
90890-06681
a
1
2
b
2
1
R
N
F
1