PTT motor
9-32
Removing the PTT motor
Before removing the reservoir cap, make
sure that the trim and tilt ram is fully ex
-
tended. Otherwise, fluid could be expelled
forcefull
y from the PTT unit due to internal
pressure.
1. Drain:
• PTT fluid
a. Fully extend the trim and tilt ram.
b. Remove the reservoir cap “1”, and
then drain the PTT fluid.
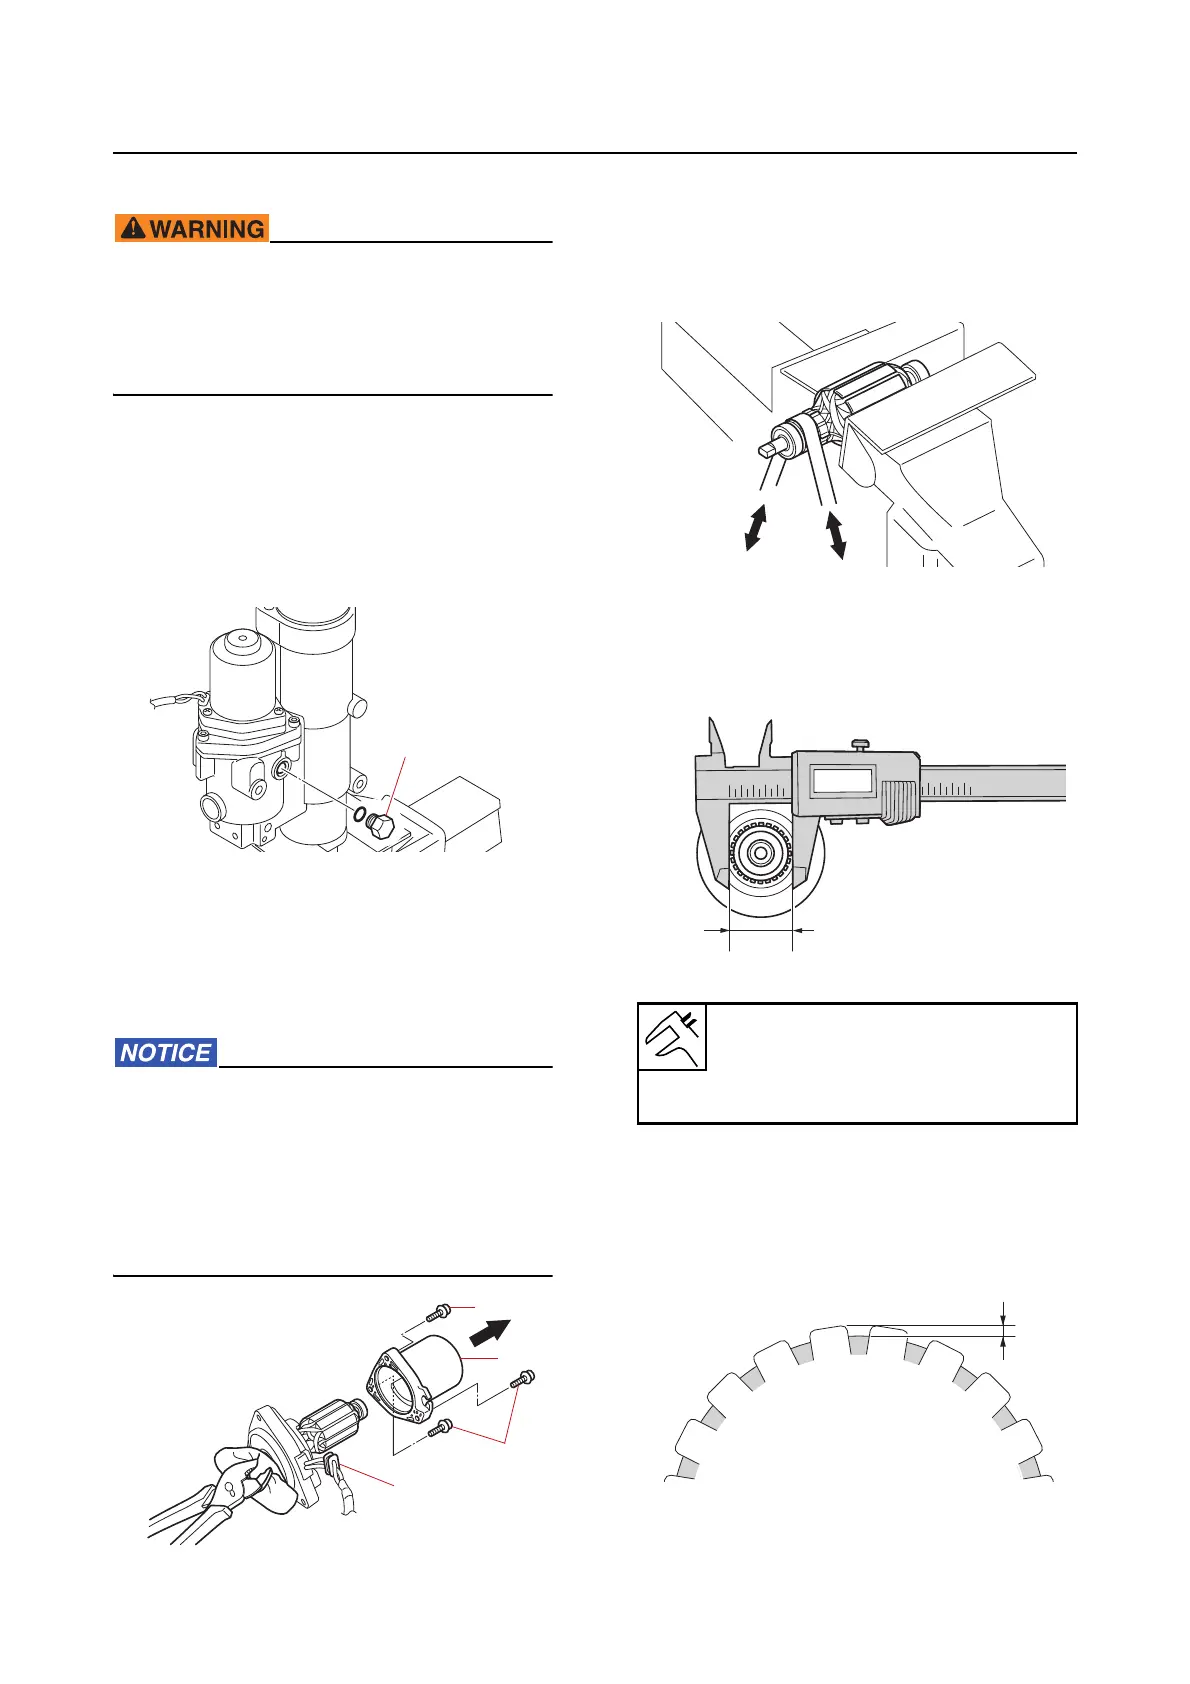
Disassembling the PTT motor
1. Remove:
• Rubber cap “1”
• Sc
rew “2”
• Stator “3”
When removing or installing the armature
along with the motor base assembly, se-
cure the end of the armature shaft using a
pair of
pliers. Otherwise, the armature
could separate from the motor base assem-
bly due to the magnetic force of the stator
and damage the brushes.
Checking the armature (PTT motor)
1. Check:
• Commutator
Dirty
Clean using 600-grit sandpaper
and compressed air.
2. Measure:
• Commutator diameter “a”
Below specification Replace
the arma-
ture.
3. Measure:
• Commutator undercut “a”
Below specification Replace
the arma-
ture.
Standard commutator diameter
22.00 mm (0.8661 in)
Wear limit
21.00 mm (0.8268 in)