Drive shaft and lower case
8-11
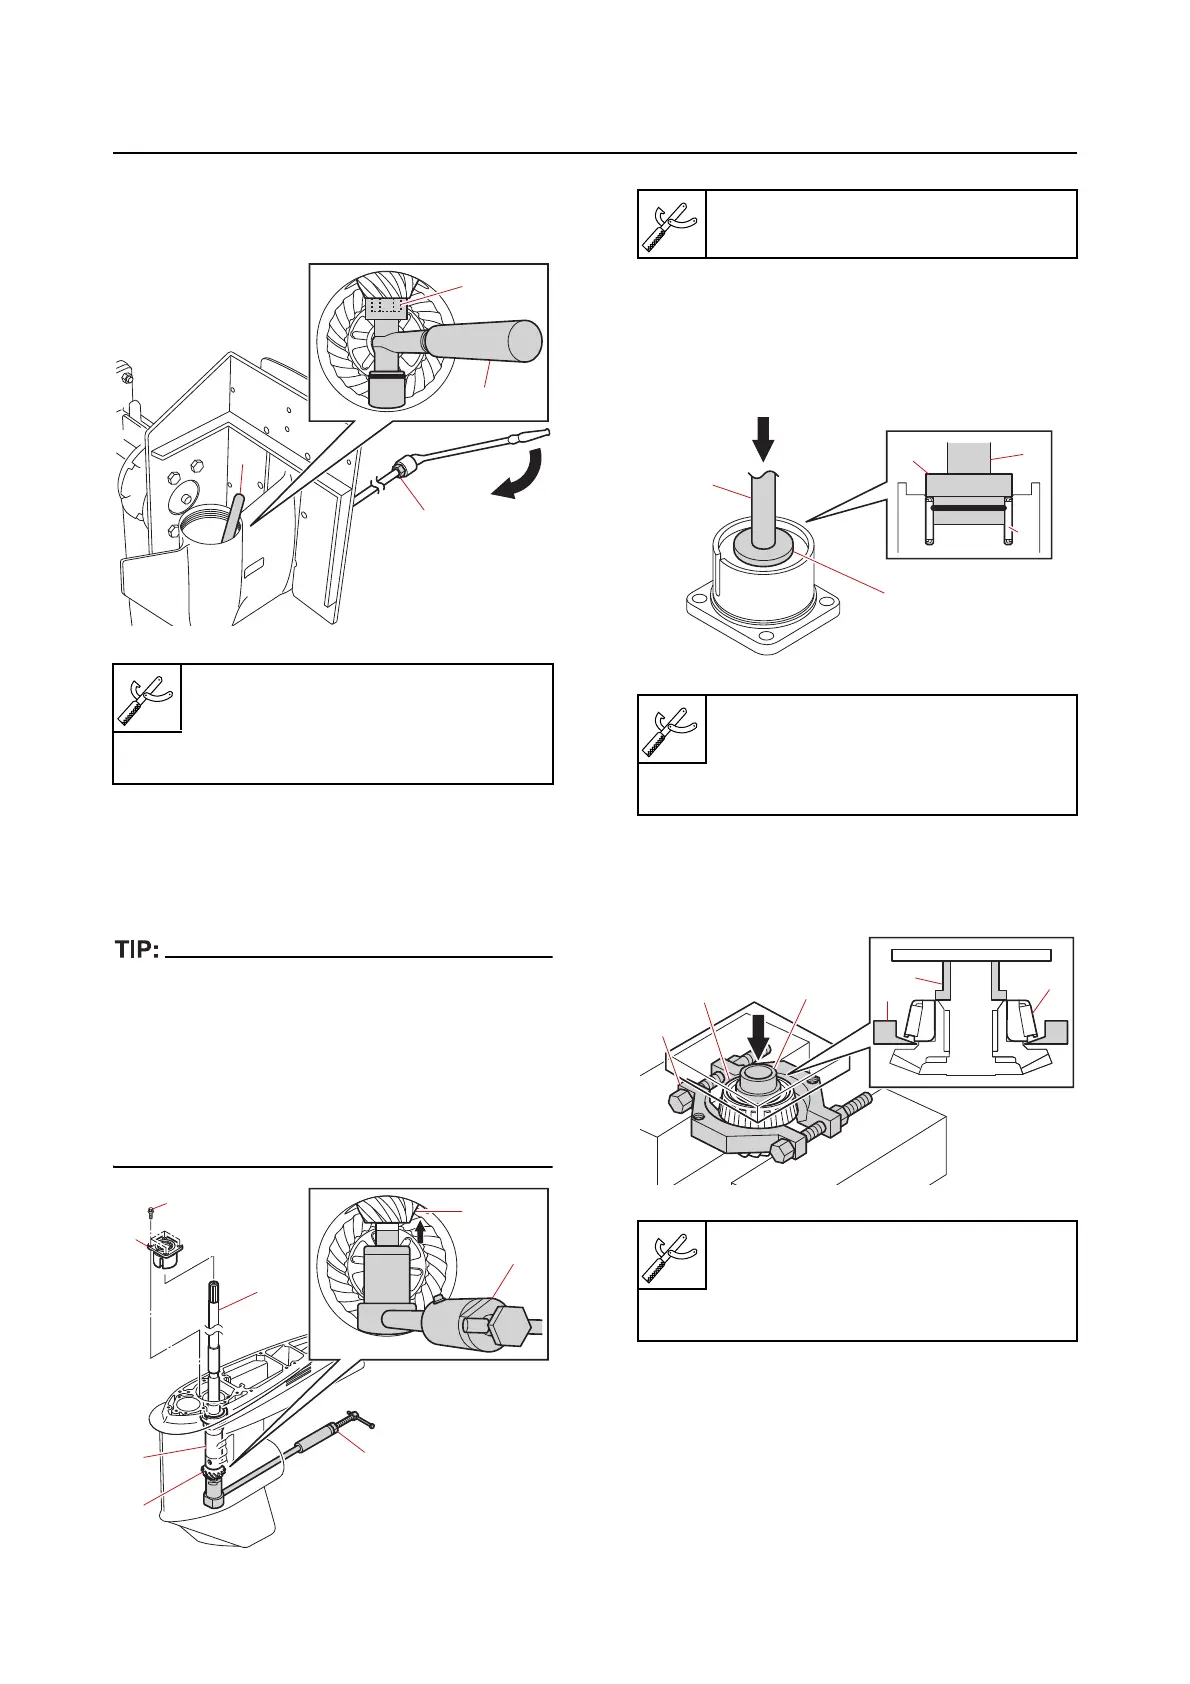
Removing the drive shaft
1. Loosen:
• Pin
ion nut “1”
2. Remove:
• Pin
ion “1”
• Drive shaft
“2”
• Sle
eve “3”
• Use the special service tool “4” if the drive
shaft “2” cannot be removed manually.
• When using the special service tool “4”, in-
stall the drive shaft housing “5” temporarily
using
the bolt “6” to prevent the drive shaft “2”
from popping out, and then apply force to the
drive shaft “2” gradually.
Disassembling the drive shaft hous-
ing
1. Remove:
• Needle bearing “1”
Disassembling the forward gear
1. Remove:
• Tapered roller bearing inner race
“1”
Drive shaft holder 6 “2”
90890-06520
Pinion nut holder “3”
90890-06715
1
2
3
3
1
4
4
2
3
1
5
6
Hydraulic drive shaft pusher “4”
90890-06688
Needle bearing attachment “2”
90890-06610
Driver rod L3 “3”
90890-06652
Bearing inner race attachment “2”
90890-06642
Bearing separator “3”
90890-06534
2
3
2
3
1
1
2
3
1
2
3