Lower unit
8-2
Removing the lower unit
• Make sure to disconnect the battery ca-
bles from the battery, and remove the clip
from the engine
shut-off switch.
• When removing the lower unit with the
po
wer unit installed, make sure to sus-
pend the outboard motor. Otherwise, the
ou
tboard motor could fall suddenly and
result in severe injuries.
• When loosening or tightening the propel-
ler nut, do not hold the propeller using
your hands.
When disassembling the lower unit, measure
the backlash before disassembly. See
“Mea-
suring the forward gear backlash and reverse
gear backlash before disassembly” (8-23).
1. Drain:
• Gear oil
See the latest edition of the owner’s man-
ual.
2. Set the gear shift to the N position.
3. Remove:
• Propeller nut
Place a block of wood between the anti-cavita-
tion plate and the propeller to prevent the pro-
peller from turning.
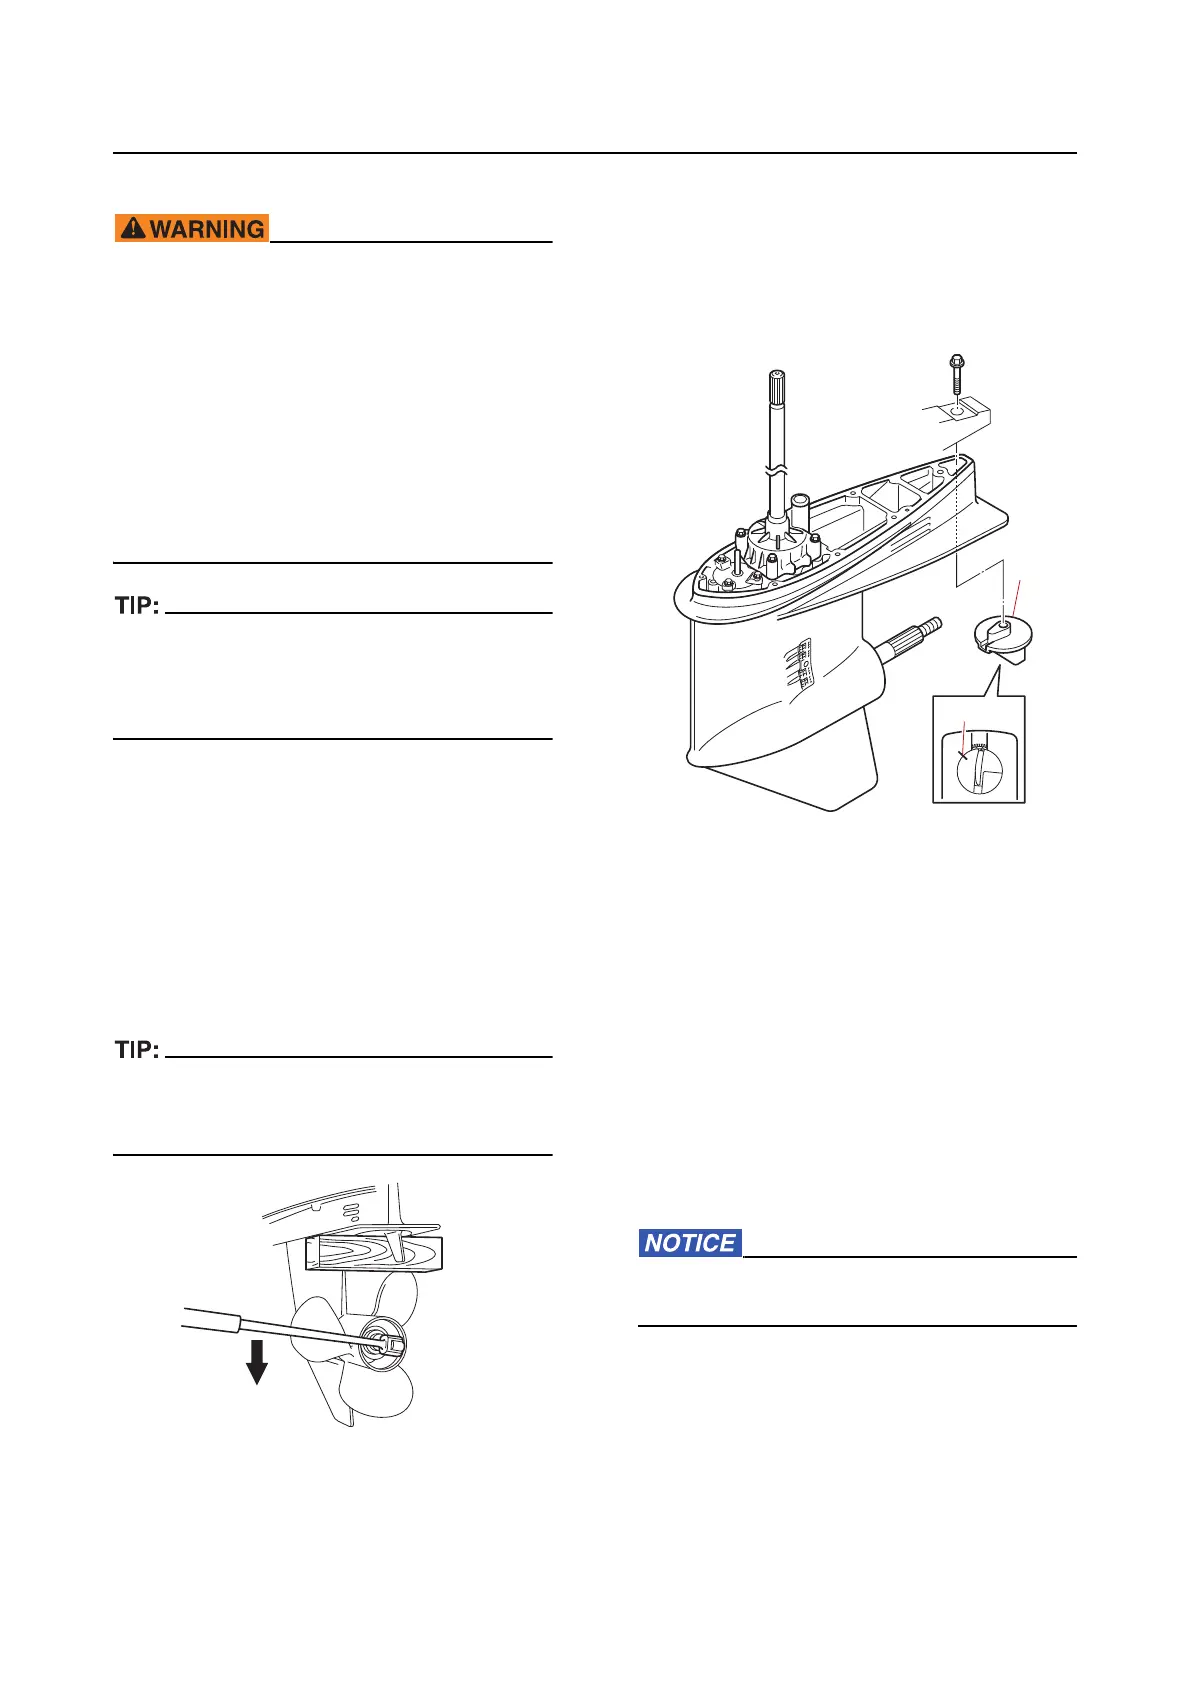
4. Remove:
• Trim tab
bolt
• Trim tab
a. Mark the trim tab “1” and lower case
with
an identification mark “a”, and
then remove the trim tab “1”.
Checking the propeller
1. Check:
• Propeller blade
• Spline
• Damper
Cracked/damaged/worn Replace th
e
propeller or dampers.
Checking the lower unit anode
1. Check:
• Trim tab
Eroded (1/2 or more) Replace.
There is grease, oil, or scales Clea
n.
Do not apply grease, oil, or paint to the trim
tab.