Crankcase
7-54
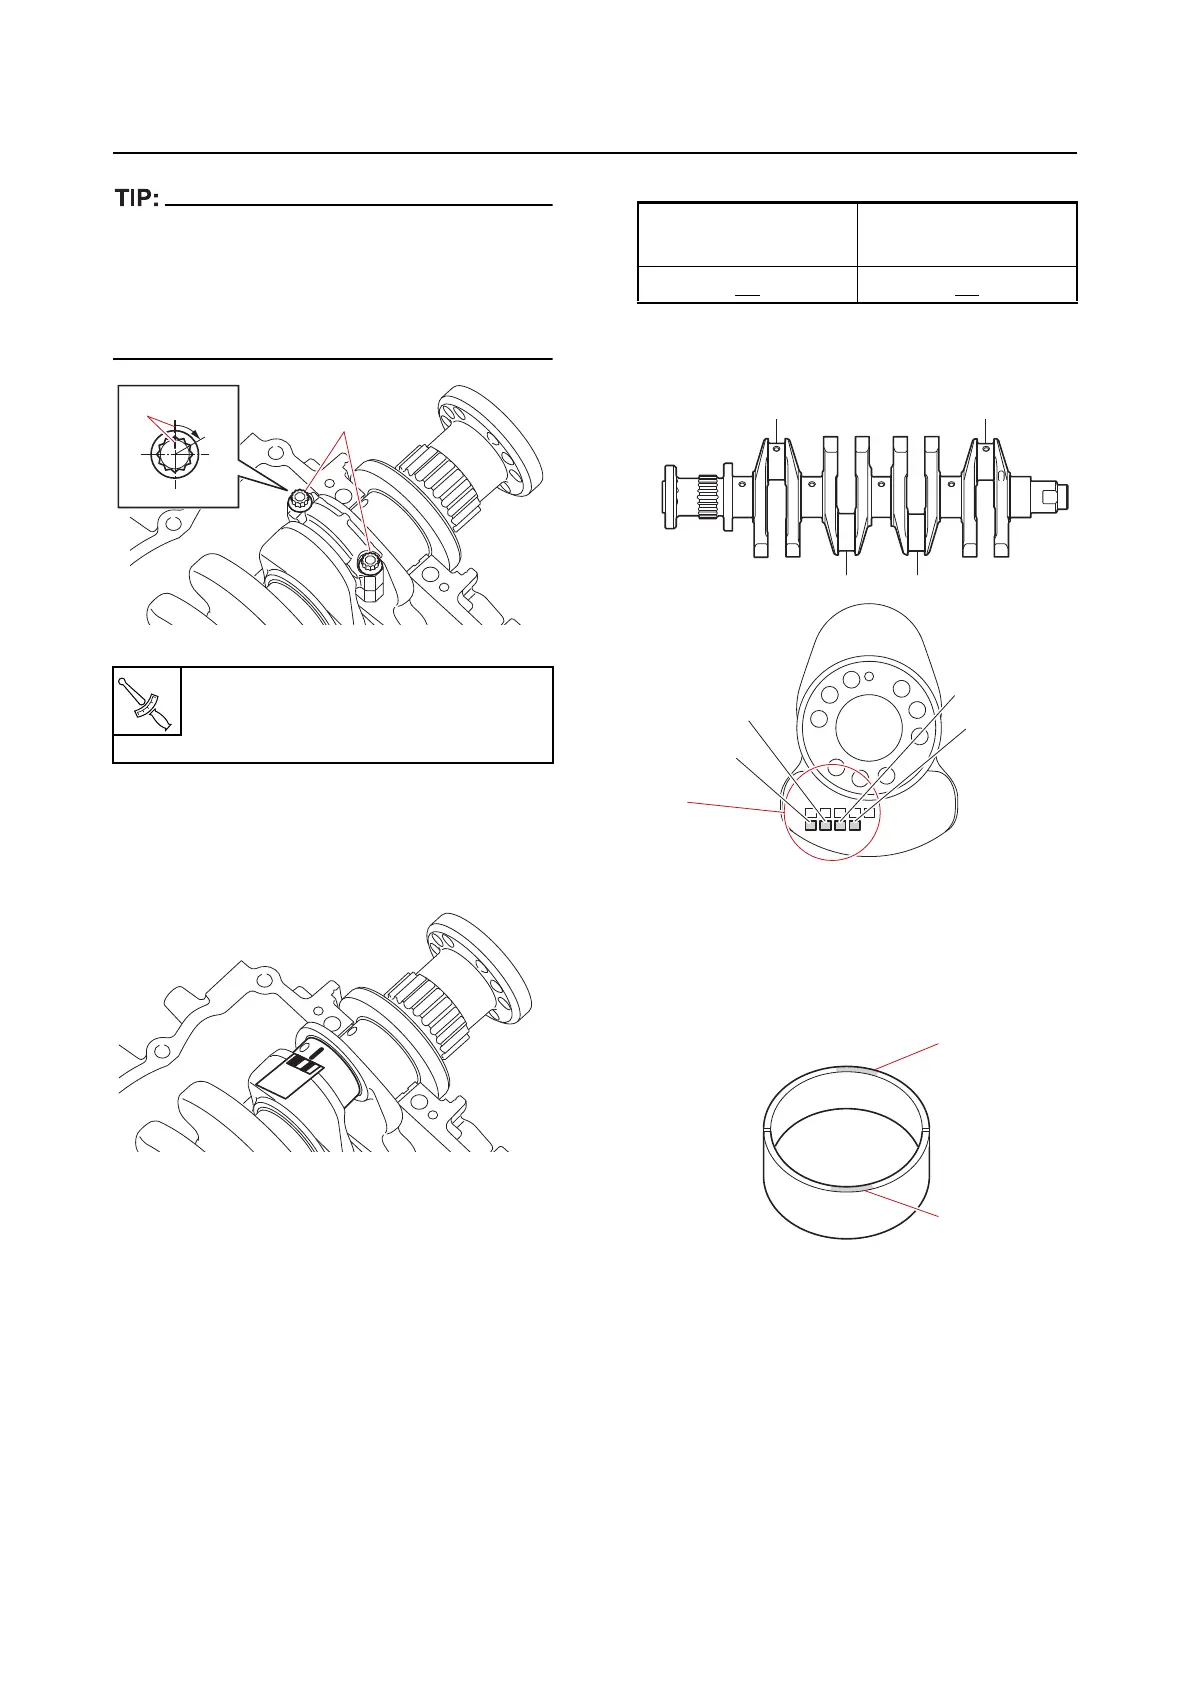
In the second tightening stage for the connect-
ing rod bolts “1”, mark the connecting rod bolts
and the connecting rod cap
with identification
marks “a”, and then tighten the bolts 60 from
the marks on the connecting rod cap.
f. Remove the connecting rod cap, and
then measure the width of the com-
pressed Plastigauge (PG-1) on the
crankshaft pin.
Selecting the crankshaft pin bearing
When replacing the crankshaft pin bearing, se-
lect the bearing as follows:
1. Select:
• Crankshaft pin bearing
a. Measure the big end inside diameter.
See “Checking the connecting rod
small end inside diameter and big end
inside diameter” (7-51).
b. Check the crankshaft pin mark “a” on
the crankshaft.
c. Select the suitable colors “1” for the
crankshaft pin bearing from the
“Crankshaft pin bearing selection ta-
ble” (7-56).
Connecting rod bolt “1”
1st: 13 N·m (1.3 kgf·m, 9.6 lb·ft)
2nd: 60
1
60˚
a
Connecting rod big
end inside diameter
Number in table
50.0
42 mm 42
1
1