Flywheel magneto and timing belt
7-13
Removing the flywheel magneto
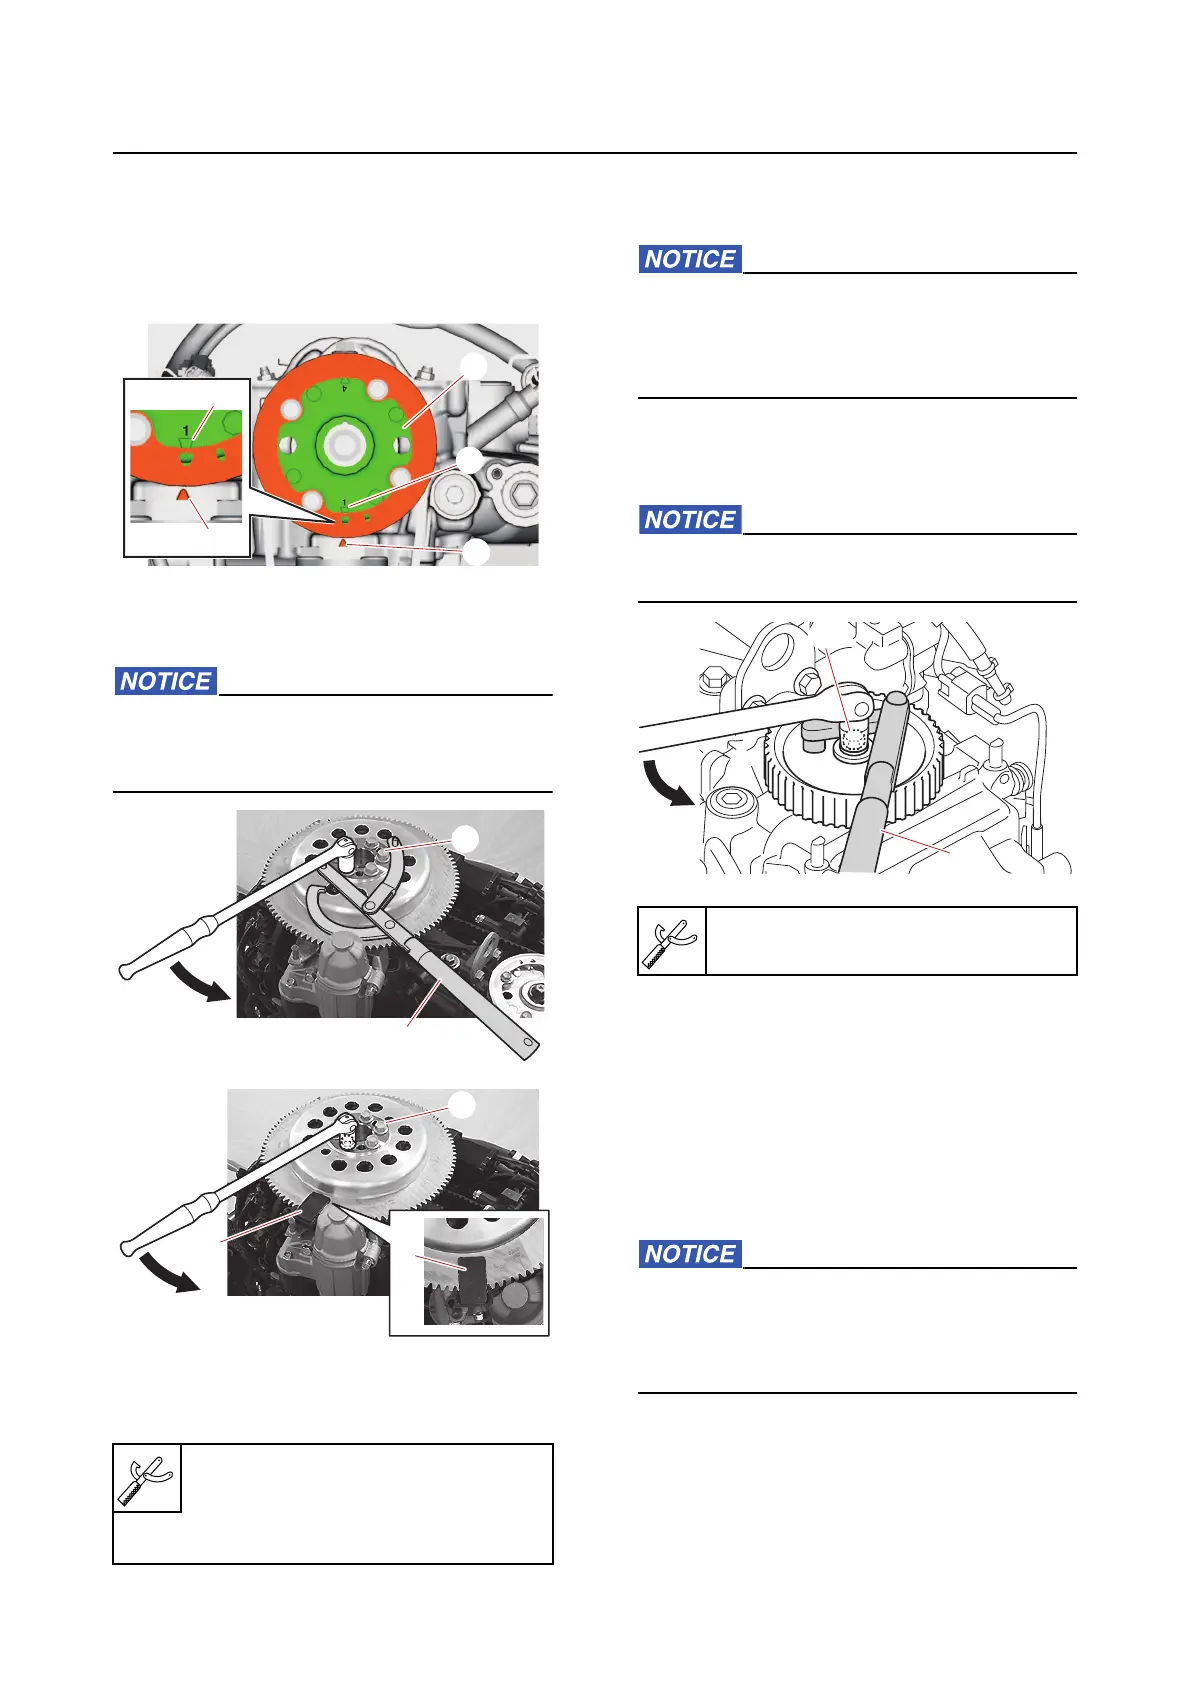
1. Turn the flywheel magneto clockwise to
align the “1 △ ” mark “a” on the driven
sprocket “1” with the “ △ ” mark “b” on the
cylinder head.
2. Loosen:
• Flywheel magneto bolt “1”
Apply force in the direction of the arrow to
prevent the special service tool “2” from
slipping off easily.
Removing the timing belt and sprock-
et
When the timing belt is not installed, do not
turn the crankshaft or driven sprocket. Oth-
erwise, the pistons and valves could collide
with each other and be damaged.
1. Loosen:
• Driven sprocket bolt “1”
When loosening the driven sprocket bolt,
do not turn the camshaft.
Checking the timing belt and sprocket
1. Check:
• Interior and exterior of the timing belt
• Driv
e sprocket
• Driven sprocket
Cracked/damaged/worn Replace.
Installing the sprocket and timing belt
When the timing belt is not installed, do not
turn the crankshaft or driven sprocket. Oth-
erwise, the pistons and valves could collide
with each other and be damaged.
1. Install:
• Dowel pin (to the camshaft)
• Driven sprocket
• Washer
A. Conventional special service tool
B. New special service tool
Rotor holder “2”
90890-01235
Flywheel stopper B “3”
90890-06686
b
1
a
b
a
Flywheel holder “2”
90890-06522
1
2



 To Next Page