Indication duringIndication during
chargingcharging
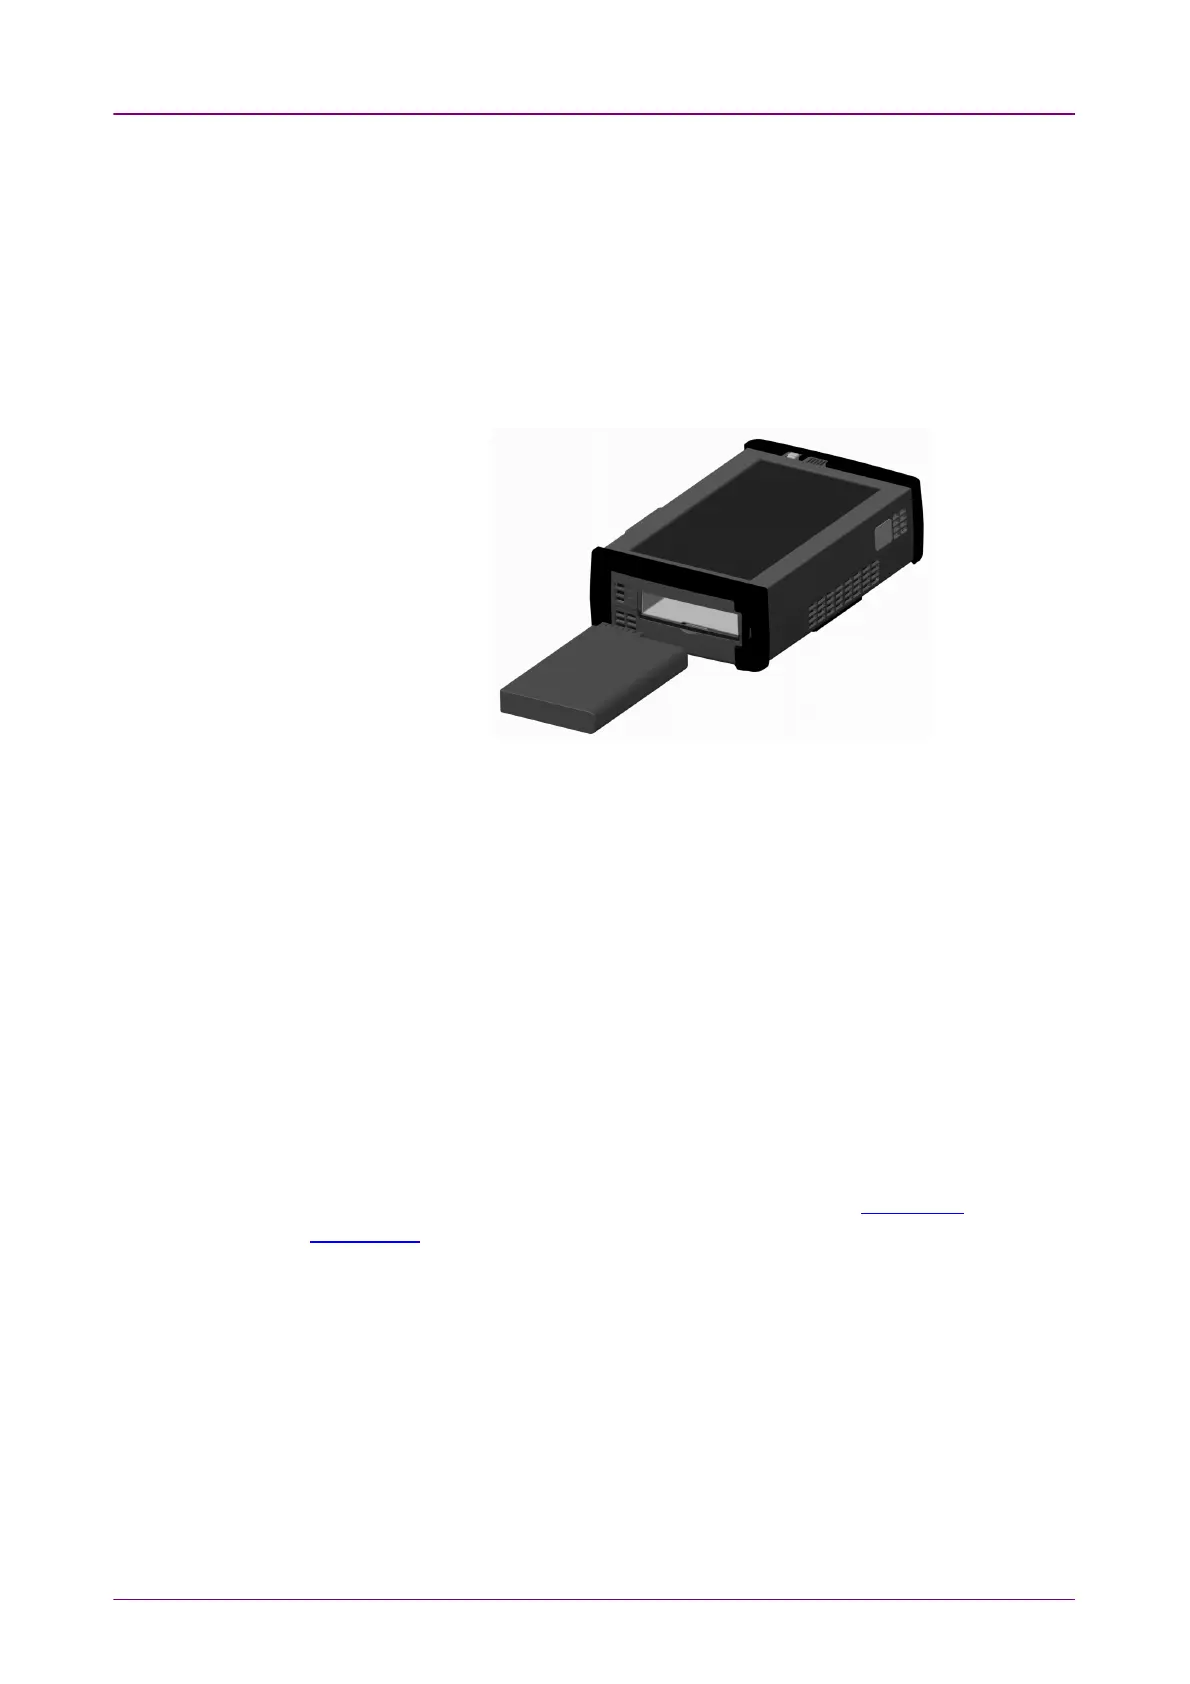
To install or replace the battery in the Network Master, follow the procedure
below:
1. Disconnect the mains power adapter if it is connected.
2. Switch the Network Master OFFOFF.
3. Place the instrument on its back on a plain surface and turn the lock screw of
the battery compartment to match the unlock mark.
4. Remove the lid of the battery compartment.
5. Pull out the battery from the compartment.
6. When installing the battery, note the direction of the battery terminals. With
the instrument placed on its back - and the battery compartment in front of
you - the terminals should be in the upper left corner.
7. Re-install the battery compartment door and tighten the lock screw.
22..33..22 Charging BatteryCharging Battery
The battery automatically charges anytime the instrument is plugged in to a live
AC power source using the power adapter. Battery power replenishes more
quickly if the instrument is turned off (Standby mode).
When the power adapter is connected and plugged in, the Power button flashes
rapidly in orange while the instrument boots up. After approx. 30 seconds, the
button then flashes slowly to indicate the battery is charging. Flashing stops
when the charging is complete. If the battery is defective - the Power button will
also light. Therefore, the best way to check the battery status is to switch on the
Network Master and observe the battery information in the Instrument
information on Instrument toolbar.