Version 2.6 195 May 1
MP-202 Telephone Adapter 13. Advanced Settings
4. Click 'OK' to save the settings.
5. Click 'OK' once more in the 'DHCP Settings' screen.
6. Click the icon 'Network Connections' on the sidebar of the main screen; the screen
'Network Connections' opens.
7. Click the link 'WAN Ethernet'; the 'WAN Ethernet Properties' screen opens.
8. Press the button 'Settings'; the screen 'Configure WAN Ethernet' opens.
9. In the screen section 'Routing', select 'Advanced' from the drop-down list; the screen
refreshes.
10. In the 'Routing Mode' drop-down list, select 'Route'; this changes the gateway's WAN
to work in routing mode, which is necessary in order for DHCP relaying to function
correctly.
11. Click 'OK' to save the settings.
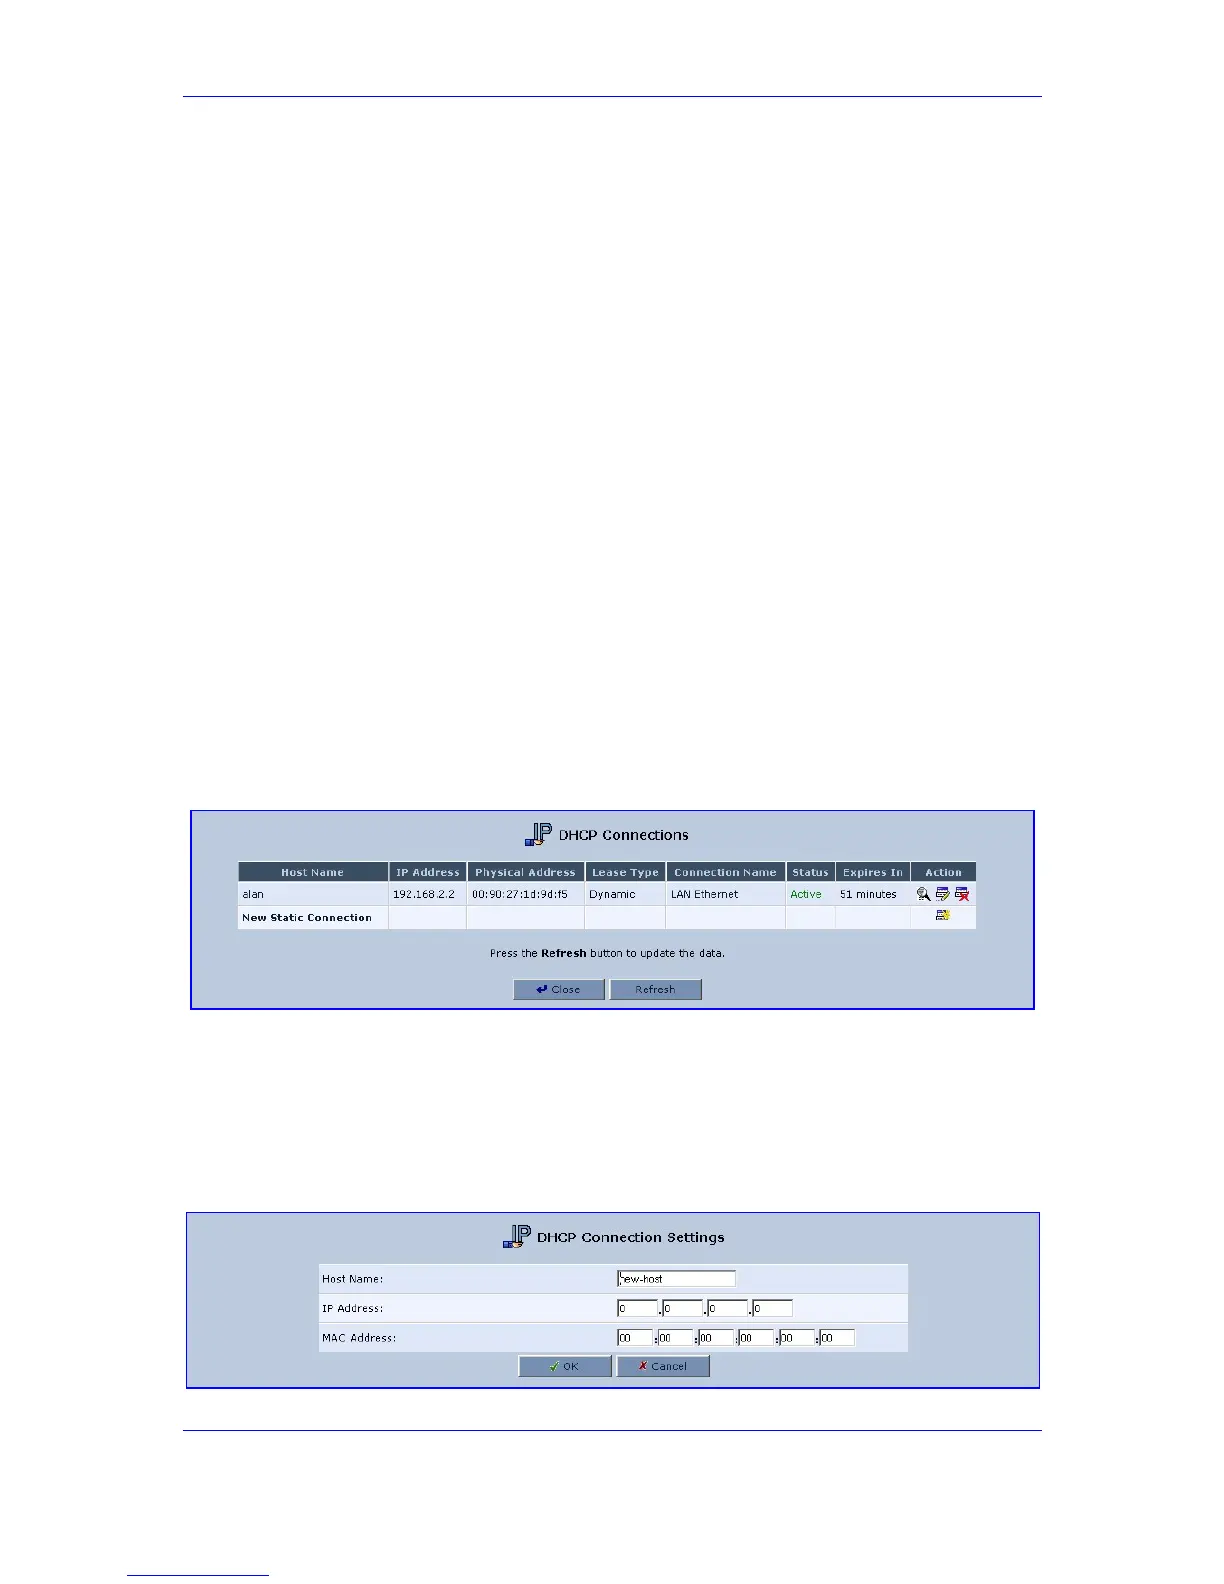
13.19.3 DHCP Connections
¾ To view a list of computers currently recognized by the DHCP
server:
1. Open the screen 'IP Address Distribution' and click button 'Connection List' (refer to
the figure); the 'IP Address Distribution' screen opens.
Figure 13-36: Advanced - IP Address Distribution - Connection List
¾ To define a new connection with a fixed IP address:
1. Click the link 'New Static Connection'; the screen 'DHCP Connection Settings' opens
(refer to the figure).
Figure 13-37: Advanced - IP Address Distribution - Connection List - New Static Connection