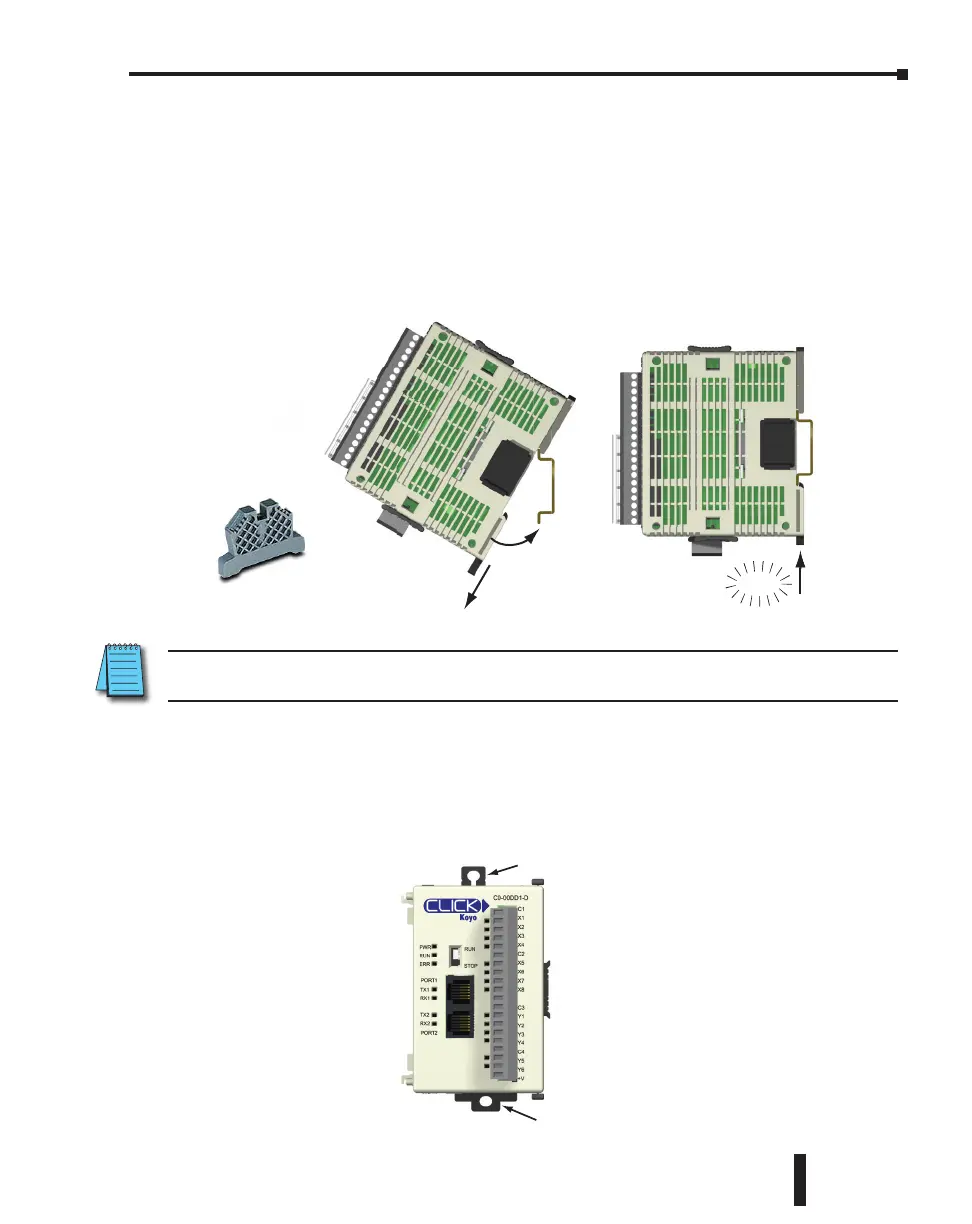
Mounting CLICK PLC System on DIN Rail
CLICK PLCs can be secured to a panel by using mounting rails. We recommend rails that
conform to DIN EN standard 50 022. They are approximately 35mm high, with a depth of
7mm. If you mount the CLICK PLC on a rail, consider using end brackets on each side of the
PLC. The end bracket helps keep the PLC from sliding horizontally along the rail, reducing
the possibility of accidentally pulling the wiring loose. On the bottom of the PLC is a small
retaining clip. To secure the PLC to a DIN rail, place it onto the rail and gently push up on
the clip to lock it onto the rail. To remove the PLC, pull down on the retaining clip, lift up
on the PLC slightly, then pull it away from the rail.
NOTE: When mounting on DIN rail, using DINnectors end brackets at both ends is recommended
(part number DN-EB35MN).
Optional Mounting Method
The CLICK PLC system can be secured to the equipment panel or desired location using
the mounting tabs located on the back panel of the PLC, I/O modules and power supplies.
Extend the upper and lower retaining clips to the full out position. Mount using M4 screws
in the center hole of the tabs.
Click
Pull tab
down.
Push tab
up until...
Mouting Tab
Lower
DN-EB35MN
CLICK PLC Hardware User Manual, 5th Edition, Rev. F – C0-USER-M
3–17
Chapter 3: Installation and Wiring

 Loading...