Note
• Depending on the selected standard paper, you might not be able to input the Name in Printer Driver and add
the created custom paper to the printer driver. To use the custom paper in the printer driver, create it by chang-
ing the standard paper to another paper.
• The characters that can be entered for Name in Printer Driver and Name on Control Panel are stated below.
alphanumeric, space, "-", ".", "_", "(", ")", "+", "%", ",", "/"
• For Name in Printer Driver up to 32 one Byte characters can be entered, and for Name on Control Panel up
to 16 one Byte characters can be entered.
• Paper Name (English) is used in keeping track of the amount of roll paper left, in status print, etc.
For Paper Name (English) up to 16 one Byte characters can be entered.
6
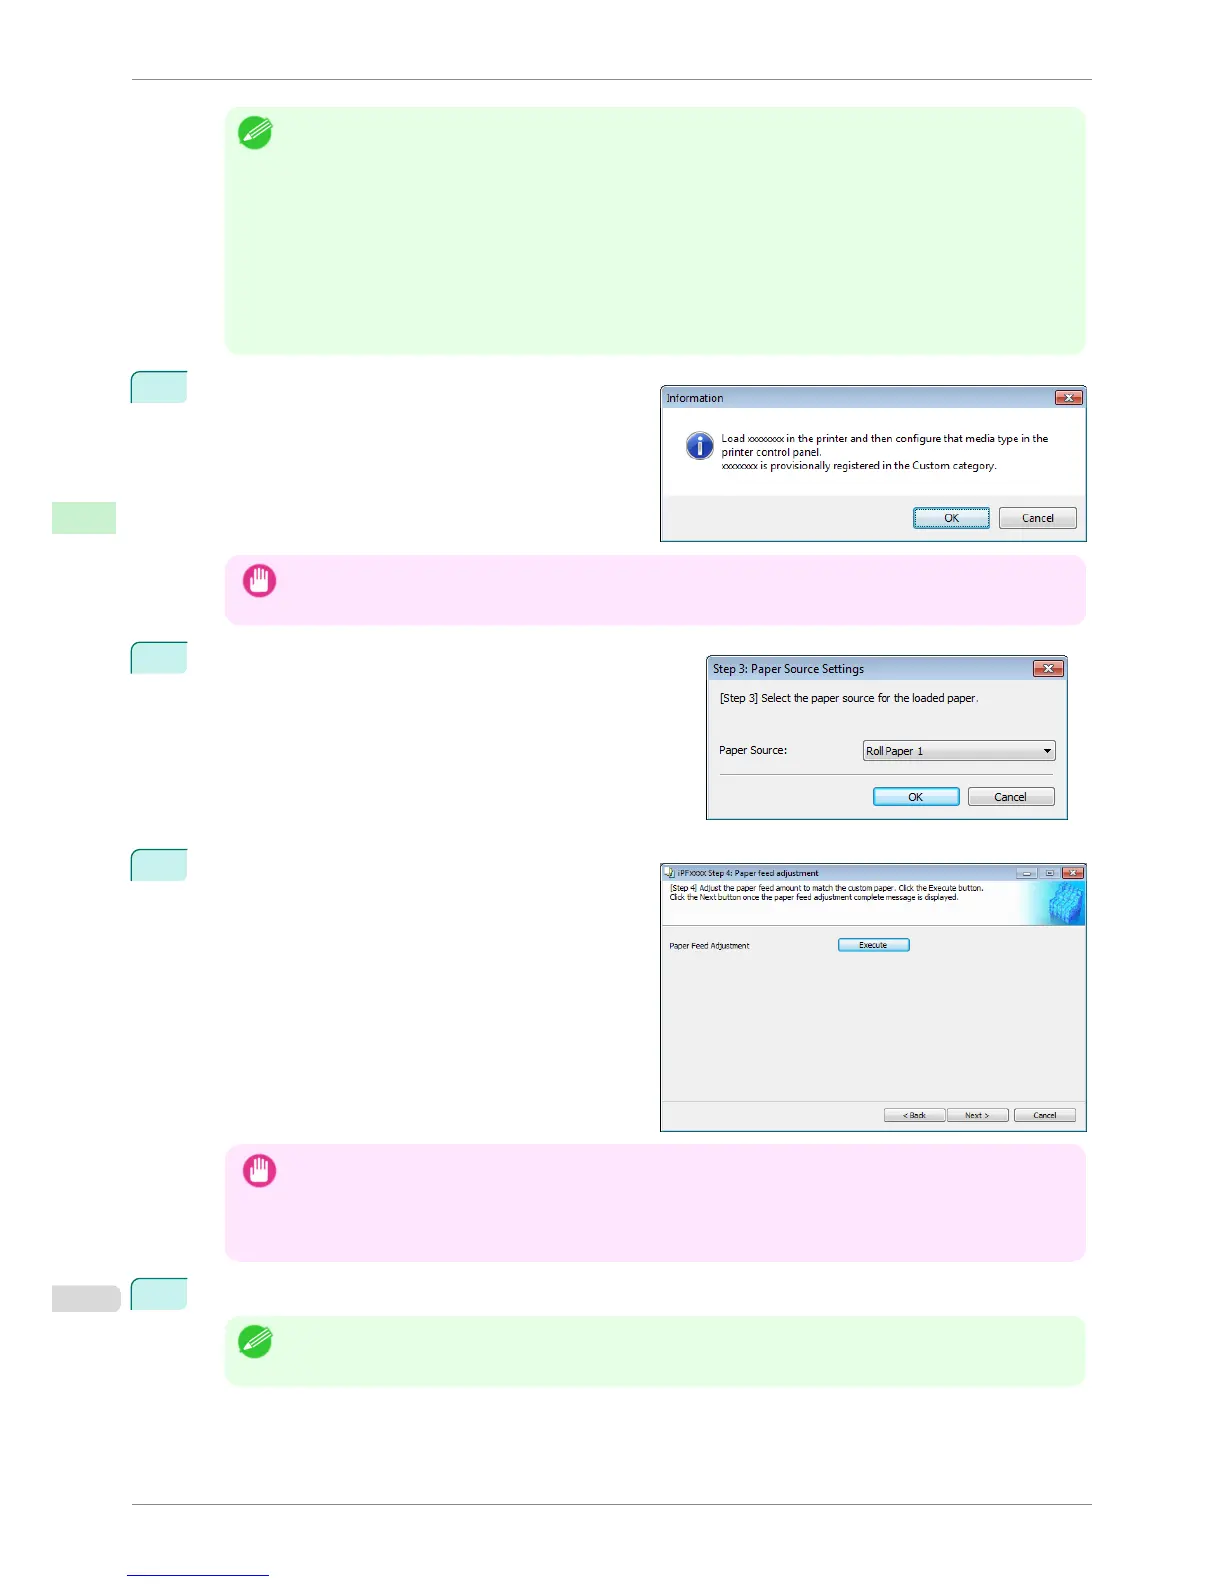
Load the custom paper in the printer and then click
the OK button.
Important
• Do not load paper that is curled or that has already been printed on.
7
The Step 3: Paper Source Settings dialog box is dis-
played. Select the paper source where the custom paper is
loaded and then click the OK button.
8
The Step 4: Paper feed adjustment dialog box is
displayed. Click the Execute button to execute paper
feed adjustment.
The adjustment pattern is printed, and the paper feed
is automatically adjusted based on the printing result.
Once the paper feed adjustment is complete, click
the Next button.
Important
• Check that there is no paper left on the ejection guide.
• If Paper Feed Adjustment is not executed, horizontal stripes with different color tones may appear in the prin-
ted material. Paper feed adjustment does not need to be executed more than once. Execute paper feed adjust-
ment only once each time you add a custom paper.
9
The Roll Paper Settings dialog box is displayed.
Note
• If a paper source other than Roll Paper is selected in the Step 3: Paper Source Settings dialog box, this
screen is not displayed.
Add Custom Paper
iPF8400S
User's Guide
Handling and Use of Paper Media Configuration Tool (Windows)
534