46
Setting Measurement Conditions (basic settings)
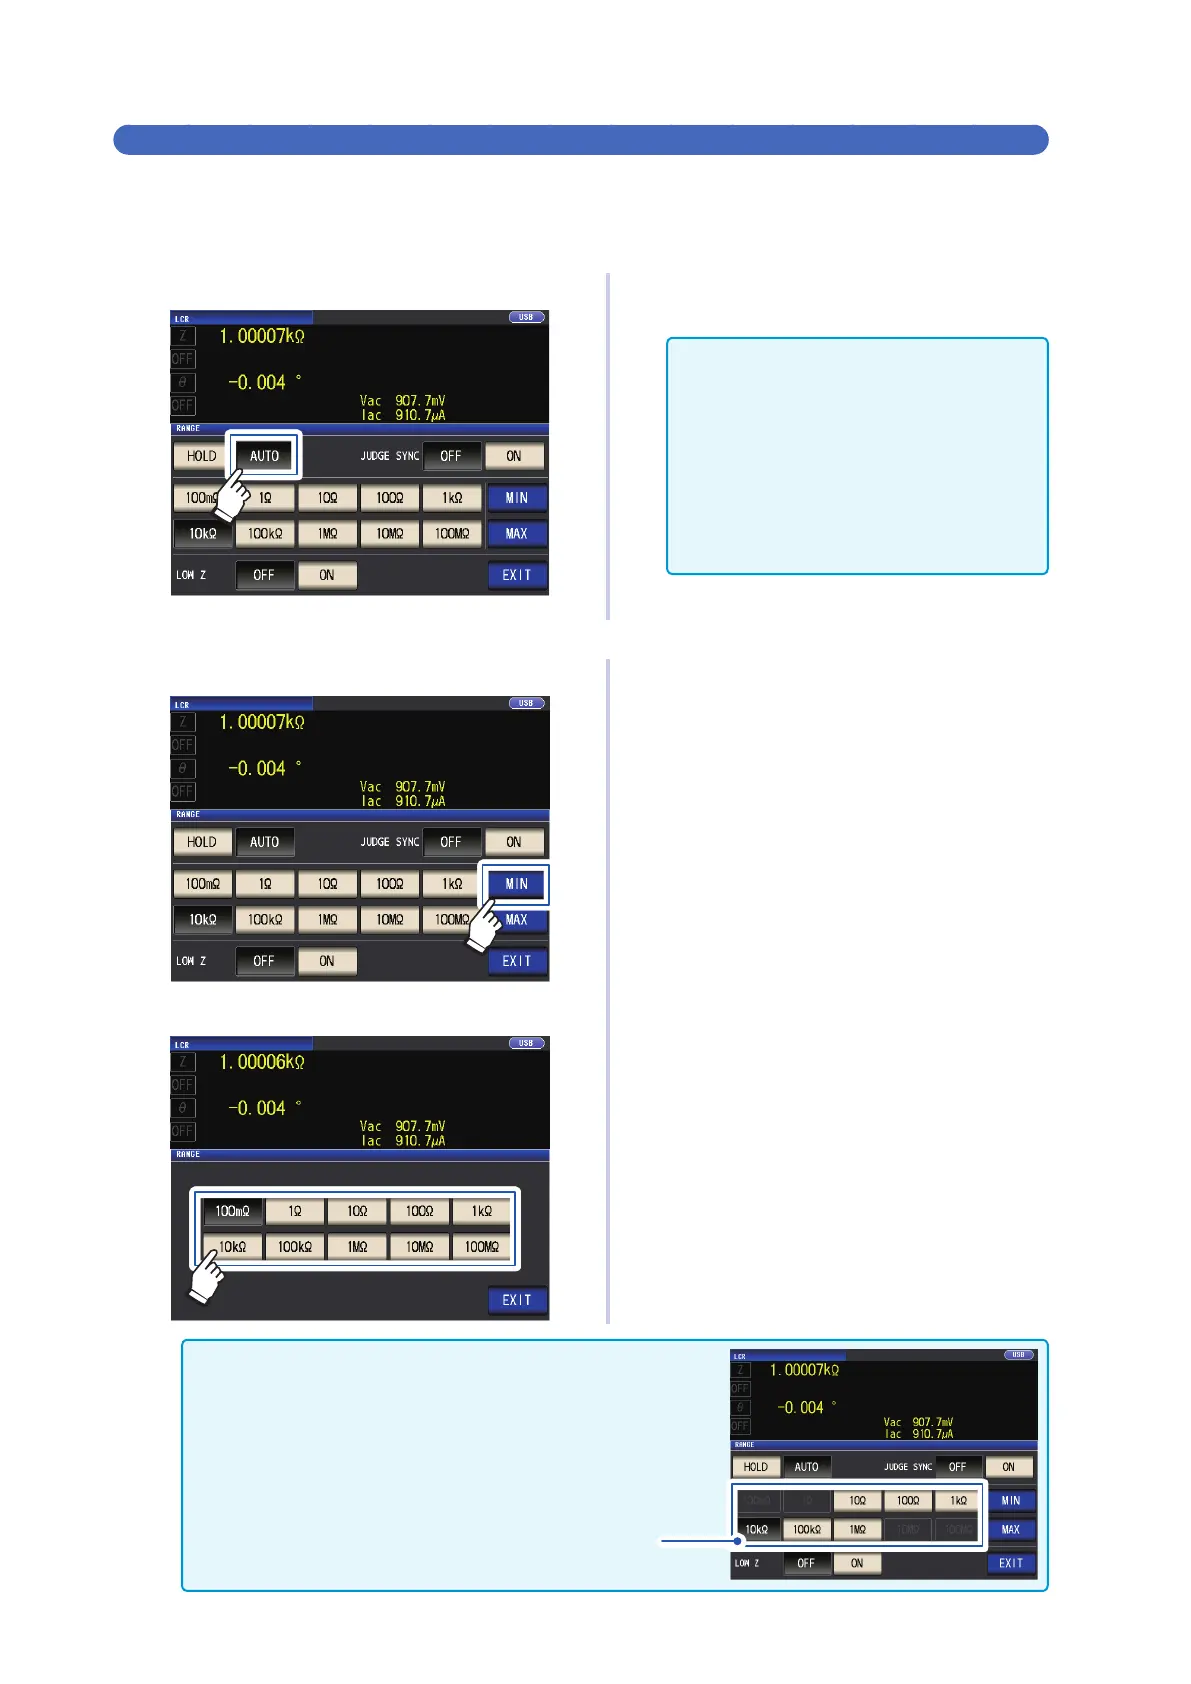
Setting AUTO ranging
Screen display method (For more information, see p. 24.):
AC measurement: (Measurement screen) SET key>(SET screen) BASIC tab>RANGE key
DC measurement: (Measurement screen) SET key>(SET screen) Rdc tab>RANGE key
1
Touch the AUTO key.
2
Touch the EXIT key twice.
Displays the measurement screen.
• If the instrument is being used outside the
limits of its specication, the suitable range
may not be set in auto ranging function.
Check the accuracy assured ranges in
"Guaranteed accuracy measurement level
range" (p. 213) and then change the test
conditions.
• Manually changing the set range while us-
ing the AUTO setting will cause the instru-
ment to switch to the HOLD setting.
The AUTO range limit function allows you to limit the AUTO ranging range.
1
Touch the MIN key.
2
Select the AUTO range lower limit range.
3
Touch the EXIT key.
The display will return to the screen shown
in step 1.
4
Touch the MAX key, and select the
AUTO range upper limit range.
5
Touch the EXIT key twice.
Displays the measurement screen.
The AUTO range scope is the selection of ranges
within which the AUTO range is selected. If the
AUTO range scope has been limited, the instrument
will not select a range that lies outside that scope.
For more information about the AUTO range scope,
see "Measurement range" (p. 190).
• When canceling the AUTO range limit function, set the lower
limit range to 100 m
Ω
and the upper limit range to 100 M
Ω
.
Range selection screen when the AUTO range scope has
been limited
Example: When the lower limit range is set to 1 k
Ω
and the up-
per limit range is set to 1 M
Ω
Ranges that fall outside the AUTO
range scope will not be shown.