47
Setting Measurement Conditions (basic settings)
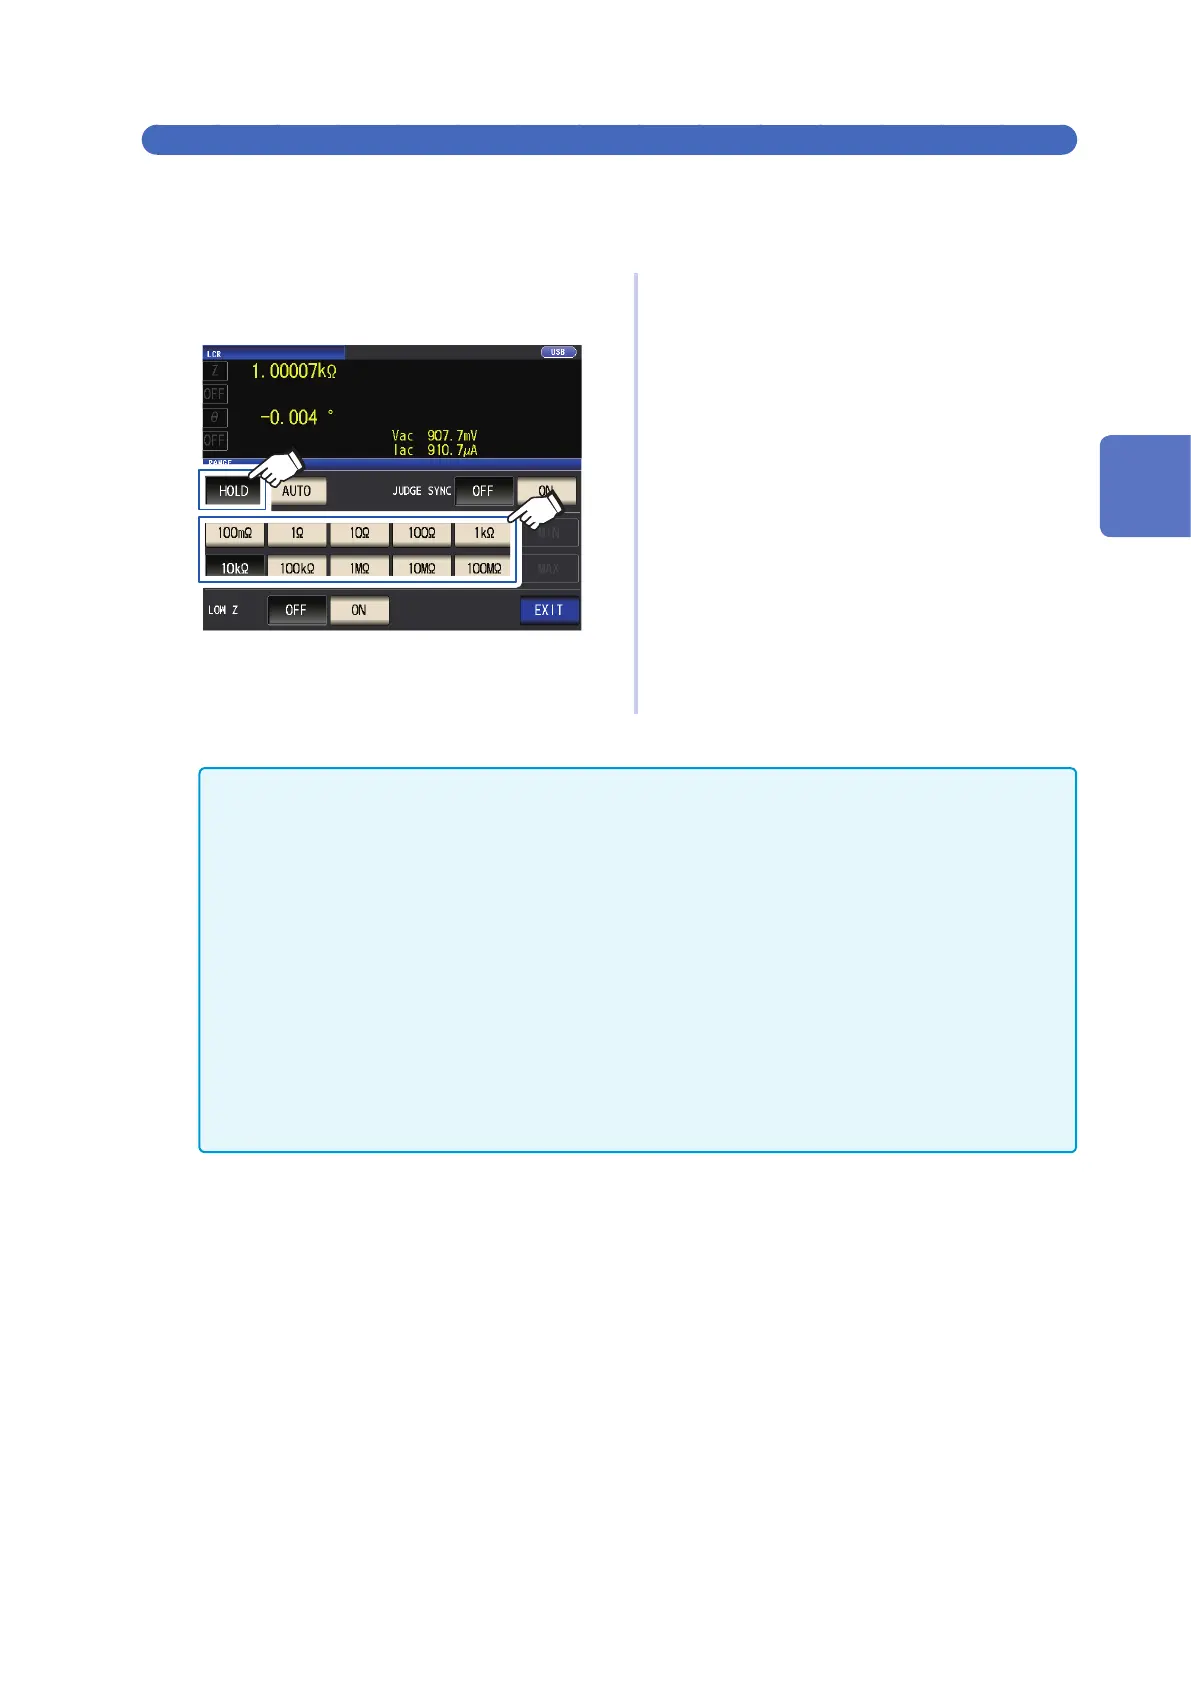
Setting the ranging to HOLD
Screen display method (For more information, see p. 24.):
AC measurement: (Measurement screen) SET key>(SET screen) BASIC tab>RANGE key
DC measurement: (Measurement screen) SET key>(SET screen) Rdc tab>RANGE key
1
Touch the HOLD key and then select the
meausrement range.
2
1
The measurement range is set based on
the total impedance of the sample, mea-
surement cable, and probe or test xture.
2
Touch the EXIT key twice.
Displays the measurement screen.
For more information about the guaranteed ac-
curacy range for each measurement range, see
"Measurement range" (p. 190).
• If you change the measurement frequency during AC measurement using the HOLD setting of a sample
whose impedance varies with frequency, you may not be able to perform measurement using the same
range. In this case, change the measurement range setting.
•
If OVER FLOW (UNDER FLOW) is indicated as the measured value, measurement cannot be performed
with the current measurement range. Change the measurement range or change to the AUTO setting so
that the instrument can select an optimal range automatically.
• The measurement range is set based on the total impedance of the sample and measurement cable.
Consequently, you may not be able to perform measurement if you set the measurement range using the
HOLD setting based solely on the sample’s impedance (for example, if the measurement cable’s parasitic
Z [Y] value is large, as it is in long cables).
In this case, perform correction, check the sample’s impedance and the xture’s residual component, and
determine the measurement range based on those values.
(See "5.2 Open Correction" (p. 99), "5.3 Short Correction" (p. 105), and "Appx. 8 Open Correction and
Short Correction" (p. Appx.11).)
• Available range settings are limited based on the measurement frequency and cable length settings.
(See p. 211 of "10.6 Measurement Range and Accuracy"..)
3
Performing Measurements in LCR Mode