Shape Manager 79
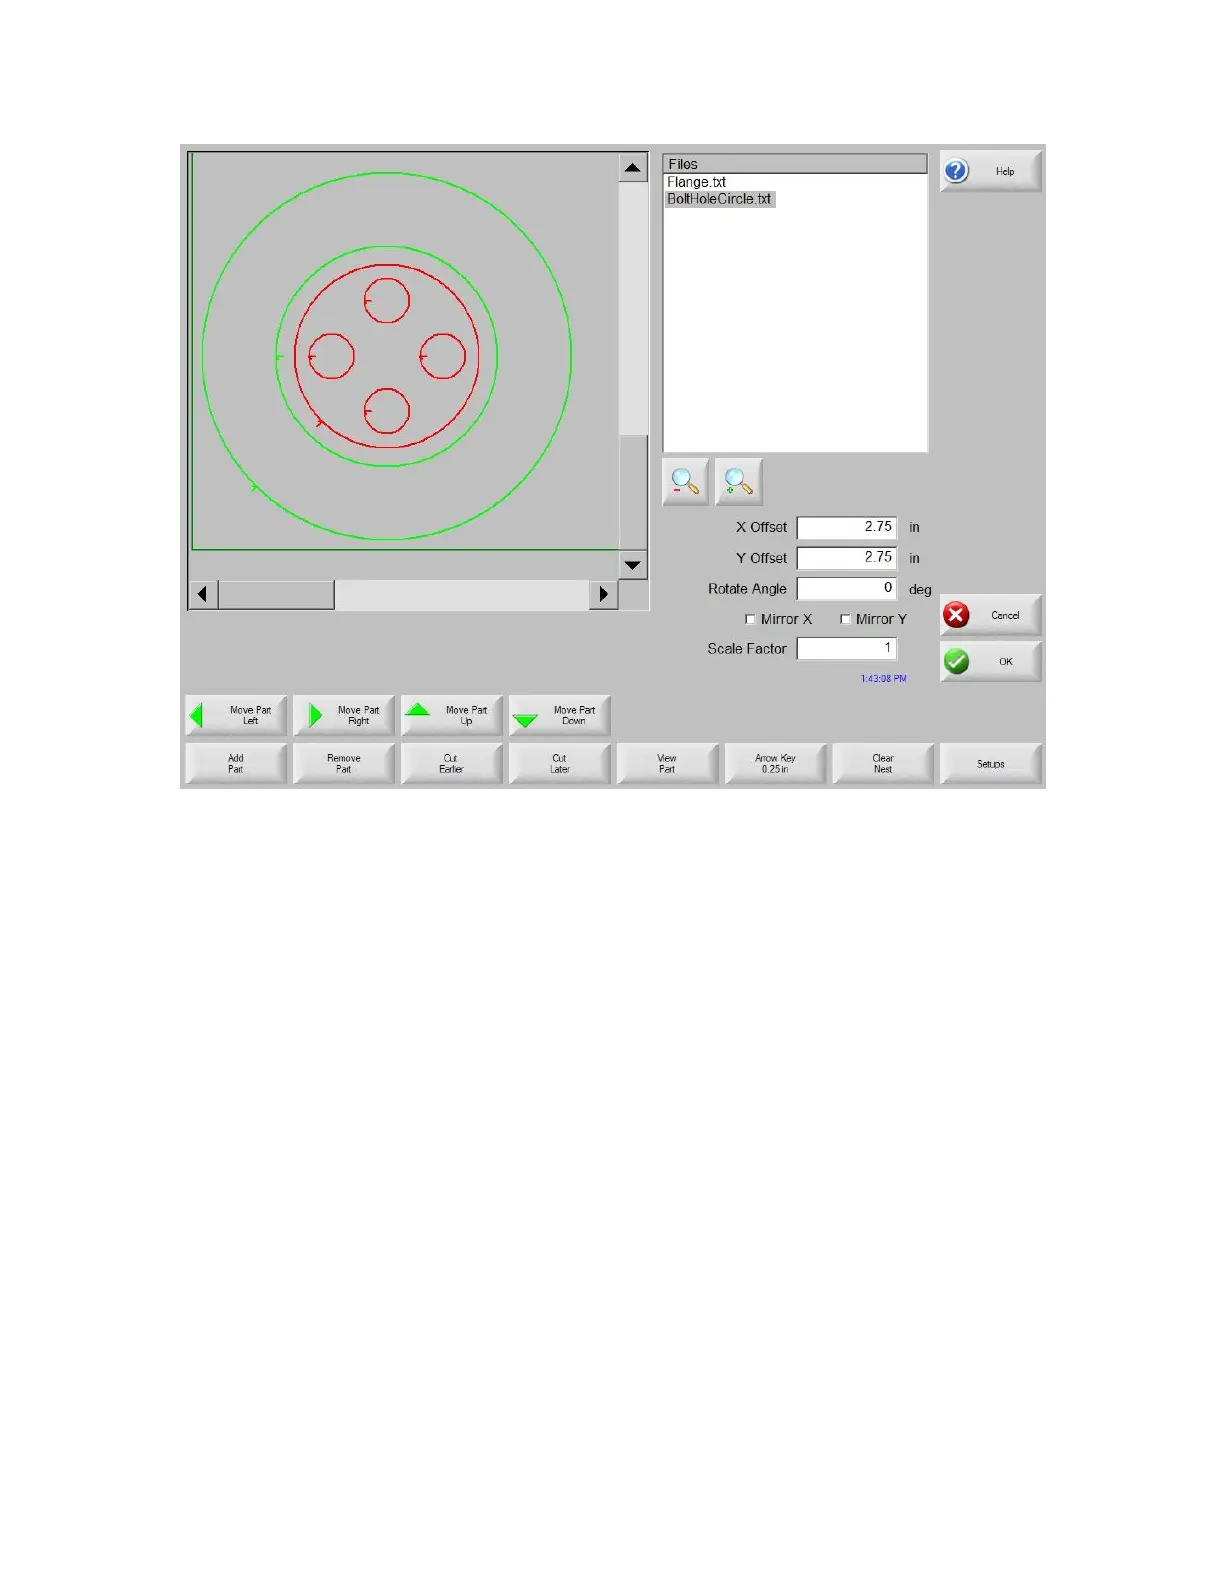
At this screen, the part can be oriented, scaled and moved to final position. This is done by moving to
the Nester™ Part List and highlighting the file name. Then select the desired field to manually offset,
rotate, mirror and scale the part.
To position the selected part, use the manual direction keys. The view screen will be outlined by a
bold blue border indicating that the arrow keys are active. Pressing the arrow keys will allow
movement of the part to the desired location on the plate. Each time the arrow keys are pressed, the
selected part will move in the direction of the arrow by the increment set by the Arrow Key distance
soft key. By use of the arrow distance key, arrow keys and zooming in the view field, exact
placement of the desired part may be obtained.
Additional parts may be added to the nest in the same fashion as described above. To customize
your nest, you may decide to delete parts or add parts to the list and change the order in which they
are cut by use of the soft keys displayed. When finished, press OK to return to the Main Cut screen
and begin cutting the nest. The part nest is currently saved as a temporary file until another part is
loaded.
Saving a Nest
From the Main Cut screen, press the Files soft key to Save to Disk. From here the part can be saved
to a hard disk folder on the control, Diskette or USB memory stick. The nested parts file may be
saved as a nest or a part. Saving as a nest using the save as Nester File feature, will create a larger
file which will allow future modification of the nest through Nester™. Nested parts saved as a part file
cannot be modified.