214683 202 Revision A
Figure 3.319: John Deere Combine Display
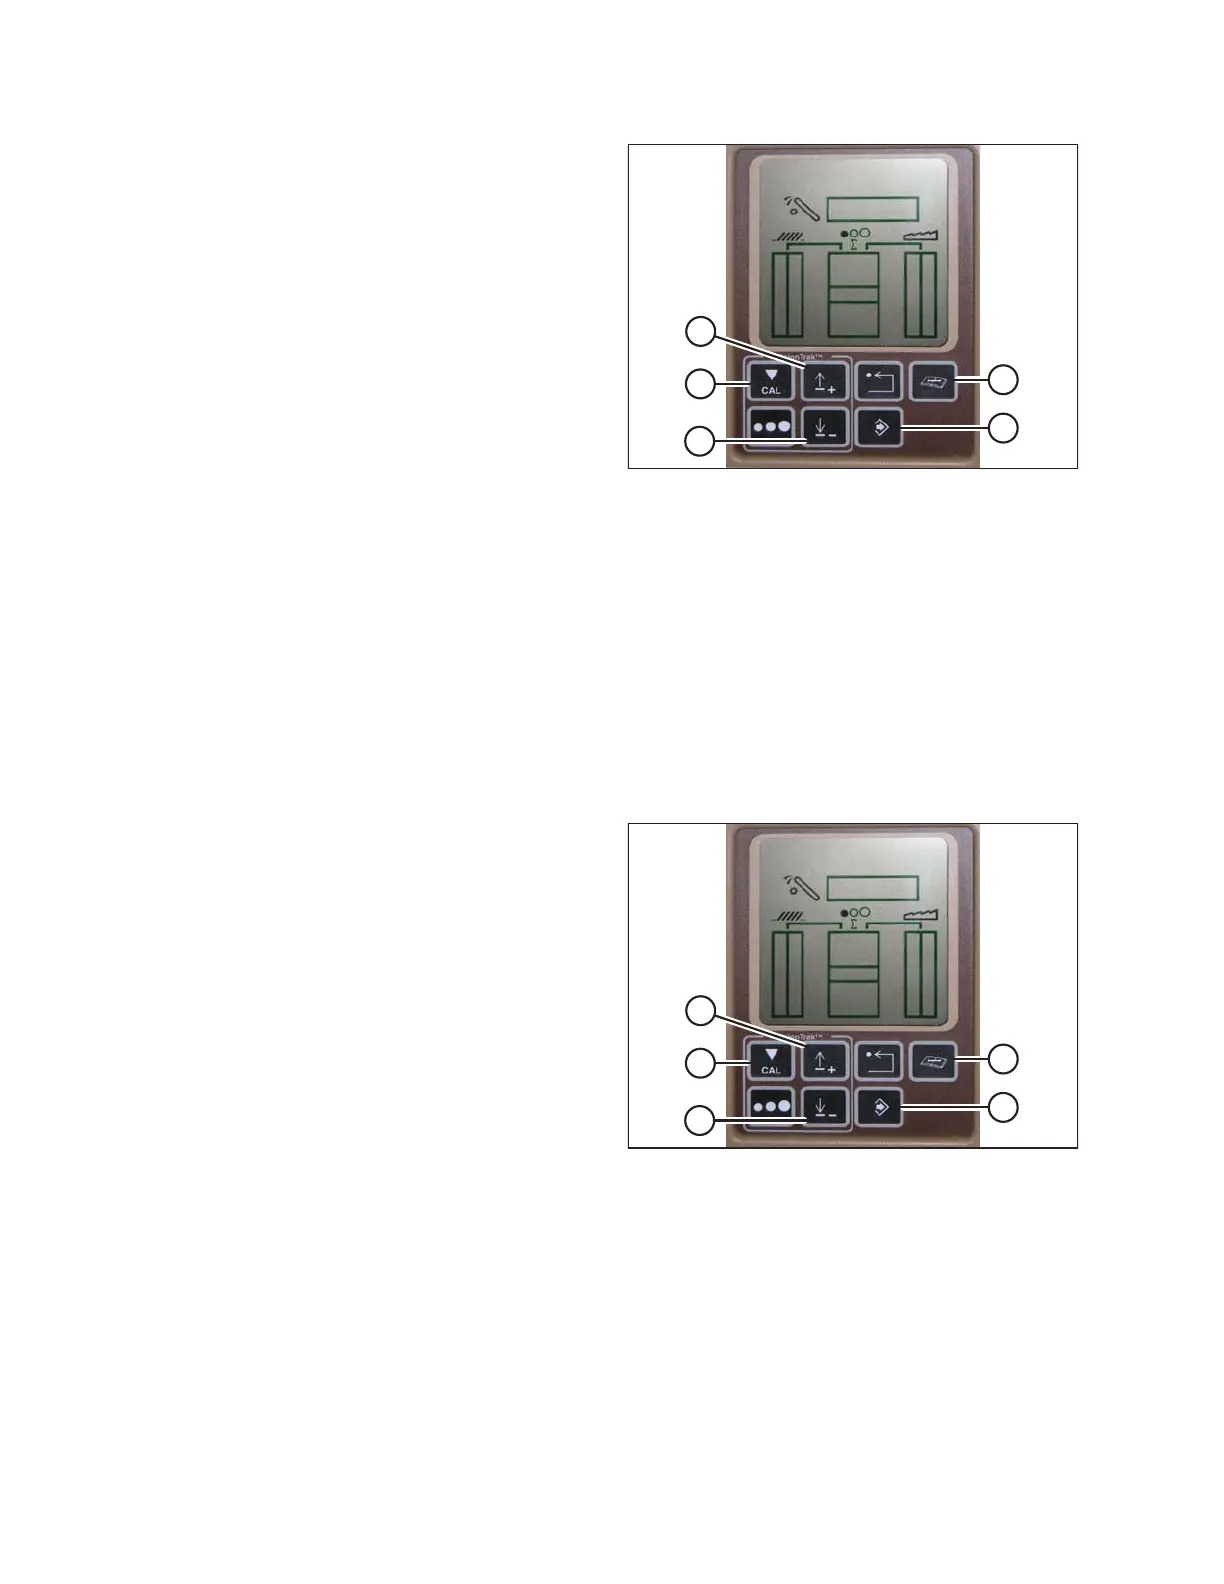
1. Press the DIAGNOSTIC button (A) on the monitor.
DIA appears on the monitor.
2. Press the UP button (B) until EO1 appears on the
monitor, and press ENTER (D). This is the header
adjustment.
3. Press the UP (B) or DOWN (C) button until 132 is
displayed on the top portion of the monitor. This is the
reading for the accumulator.
4. Press ENTER (D) to select 132 as the accumulator
reading (this will allow you to change the display to a
three-digit number so it has a 0 in it, for example, x0x).
5. Press the UP (B) or DOWN (C) button until the desired
number is displayed, and press the CAL button (E).
6. Press ENTER (D) to save the changes. The
accumulator is now deactivated.
Setting the Sensing Grain Header Height to 50 (John Deere 60 Series)
In order for a John Deere 60 Series combine to accurately read the height sensors on a MacDon FD1 header, the
combine’s sensitivity needs to be set to 50.
NOTE:
Changes may have been made to the combine controls or display since this document was published. Refer to the
combine operator’s manual for updates.
To set the sensing grain header height, follow these steps:
Figure 3.320: John Deere Combine Display
1. Press the DIAGNOSTIC button (A) on the monitor. DIA
appears on the monitor.
2. Press the UP button (B) until EO1 appears on the
monitor, and press ENTER (D). This is the header
adjustment.
3. Press the UP (B) or DOWN (C) button until 128 is
displayed on the top portion of the monitor. This is the
reading for the sensor.
4. Press ENTER (D) to select 128 as the sensor reading
(this will allow you to change the display to a three-digit
number so it has a 50 in it).
5. Press the UP (B) or DOWN (C) button until the desired
number is displayed, and press the CAL button (E).
6. Press ENTER (D) to save the changes. The height is
now set.
OPERATION