Do you have a question about the Mold-Masters Hot Runner and is the answer not in the manual?
Defines the purpose and scope of the Hot Runner systems, emphasizing compliance with safety standards.
Lists the essential documentation to be referenced alongside this manual for system integration.
Provides a table of document numbers, release dates, and versions for reference.
Directs users to the website or representative for current warranty information.
Presents a table of units of measure and their conversion factors used in the manual.
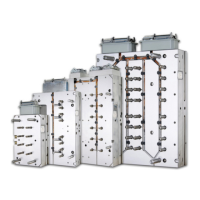
Lists the global headquarters and regional offices with contact details.
Provides contact information for international representatives across various countries.
Identifies common safety hazards associated with plastic injection molding equipment.
Details potential operational hazards and necessary precautions for safe use.
Explains the meaning and application of various safety symbols used in the manual.
Provides critical checks and cautions for system mains supply and controller to mold wiring.
Emphasizes the importance of isolating and locking out supplies before maintenance.
Provides guidelines for the safe and environmentally responsible disposal of components.
Highlights specific safety hazards related to Hot Runner system operation and maintenance.
Lists the necessary tools and materials for preparing the Hot Runner system for use.
Warns about the importance of correct screw lengths to prevent shearing and downtime.
Provides instructions for safely unpacking components and checking against the packing slip.
Details the process of removing factory rust inhibitors from nozzles and components.
Guides users in identifying their system type with diagrams of common configurations.
Illustrates a typical cast-in Hot Runner system, divided into valve and non-valve sides.
Shows a typical bolt-in Hot Runner system, divided into valve and non-valve sides.
Illustrates a typical MasterSHIELD cast-in system, divided into valve and non-valve sides.
Explains that most nozzles have gate seals installed but may require final machining.
Details hot valve, hot sprue, and F type systems, requiring gate seal machining.
Provides step-by-step instructions for installing thermocouples into nozzles.
Explains the procedure for inserting nozzles into the manifold plate, with specific notes.
Guides on organizing and routing thermocouple and power wires for back and front mounted systems.
Describes types of valve bushings and provides instructions for their installation.
Details three methods for locating the manifold during mounting: locator, dowel pin, and slot.
Explains the function and installation of pressure disks and valve disks in the system.
Details the installation of various inlet components, including back plates and center heaters.
Emphasizes user responsibility for protection against electrical shock and proper grounding.
Provides checks for zone numbering, wire organization, and secure connections.
Outlines electrical safety tests based on EN 60204-1 and NFPA79 standards.
Describes how to measure resistance and verify thermocouple alignment for continuity.
Explains how to measure resistance between heater power wires for checking elements.
Provides guidelines for thermocouple wiring, including type, tip treatment, and zone control.
Details the procedure for assembling the hot half, including warnings and cautions.
Provides guidelines for installing cavity plates in stack molds, emphasizing safety and procedure.
Covers essential pre-startup checks and precautions for the Hot Runner system.
Details startup procedures based on different system types (Standard, Stack Mold, etc.).
Outlines the correct shutdown procedures for various Hot Runner system types.
Offers general advice and tips for performing effective color changes in the Hot Runner system.
Presents a basic, effective procedure for color changes.
Details a more thorough procedure for color changes, including specific steps.
Explains the installation and assembly of valve actuators for various series.
Guides on assembling the bottom part of the cylinder, including seal installation.
Details the piston assembly process for different series, including seal and ring installation.
Covers the process of finishing the valve pin tip, including measurements and grinding.
Explains the procedure for lapping valve pins into the gate for satisfactory shut-off.
Details the assembly of the valve pin, including disk springs and retainer studs.
Provides instructions for installing the valve actuator onto the hydraulic plate.
Guides on installing proximity sensors for hydraulic limit switch options.
Outlines maintenance procedures for specific actuator series, including oil and pneumatic systems.
Introduces the Slimstack actuator and directs users to assembly and installation information.
Provides an exploded view and parts list for the Slimstack actuator assembly.
Details the step-by-step assembly process for the Slimstack actuator components.
Guides the user through the installation of the Slimstack actuator onto the manifold plate.
Introduces the SeVG Plus actuator as an industrial grade actuator for moving mechanisms.
Lists the available SeVG Plus actuator models, including closing force, stroke, and cooling.
Explains the flexibility of Master-Series Hot Runner systems in using SeVG Plus actuators.
Describes the different SeVG Plus actuator models (SE40-20, SE40-20C, SE20-15).
Covers the assembly and installation procedures for the SeVG Plus actuator, including warnings.
Provides instructions for the safe disassembly of SeVG Plus actuators (SE40-20, SE40-20C, SE20-15).
Illustrates the typical components and layout of the E-Drive system.
Details safety hazards related to entanglement, electrical, and trip risks associated with E-Drive.
Explains that the E-Drive system is shipped pre-assembled and requires minimal additional assembly.
Provides detailed steps for assembling the Hot Runner system and interface plate.
Recommends Dynalub 510 for lubricating ball-screws, warning against graphite or MoS2.
Guides on installing and tensioning the timing belt using an idler tensioning screw.
Explains how to check for parallel and angular misalignment using a straight edge tool.
Presents a 3D view of the Mag-Pin assembly, labeling all components.
Warns about strong magnetic field hazards and precautions for individuals with implants.
Describes the normal and deactivated gate conditions for Mag-Pin operation.
Provides cautions and recommendations for safely handling and storing magnets.
Summarizes the assembly steps for the Mag-Pin option, referencing specific pages.
Details the recommended tools and procedures for extracting Mag-Pin assemblies.
Provides warnings and procedures for removing 1-piece and 2-piece valve disks.
Details the process for removing and installing terminal ends on nozzles and manifolds.
Explains the procedure for removing power leads from heater plates.
Discusses reasons for gate seal maintenance and procedures for removal and replacement.
Covers maintenance for Sprint gate seals, including nozzle tip removal and installation.
Details the procedure for checking nozzle tip height using a dial indicator.
Provides torque settings for Dura-Plus, Master-Series, and Summit-Series gate seals.
Describes TIT edge gated systems and the requirement for gate seal grinding.
Provides procedures for removing TIT Edge gate seals, with notes on reinstallation.
Details the components and assembly of the Accu-Line™ with valve bushing for Centi systems.
Explains the pre-assembly and assembly of Accu-Line™ with valve insert for Deci and Hecto systems.
Guides on identifying systems with a Reverse Melt Link by checking the plate or parts list.
Details the process of disassembling, wiping, and applying anti-seize compound to Melt-Disk components.
Describes how to assemble the nozzle thermocouple, including bending and connecting.
Explains the assembly of the Melt-Disk thermocouple, including tip insertion and bending.
Details the assembly of Melt Disks to nozzles using Melt-Links, including torque specifications.
Provides startup procedures for standard and reverse Melt Links, emphasizing safety and temperature settings.
Outlines shutdown procedures for standard and reverse Melt Links, including temperature reductions.
Helps identify Melt-CUBE designs A and B, noting they are not interchangeable.
Details components, gate seal assembly, inspection, cleaning, and assembly for Melt-CUBE Design A.
Covers components, maintenance toolkit, inspection, and cleaning for Melt-CUBE Design B.
Provides step-by-step instructions for assembling the Melt-CUBE Design B.
Guides on the disassembly of transfer seals, torpedoes, and melt blocks for Melt-CUBE Design B.
Discusses moisture contamination in resin, its causes, and importance of pre-drying.
Covers essential precautions before production to minimize defective parts.
Provides guidance on identifying the root cause of sub-standard parts production.
Outlines steps for operators to evaluate conditions causing product defects.
An index listing various defect types with corresponding page numbers for causes and remedies.
Addresses common molding problems like dark specks, blisters, and flow marks.
| Type | Hot Runner System |
|---|---|
| Application | Injection Molding |
| Material Compatibility | Various Thermoplastics |
| Temperature Control | Precise Temperature Regulation |
| Heating Technology | Electric Heating Elements |
| Control System | Advanced Digital Controllers |
| Customization | Tailored Solutions for Specific Needs |