19.3.9 Melt-CUBE Design A: Assemble into Cavity Block
If the system has been running:
1. Make sure water to the cover plate is o, then remove the cover plate.
2. Turn on cooling to the rest of the plates, especially the cavity plates.
NOTE
Mold-Masters recommends a separate cooling circuit for the cover plate,
to be able to assemble and disassemble it without aecting other cooling
circuits.
19.3.10 Melt-CUBE Design A: Assembly (Cold Condition)
CAUTION
Failure to retighten wedge screws at process temperature could cause
leakage.
CAUTION
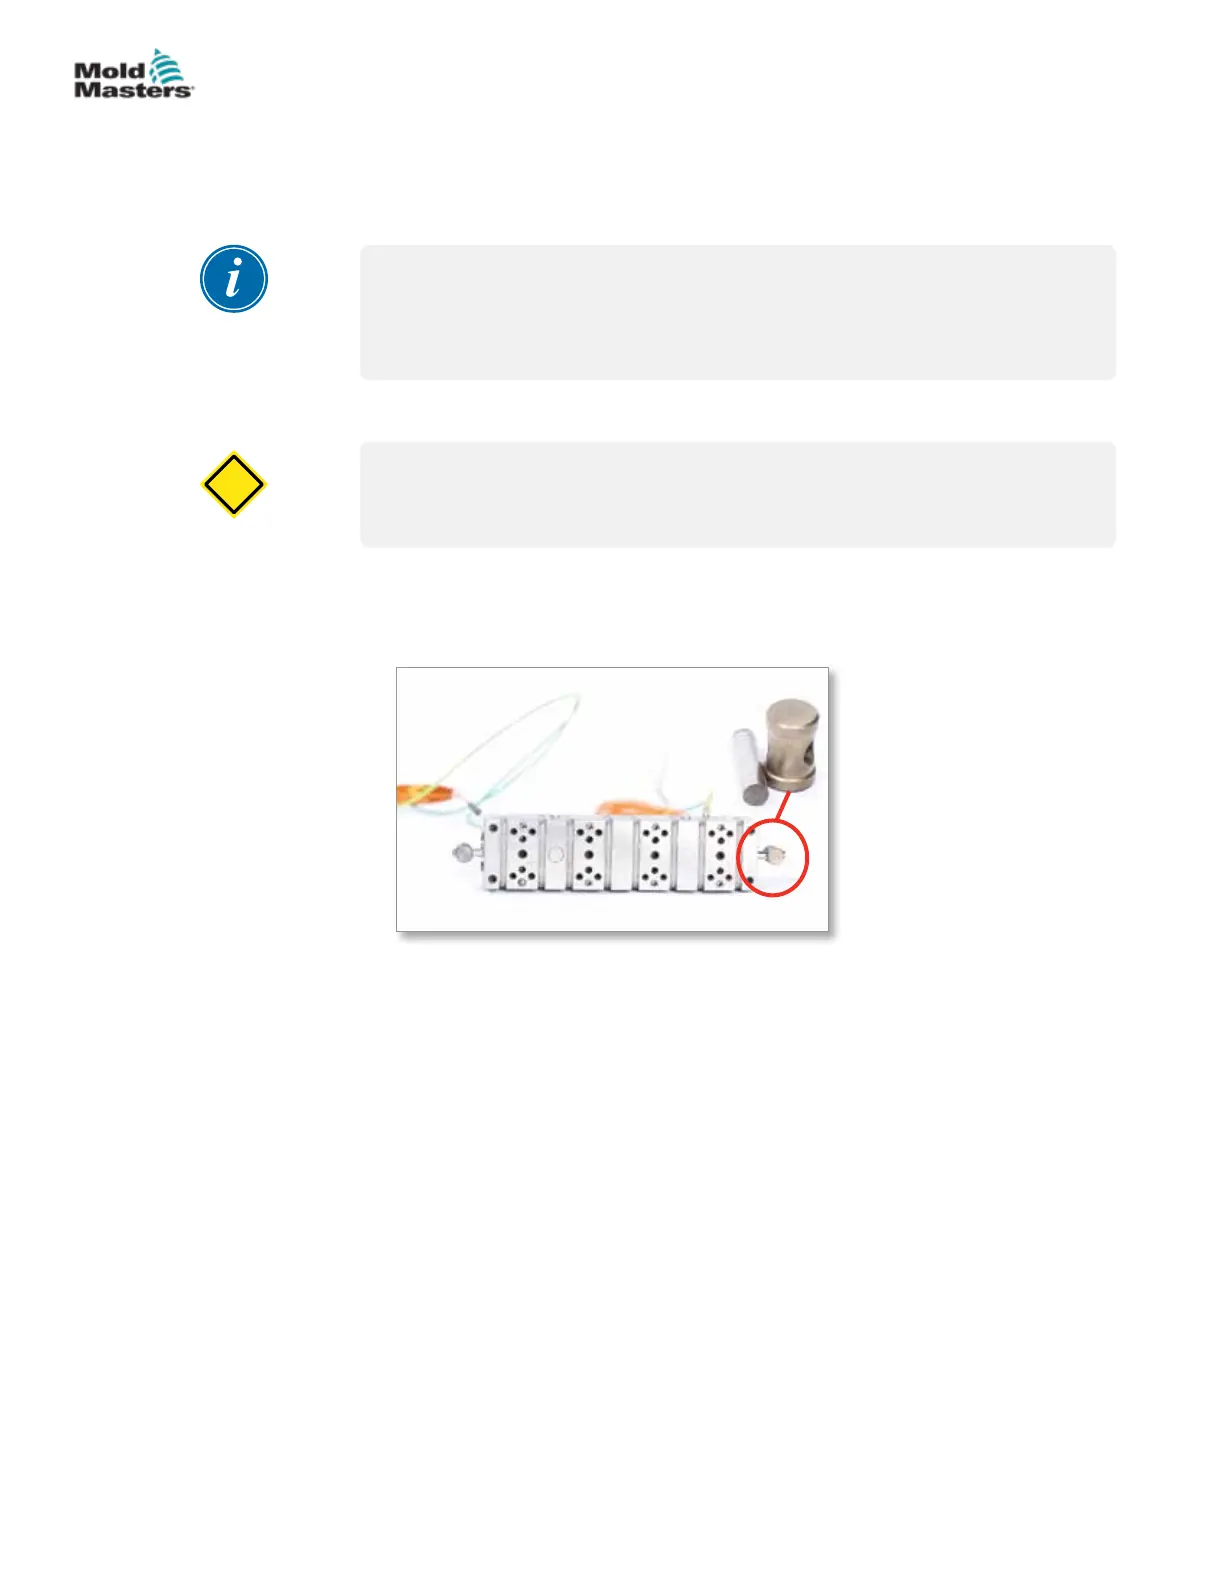
Assembly at cold condition, as follows. For clarity, an example 8-cavity demo
system is shown.
1. Install Melt-CUBE anti-rotation dowel in each end of the Melt-CUBE.
2. Install Melt-CUBE center locator into the back of the cavity block. Install
spacing supports into the back of the Melt-CUBE.
19-9MELT-CUBE SYSTEMS
Hot Runner User Manual
© 2020 Mold-Masters (2007) Limited. All Rights Reserved.