10.9 Valve Pin Assembly
CAUTION
For systems with Accu-Valve MX, Accu-Valve EX or Accu-Valve CX gate
seals: Gate seals must be removed prior to installing valve pins.
CAUTION
10.9.1 5500 Series
1. Check the valve pin length. Refer to:
”Valve Pin Finishing of Tip” on page 10-4,
“Valve Pin Finishing of Head” on page 10-11.
2. Slide the valve pin into the piston.
3. Grease and install the O-ring.
4. Install the piston top and tighten, torque setting 20-27 Nm (15-20 ft-Ib).
10.9.2 6X00 Series
CAUTION
Failure to install the disk springs in the correct order will cause damage to
the gate.
CAUTION
1. Check the valve pin length. Refer “Valve Pin Finishing of Tip” on page
10-4.
2. Slide the valve pin into position.
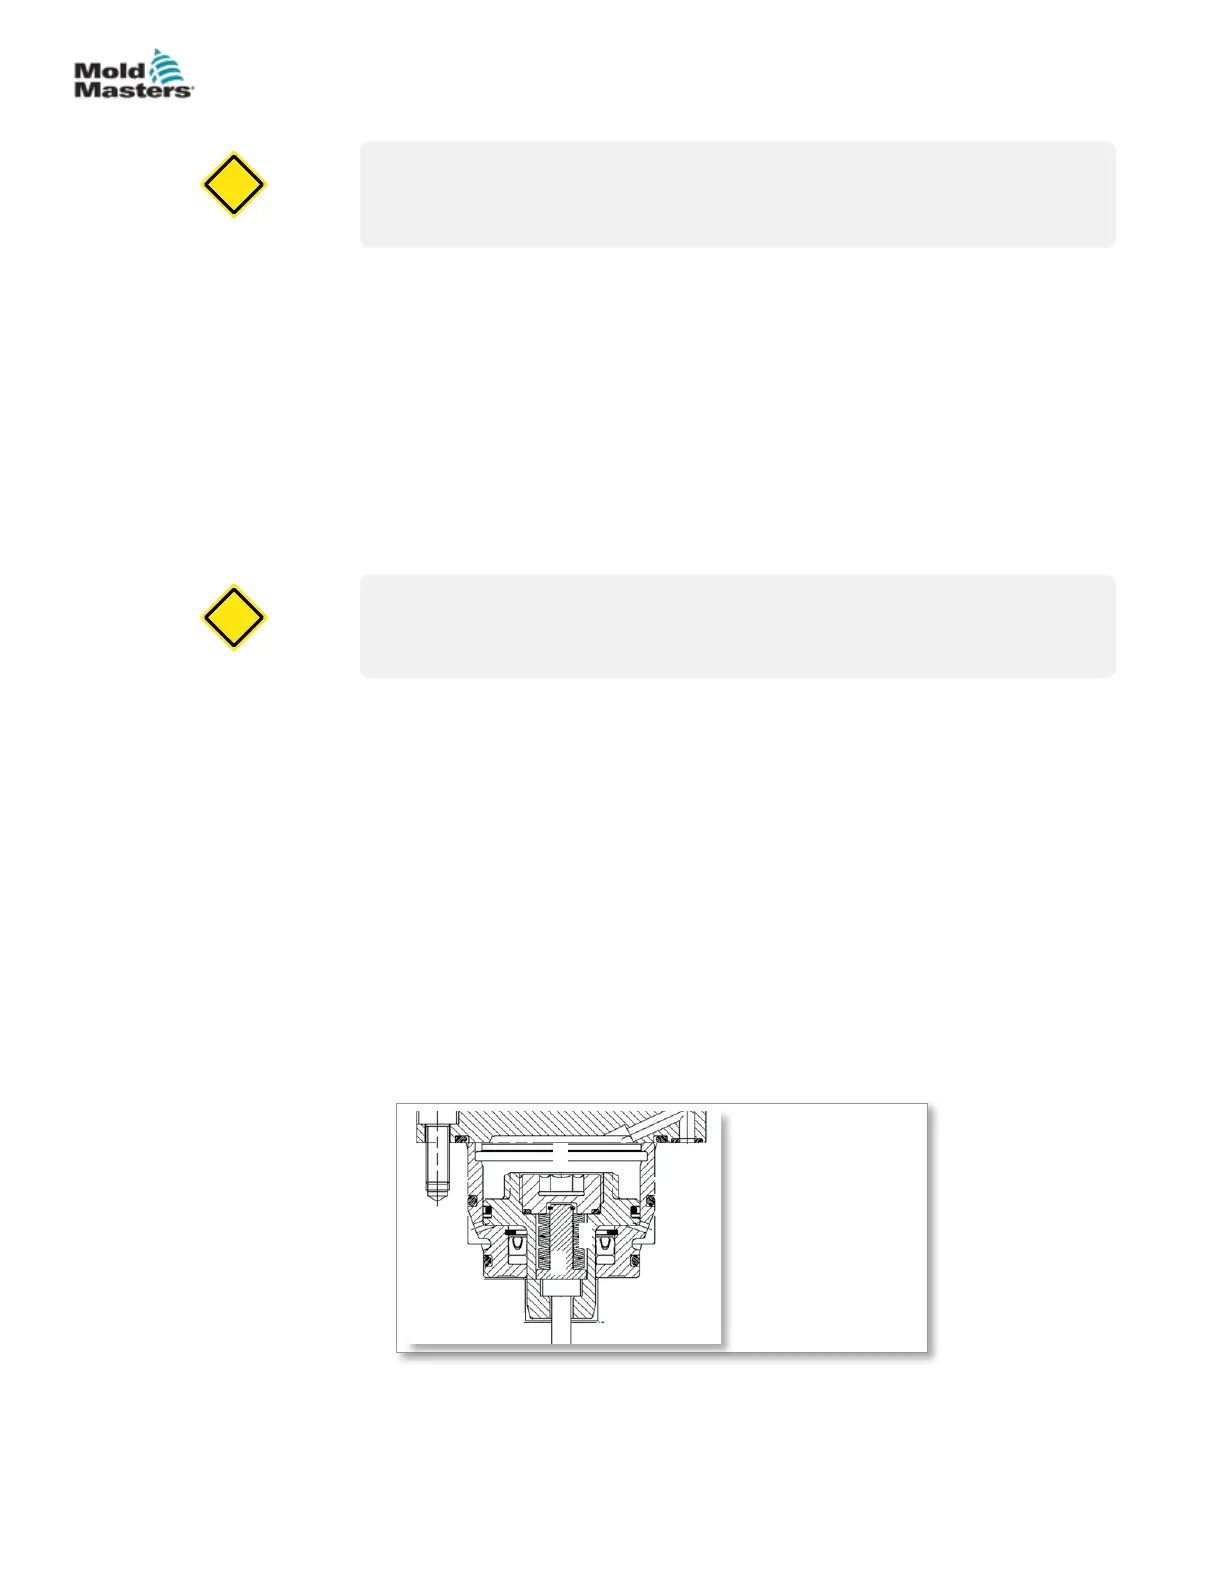
3. Assemble the disk springs to the spring retainer stud.
a) Check for the correct orientation of the disk springs when installing.
b) 6500 Series: Align the springs in 5 alternating groups of 5, convex
and concave.
c) 6600 Series and 6700 Series: Align the springs in 8 alternating
groups of 6, convex and concave.
4. Install the disk spring assembly on top of the valve pin.
5. Grease and install the O-ring.
6. Install piston top and tighten, recommended torque setting
20-27 Nm (15-20 ft-Ib).
1. Cylinder top
2. Valve pin
3. Spring retainer stud
4. Disk springs
3
2
4
Figure 10-16 8 X 5 Disk spring assembly
1
10-12
© 2020 Mold-Masters (2007) Limited. All Rights Reserved.
HYDRAULIC / PNEUMATIC ACTUATORS
Hot Runner User Manual


 To Next Page