b. If you are on a DHCP-enabled network, you can assign an IP address by
enabling DHCP on your unit. Use the dhcp4set <x> on command, (x being
0/1 for ETH0 and ETH1, respectively).
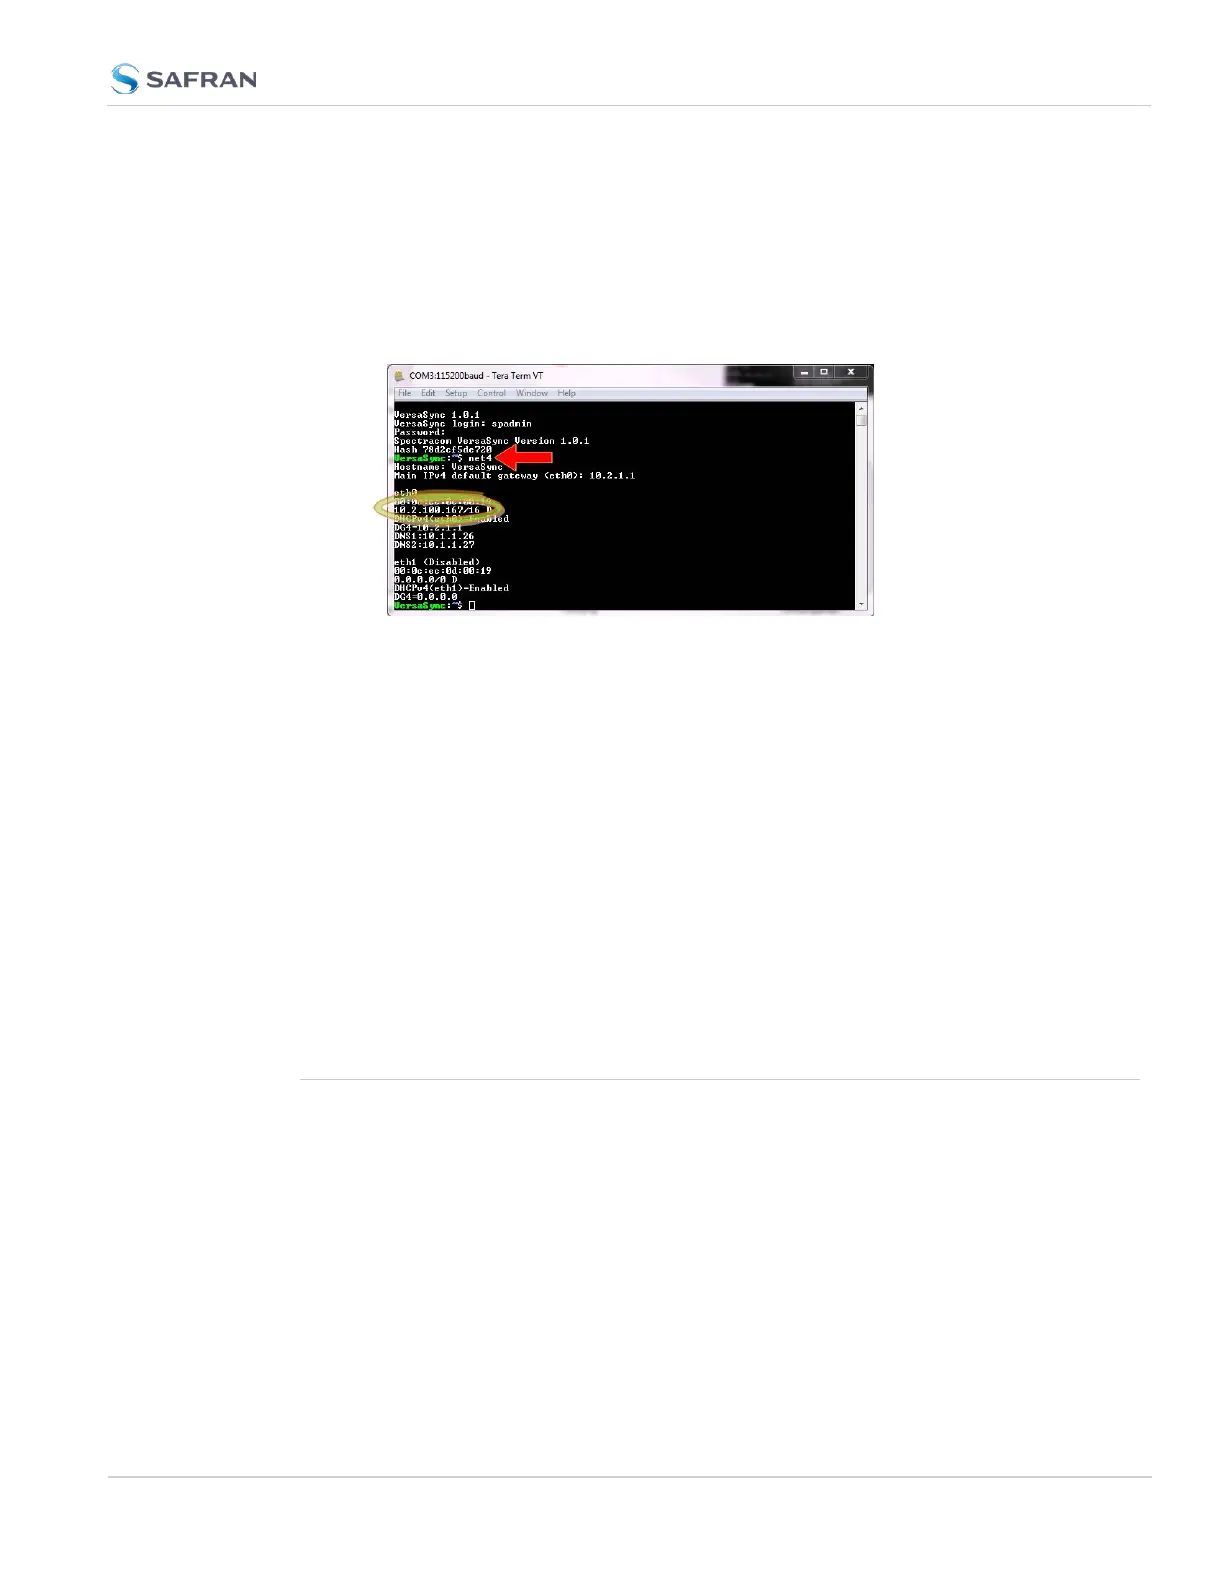
Retrieve the IP address assigned to VersaSync by typing the net4 com-
mand. The command should return the network settings, including the IP
address.
You can use this IP address to login to the VersaSync Web UI and then set a
static IP address, subnet mask and gateway. (This can also be done via the
CLI and a terminal emulator. See "Assigning a Static IP Address" on
page41).
c. If you are NOT on a DHCP-enabled network, your unit's IP address is set to
the default for each Ethernet port, unless you have assigned a new static IP
address.
For more detailed information about setting a static IPaddress for your unit, see
"Setting up an IP Address" on page40
Or, proceed to "Accessing the WebUI" below (it is recommended that you have
identified or set your unit IP address for this step).
2.4 Accessing the WebUI
VersaSync's WebUI is the recommended tool to interact with the device, since it
provides access to nearly all configurable settings, and obtain comprehensive
status information without having to use the Command Line Interpreter (CLI).
You can access the Web UI either by using the default IP address, an auto-
matically assigned DHCP IP address, or by using a manually set static IP address
(see "Assigning a Static IP Address" on page41).
1. On a PC connected to VersaSync via ETH1 or ETH0, start a web browser.
2. Navigate to the IP address assigned or identified in "Initial Network Setup"
on page34.
2.4 Accessing the WebUI
CHAPTER 2 • VersaSync User Manual Rev. 12
37