689
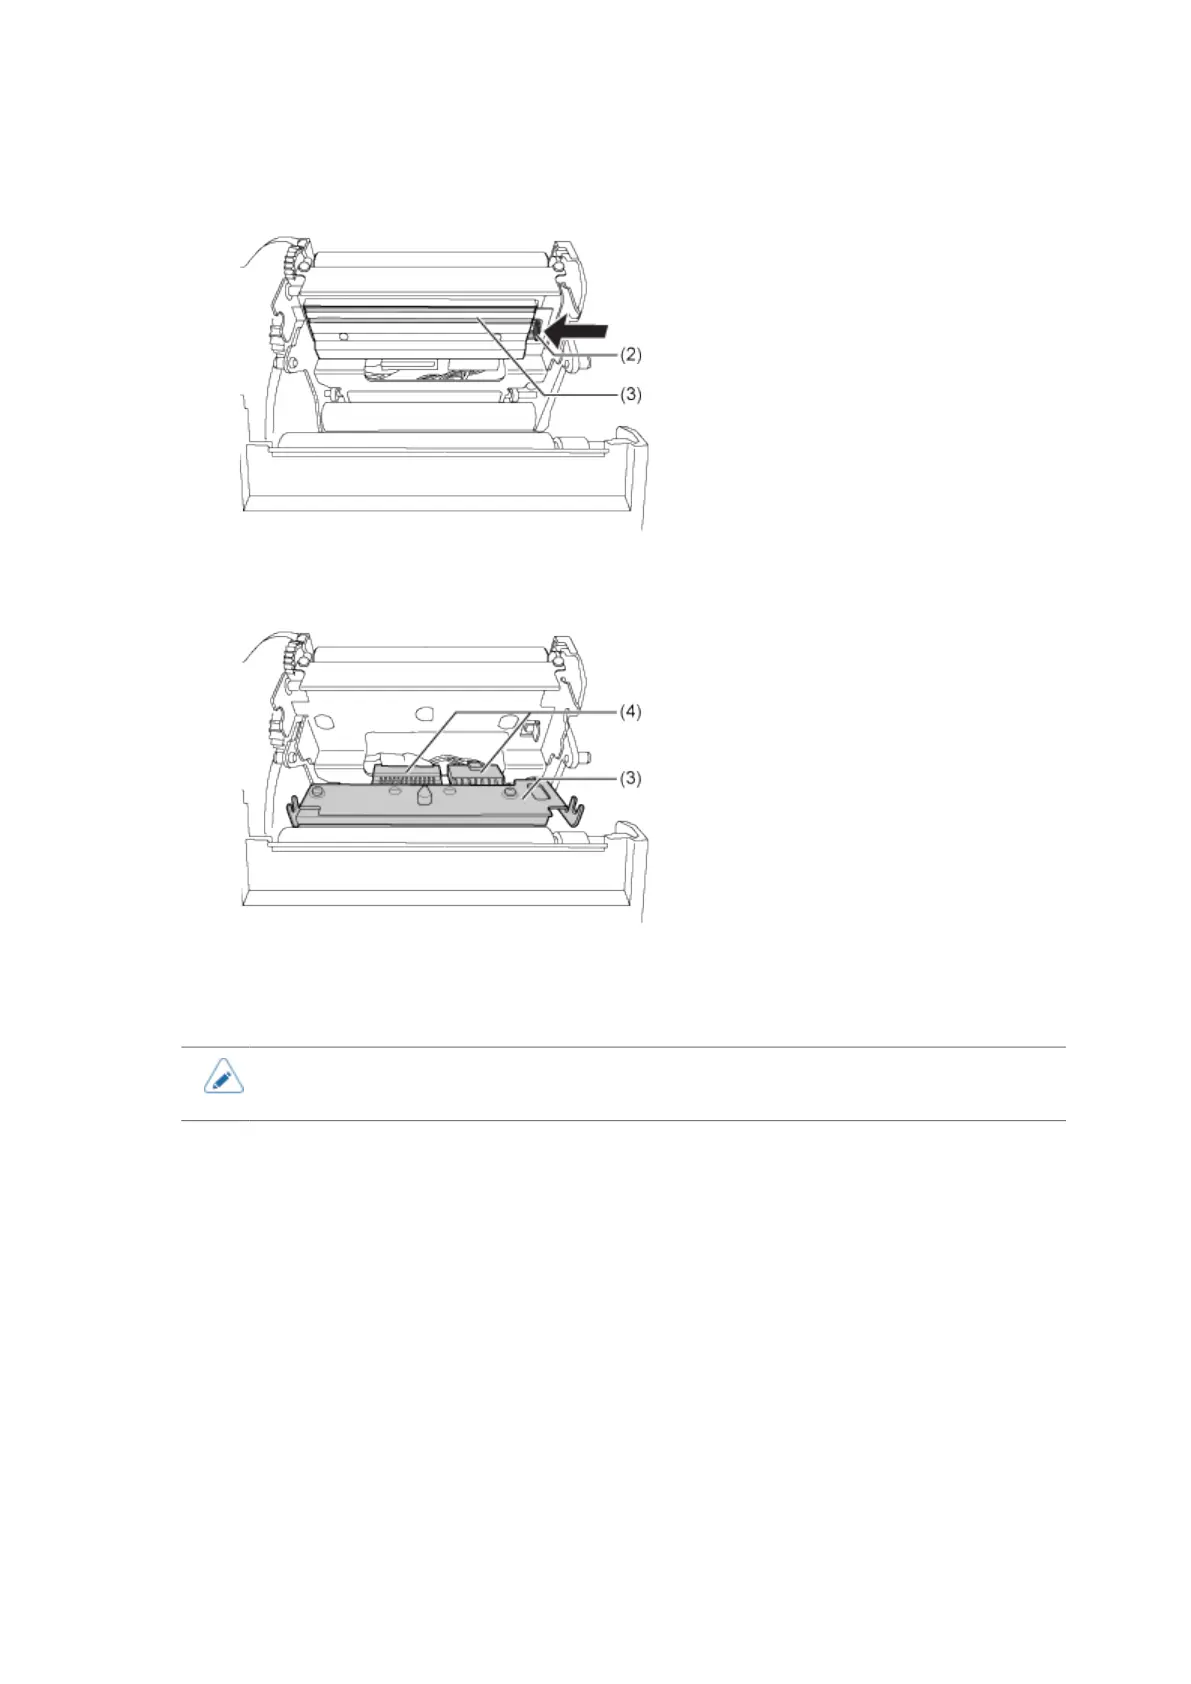
5. Press the lever (2) to remove the print head (3).
6. Disconnect all the connectors (4) from the defective print head (3).
In total, there are two connectors for CL4NX Plus.
7. Connect all the connectors (4) to the new print head.
• Handle the print head with care. Do not contaminate or scratch the sensitive print head
surface.
8. Install the new print head.
Install the print head so that it is locked with a click sound.
9. Load the media and ribbon back if you remove them in step 4.