April 2017
4-176
Xerox® VersaLink® B7025/B7030/B7035 Multifunction Printer
REP 70.12
Launch Issue
Repairs and Adjustments
CAUTION
Take extreme care when removing the metal drive plate. The internal drive gears will be loose.
Do not turn over the drive assembly after the metal drive plate has been removed.
3. Place the drive assembly, metal drive plate face up, on four reams of paper (two stacks of
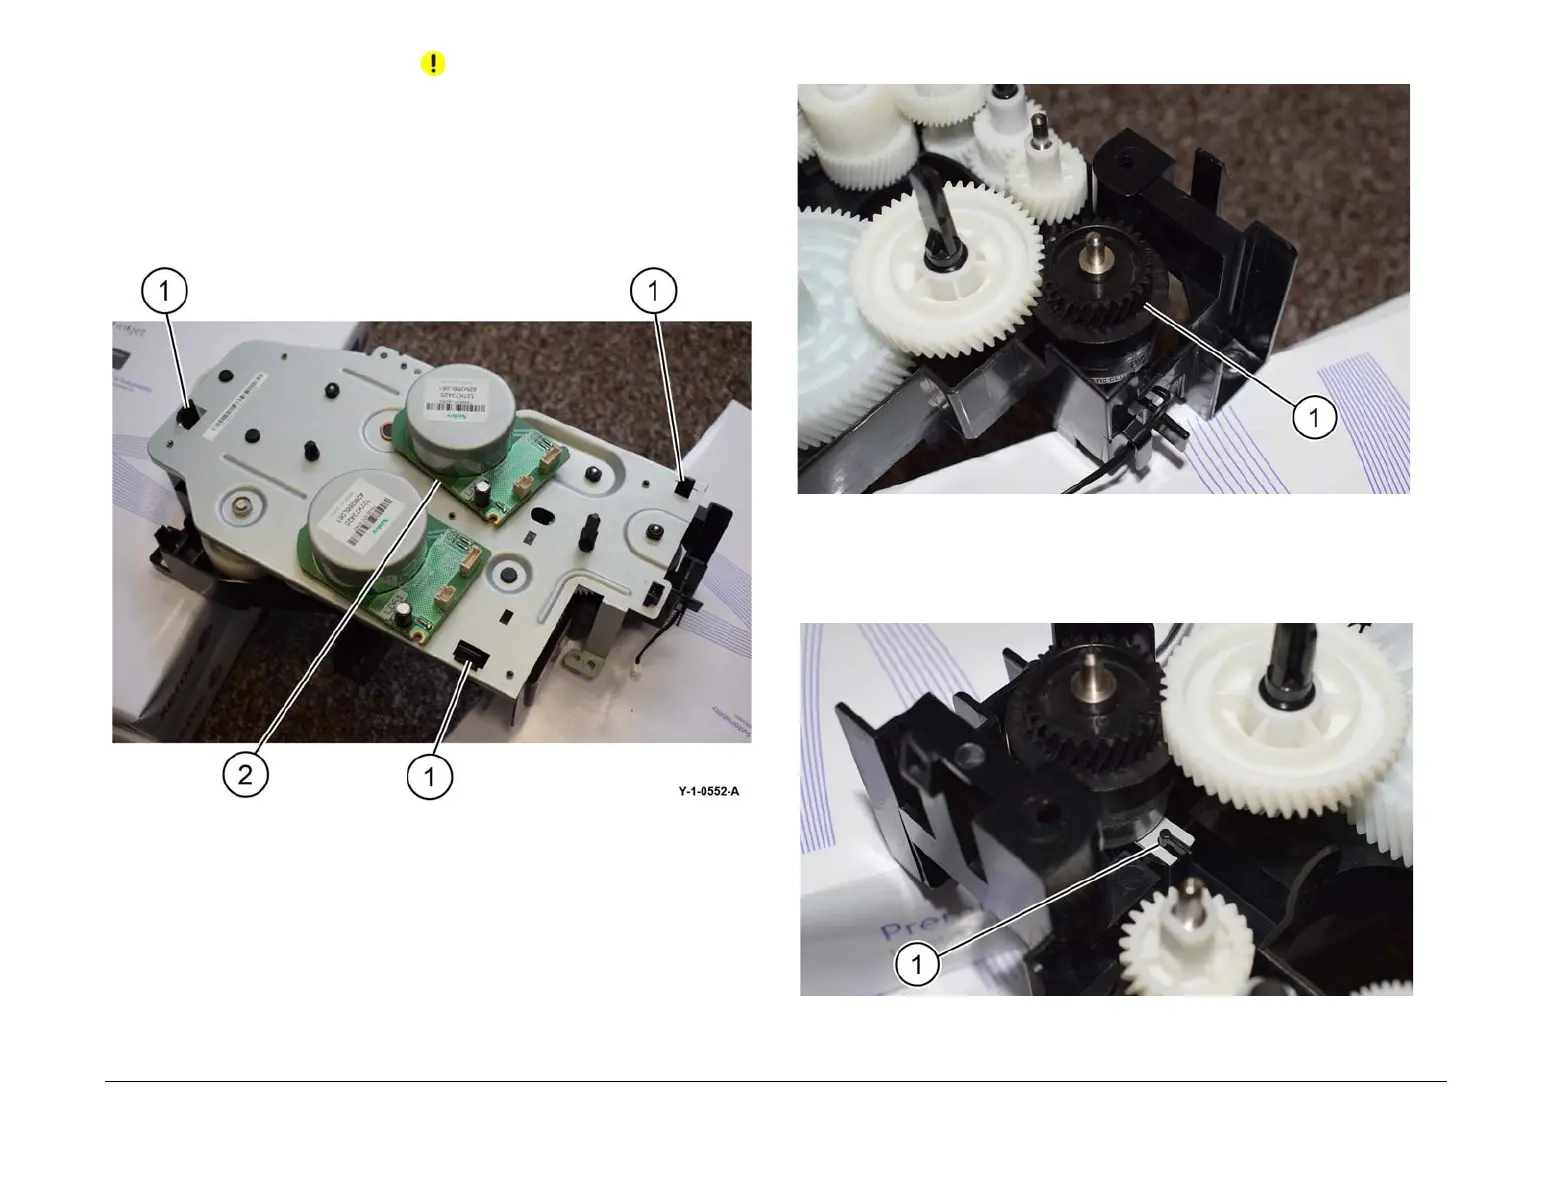
two). Remove the metal drive plate, Figure 2:
a. Release the three clips (1).
b. Very carefully, lift off the metal drive plate (2).
Figure 2 Clips
4. Remove the takeaway clutch (1) or lock bearing, PL 40.10 Item 4 as necessary, Figure 3.
Figure 3 Clutch removal
Replacement
1. The replacement is the reverse of the removal procedure.
2. When installing the new takeaway clutch. Ensure that the two fingered bracket on the
clutch is correctly positioned over the moulded peg (1) on the drive assembly, Figure 4.
Figure 4 Clutch replacement
3. When re-installing the metal drive plate, ensure all the spindles are correctly aligned with
the bearings in the metal drive plate.
 Loading...


