April 2017
2-65
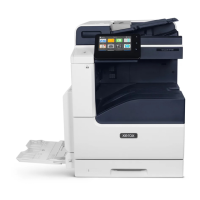
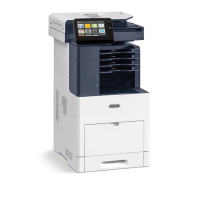
Xerox® VersaLink® B7025/B7030/B7035 Multifunction Printer
012-211A
Status Indicator RAPs
Launch Issue
012-211A Stacker Tray Fail RAP
BSD-ON: BSD 12.8 Integrated Office Finisher Stacker Tray Control
Initial Actions
NOTE: Ensure the correct RAP is performed, refer to the 012-211 Stacker Tray Fail Entry RAP.
WARNING
Ensure that the electricity to the machine is switched off while performing tasks that do
not need electricity. Refer to GP 10. Disconnect the power cord. Electricity can cause
death or injury. Moving parts can cause injury.
• Check the stack height sensor, PL 12.26 Item 9 is correctly installed, not broken, and has
no foreign object.
• Check the stacker stack sensors 1 and 2, PL 12.20 Item 18 are correctly installed and
have no foreign objects and that their actuators are not broken.
• Switch off, then switch on the machine, GP 10.
Procedure
Check the drive mechanism to the stacker tray for a deformed or broken part and not-seated
gears.
The mechanism is good.
YN
Repair the mechanism or install new components as necessary, PL 12.20.
Enter dC330 code 012-267. Use a piece of paper to actuate the stack height sensor. The
display changes.
YN
Check the connections of P/J8708 and P/J8727. The connectors are good.
YN
Secure the connections.
Check for an open or short circuit between P/J8708 and P/J8727. The wiring is good.
YN
Repair the open or short circuit.
Measure the voltage between the finisher PWB P/J8708 pin 3 (+) and ground (-). The
voltage is approximately +5VDC.
YN
Check the +5VDC circuit. Refer to the Wiring Diagrams.
Measure the voltage between the finisher PWB P/J8708 pin 2 (+) and ground (-). Use a
piece of paper to actuate the stack height sensor.
The voltage changes.
YN
Install a new stack height sensor, PL 12.26 Item 9.
Check the wires and connectors for an intermittent open or short circuit. If the fault per-
sists, install a new finisher PWB, PL 12.14 Item 1.
Enter dC330 code 012-278. Actuate the stacker stack sensor 1 by rotating the actuator. The
display changes.
YN
Check the connections of P/J8707 and P/J8722. The connectors are good.
YN
Secure the connections.
Check for an open or short circuit between P/J8707 and P/J8722. The wiring is good.
YN
Repair the open or short circuit.
Measure the voltage between the finisher PWB P/J8707 pin 6 (+) and ground (-). The
voltage is approximately +5VDC.
YN
Check the +5VDC circuit. Refer to the Wiring Diagrams.
Measure the voltage between the finisher PWB P/J8707 pin 5 (+) and (-). Actuate the
stacker stack sensor 1 by rotating the actuator.
The voltage changes.
YN
Install a new stacker stack sensor 1, PL 12.20 Item 18.
Check the wires and connectors for an intermittent open or short circuit. If the fault per-
sists, install a new finisher PWB, PL 12.14 Item 1.
Enter dC330 code 012-279. Actuate the stacker stack sensor 2 by rotating the actuator. The
display changes.
YN
Check the connections of P/J8707 and P/J8721. The connectors are good.
YN
Secure the connections.
Check for an open or short circuit between P/J8707 and P/J8721. The wiring is good.
YN
Repair the open or short circuit.
Measure the voltage between the finisher PWB P/J8707 pin 3 (+) and ground (-). The
voltage is approximately +5VDC.
YN
Check the +5VDC circuit. Refer to the Wiring Diagrams.
Measure the voltage between the finisher PWB P/J8707 pin 2 (+) and ground (-). Actuate
the stacker stack sensor 2 by rotating the actuator.
The voltage changes.
YN
Install a new stacker stack sensor 2, PL 12.20 Item 18.
Check the wires and connectors for an intermittent open or short circuit. If the fault per-
sists, install a new finisher PWB, PL 12.14 Item 1.
Enter dC330 code 012-060 and 012-061 alternately. The stacker motor runs.
YN
Check the connections of P/J8711 and P/J8736. The connectors are good.
A
A
B

 Loading...


