Home
Accutome
Medical Equipment
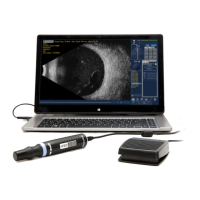
B-Scan Plus
Page 44 (How to Start a New Patient Exam)
Accutome B-Scan Plus - How to Start a New Patient Exam; Figure 5 Main Screen Starting New Exam
268 pages
Manual
Save Page as PDF
To Next Page
To Next Page
To Previous Page
To Previous Page
Loading...
24
Accutome
B-Scan Plus User Guide
How to St
art a New Patient Exam
T
o start a new Patient exam:
1.
On
the Accutome Main Screen, click on "New
Exam". Refer to
Figure
5 below
.
Figure 5
Main Screen Starting New Exam
43
45
Table of Contents
Main Page
Default Chapter
3
Table of Contents
3
Introduction
21
Accutome B-Scan Plus Overview
21
Figure 1 Accutome B-Scan Plus Components
21
Features
22
Adjustable TGC Curves
22
Gamma Settings
22
Gain Adjustment
22
Automatic Image Orientation Labeling
22
Image Playback
22
Measurements
23
Patient Data Storage and Retrieval
23
Reports and Printouts
23
Components
23
About this Manual
24
Safety
27
Safety Information
27
Safety Issues to Consider When Using the Accutome B-Scan Plus
27
Indications for Use
27
Disposal Requirements
28
Disposal of the Product Within the EU
28
Symbol Definitions for the Accutome
28
Safety Precautions
29
Disinfection of the Probe
29
Cleaning of the Probe
31
Electrical Hazard and Safety
31
Avoiding Equipment Damage
32
Avoiding Electromagnetic and Other Interference
33
Getting Started
35
Assembling the Accutome B-Scan
35
What You Need
35
Footswitch
36
Printer
36
Probe
36
Installing the Software
37
Installation - Phase One
37
Installation - Phase Two
39
Installation - Phase Three
39
Probe
41
Figure 2 Accutome B-Scan Plus Probe
41
Footswitch Setup
42
Figure 3 Accutome B-Scan Plus Footswitch
42
Basic Operation
43
Starting Accutome B-Scan Plus Program
43
Figure 4 Accutome B-Scan Plus Desktop Shortcut
43
How to Start a New Patient Exam
44
Figure 5 Main Screen Starting New Exam
44
Entering Patient Exam Information
45
Figure 6 New Exam Info Screen
45
Figure 7 Entering New Patient Information
46
Figure 8 Selecting Facility
47
Figure 9 Selecting Physician
48
Figure 10 Selecting Scan Group and Protocol
49
Figure 11 Starting a New Exam
50
Figure 12 Exam Screen
51
Figure 13 Tools Palette and Current View
52
Operation
52
Figure 14 Probe Tab Active
53
Figure 15 Cine Tab Active
53
Figure 16 TGC Tab Active
54
Figure 17 Gamma Tab Active
54
Scanning
55
How to Print an Exam
55
How to Save Patient Exams
56
Setup
57
Setup - - - - - - - - - - - - - - - - - - - 37
57
Setting up the B-Scan Plus
57
How to Access Setup
57
Figure 18 Selecting Setup
57
Setup Menu Selections
58
Figure 19 Setup Facilities Tab
58
Facilities
59
How to Add New Facilities
59
Figure 20 Selecting "New" Facility
59
Figure 21 New Facility Information Active
60
Deleting Facilities
61
Figure 22 Saving New Facility
61
Duplicate Facilities from Selected
62
Set Selected Facility as Default
62
Save
62
Figure 23 Update Restore Point Dialog
62
Restore
63
Figure 24 Restore Facilities Dialog
63
Users
64
How to Add a New User
64
Figure 25 Users Screen
64
Figure 26 New User Information Active
65
Deleting Users
66
Figure 27 Saving New User
66
Set Selected User as Default
67
Save
67
Restore
67
Figure 28 Update Restore Point Dialog
67
Figure 29 Restore Users Dialog
67
Sequences
68
How to Create Sequences
68
Figure 30 Sequences Screen
68
Figure 31 Adding New Sequence
69
How to Add New Sequences
69
Figure 32 Adding New Sequence
70
Figure 33 Assigning Name to New Sequence
71
Figure 34 New Sequence - New View Active
72
How to Define the Sequence Scan
72
Edit Current View Selections
73
Figure 35 First Scan Editing View
74
Figure 36 Adding a New Sequence Scan
75
How to Add Another Sequence Scan
75
Figure 37 New Sequence Scan (View) Added
76
Figure 38 Change Probe Orientation
77
Figure 39 Change Probe Orientation
78
Figure 40 Saving New Sequence
79
Deleting Sequences
80
Figure 41 Deleting a Sequence
80
Duplicate Sequences from Selected
81
Set Selected Sequence as Default
81
Figure 42 Duplicating Current Sequence
81
Save
82
Restore
82
Figure 43 Update Restore Point Dialog
82
Figure 44 Restore Sequences Dialog
82
Options
83
Figure 45 Options Screen
83
Folders of Exams
84
Figure 46 Selecting Main Exam Folder
84
Main Folder
84
Figure 47 Windows Browser - Locate Exam Folder
85
Figure 48 Selecting Restored Exam Folder
86
Restored Folder
86
Figure 49 Windows Browser - Locate Exam Folder
87
Exam Name Combination
88
Figure 50 Selecting Exam Name Combination
88
Figure 51 Selecting Probe Frequency
89
Frequency
89
Probe Control
89
Depth
90
Figure 52 Selecting Probe Depth
90
Cine Buffer
91
Figure 53 Selecting Probe Cine Buffer
91
Figure 54 Adjusting the Power Level
92
Power
92
Start/Stop
92
Info on Images
93
Info to Show
93
Measurement Data Position
93
System Defaults
93
File and Print
94
Print Format
94
Show Name on Snapshot Filename
94
Image Controls
95
Figure 55 Image Settings before Adjustment
95
Figure 56 TGC Adjustment
96
Tgc
96
Figure 57 Selecting a Preset Gamma
97
Gamma Settings
97
Preset Gamma
97
Brightness
98
Contrast
98
Figure 58 Adjusting Contrast and Brightness
98
Adjusting the Gain
99
Figure 59 Image Settings after Adjustments
99
Gain
99
Figure 60 Selecting Gain Adjustment
100
Figure 61 Adjusting Gain
101
Image Controls System Defaults
101
Figure 62 Restore All to System Defaults
102
Figure 63 Update Restore Point Dialog
102
Reset All to Defaults
102
Save
102
Exiting Setup
103
Figure 64 Restore Options Dialog
103
Figure 65 Exiting Setup (Cancel)
103
Restore
103
Physicians
104
How to Add a New Physician
104
Figure 66 Physicians Screen
104
Figure 67 Physician Name Entered
105
Deleting Physicians
106
Figure 68 Saving New Physician
106
Set Selected Physician as Default
107
Save
107
Restore
107
Figure 69 Update Restore Point Dialog
107
Figure 70 Restore Physicians Dialog
107
Performing Exams
109
Overview
109
Exam Steps
109
How to Start a New Exam
110
No Probe Found
110
Figure 71 Starting a New Exam
110
Figure 72 no Probe Found Message
110
Initial Exam Screen
111
Figure 73 Initial Exam Screen
111
Entering Information on Initial Exam Screen
112
Entering Data
112
Moving between Fields
112
Selecting Items from a Drop down List
112
Patient Info
113
Date of Birth
113
First Name
113
Last Name
113
Medical Record
113
Required Fields
113
Figure 74 Initial Exam Screen with Patient Name
114
Figure 75 Selecting Gender
115
Gender
115
Indication of Scan
115
Probe Info
116
Default Range
116
Frequency
116
Gain
116
Serial Number
116
Sweep Angle
116
Exam Info
117
Exam ID
117
Facility
117
Figure 76 Selecting Facility
117
Figure 77 Selecting Physician
118
Physician
118
Figure 78 Selecting Operator
119
Operator
119
Create Date/Time
120
Exam Setup
120
Figure 79 Selecting Scan Group
120
Scan Group
120
Description
121
Figure 80 Selecting Scan Protocol
121
Protocol
121
Figure 81 Starting New Exam
122
Exam Screen Features
123
Figure 82 Exam Screen Layout
123
All Views
124
Current View
124
Exam Information Displayed above Image
124
Probe and Scan Controls
125
Probe Settings
125
Scan/Stop and Save Cine
125
Tools Palette
125
Adjusting the Power
126
Figure 83 Probe and Scan Controls Tab Selected
126
Figure 84 TGC Adjustments Tab Selected
127
TGC Adjustments
127
Figure 85 Gamma Adjustments Tab Selected
128
Gamma Adjustments
128
Cine Adjustments/Playback
129
Figure 86 Cine Adjustments/Play Tab Selected
129
Add View
130
Edit Current View
130
Axial
130
Probe Orientation
130
Longitudinal
131
Transverse
131
Edit Exam Info
131
Figure 87 Edit Exam Information Window
131
Analyze
132
Main Menu
132
Exit
132
Menu Buttons
132
New Exam
132
Probe Usage in Scanning
133
How the B-Scan Probe Works
133
Probe Operation
134
Figure 88 B-Scan Example
134
Figure 89 Eye and Probe Marker Alignment
135
Marker Alignment
135
Probe Positions
136
Axial Probe Positions
136
Longitudinal Probe Positions
137
Transverse Probe Positions
137
How to Scan
138
Using the Probe Trigger Button
138
Using the Footswitch
138
Scanning with a Predefined Protocol
139
Figure 90 New Exam with Selected Protocol - First Scan Complete
139
Scanning Without a Protocol
140
Figure 91 New Exam no Protocol - First Scan Selected
140
Figure 92 New Exam First Scan Complete
141
Proceed with the Next Scan
142
Figure 93 New Exam Second Scan Complete
142
Adding a View
143
Figure 94 Adding a View
143
Adjusting the Gain
144
Figure 95 Adjusting Gain
144
Changing the Scan View
145
Figure 96 Changing a View - Probe Position
145
Figure 97 Changing a View - Slice Position
146
Figure 98 Changing a View - Global Orbit
147
Figure 99 Changing a View - Done
148
Macula Scans
149
Horizontal Macula
149
Longitudinal Macula
149
Labeling Macula Scans
149
Figure 100 Labeling an LMAC Scan
150
Figure 101 LMAC Scan Labeled
151
A-Vector
152
Figure 102 Selecting "Show A-Vector
152
Figure 103 A-Vector Displayed
153
Completing Patient Exam
154
Main Menu
154
New Exam
154
Exit
154
Analyze
154
Patient Image Analysis
155
Overview
155
Selecting Images for Analysis
155
How to Select an Existing Exam
155
Figure 104 Starting Existing Exam
155
Figure 105 Analyze Screen
156
Analyze Screen
157
Analyze Screen Features
157
Figure 106 Analyze Screen Layout
157
Exam Information Displayed above Image
158
Current View
158
Current View Orbital Locators
158
Editing Current View Info
159
Views to Review
159
Play Controls
159
Zoom Controls
159
TGC Adjustments
159
Gamma Adjustments
159
Edit Exam Info
160
Menu Buttons
160
Main Menu
160
Rescan
160
Exit
160
Selecting an Existing Exam
161
Figure 107 Selecting a Patient Exam
161
Figure 108 Existing Exam Displayed
162
How to Edit Exam Info
163
Drop down Lists
163
Text Fields
163
Figure 109 Edit Exam Information Window
164
Figure 110 Restore Changes Information Dialog
164
Restore
164
Cancel
165
Done
165
Figure 111 Exit Edit Exam Information Dialog
165
Exams
166
Figure 112 Exams Tab
166
Playing an Exam
167
Figure 113 Starting Scan Play
167
Figure 114 Scan Stopped and Returned to Beginning
168
Stopping an Exam
168
Figure 115 Pausing the Scan Film Loop
169
Pause
169
Figure 116 Playing the Scan Film Loop Forward
170
Forward
170
Backward
171
Figure 117 Playing the Scan Film Backward
171
TGC Adjustment
172
How to Adjust the TGC
172
Figure 118 TGC Adjustments Displayed
173
Image Enhancement Gammas
174
Linear
175
Figure 119 Linear Full Range Gamma Setting
175
S-Curve
176
Figure 120 S-Curve Full Range Gamma Setting
176
Log
177
Figure 121 Log Full Range Gamma Setting
177
Color
178
Figure 122 Color Gamma Setting
178
Changing Gamma Settings
179
Figure 123 Selecting a New Gamma Setting
179
How to Use Zoom
180
Figure 124 Zoom Selected
180
Reset Zoom
181
Figure 125 Zoom Changed
181
How to Move Image
182
Figure 126 Image Move Icon
182
Figure 127 Line 1 Measurement Selected
183
Measurement Types
183
Taking Distance Measurements
183
Figure 128 Line 1 Measurement Displayed
184
Figure 129 Area 1 Measurement Selected
185
Taking Area Measurements
185
Delete Current
186
Figure 130 Area 1 Measurement Displayed
186
A-Vector
187
Figure 131 Selecting "Show A-Vector
187
Figure 132 A-Vector Displayed
188
Comments on Image
189
Figure 133 Selecting "Comments on Image
189
Figure 134 Entering Comments
190
Figure 135 Comments Appearing on Image
191
Printing Images and Reports
193
Overview
193
Printing Images
193
How to Print an Image
194
Selecting Patient Exam
194
Selecting a Frame
194
Adjusting Images
195
Executing Print
195
Figure 136 Printing a Frame
196
Creating Reports
197
Selecting Patient Exam
197
Capturing Snapshots
198
Reports Tool
199
Figure 137 Selecting Reports Tool
199
Figure 138 Selecting Snapshot List
200
Snapshot List
200
Deleting Snapshots
201
Figure 139 Deleting a Selected Snapshot from List
201
Executing Manage Reports
202
Figure 140 Confirming Snapshot Deletion
202
Figure 141 Executing Manage Reports
202
Create a New Report
203
Figure 142 Creating a New Report
203
Report Form
204
Figure 143 Report Form
204
Selecting Snapshots
205
Figure 144 Selecting Snapshots
205
Alternate Method for Selecting & Inserting Snapshots
206
Figure 145 Inserting Selected Snapshots
206
Inserting Selected Snapshots
206
Print or Save Report
207
Figure 146 Saving a Patient Report
207
Figure 147 Selecting File Type
208
Figure 148 Saving Report
208
Archive and Restore
211
Overview
211
Figure 149 Selecting Archive
211
Archive Screen
212
Figure 150 Archive Screen
212
Archive to CD or DVD
213
Selecting Patient Exams
213
Figure 151 Selecting the First Exam
213
Selecting Individual Exams
213
Figure 152 Selecting the Second Exam
214
Figure 153 Select All
215
Select All
215
Clear All
216
Figure 154 All Exams Displayed - Clear All
216
Burn Disc
217
Figure 155 Burning the Disc
217
Figure 156 Disc Burning Progress
218
Archive to a Local/Net Hard Disk
219
Selecting Patient Exams
219
Selecting the Backup Tool
219
Figure 157 Selecting the Local/Net Hard Disk Tools
219
Selecting the Destination Folder
220
Figure 158 Launching Select Destination Folder
220
Figure 159 Windows Browser - Locating Destination Folder
221
Figure 160 Destination Folder Displayed
221
Locating Destination Folder
221
Figure 161 Execute Backup Exams
222
Figure 162 Backup Activity
223
Additional Archive Features
224
Delete Selected Exams
224
Figure 163 Delete Selected Exams
224
Disc Tool Features
225
Abort Proc
225
Erase Disc
225
Figure 164 Deleting Exam Warning
225
Save Reports Only
225
Disc Info
226
Figure 165 "Disc Info
226
Check to Fit the Media
227
Eject Disc
227
Figure 166 Verify Burn Results
227
Verify Burn
227
Load Disc
228
Local/Net Hard Disk
228
Abort Backup
228
Check Name Conflict
228
Checking System Free Space
228
If Name Conflict Found
228
Space Required
228
Verify
229
Restore Screen
229
Figure 167 Selecting the Restore Screen
229
Figure 168 Restore Screen
230
Restore from DVD or
231
Selecting Patient Exams
231
Figure 169 Selecting the First Exam
232
Selecting Individual Exams
232
Figure 170 First Exam Selected
233
Figure 171 Selecting the Second Exam
234
Figure 172 Select All Exams to be Restored
235
Select All
235
Clear All
236
Figure 173 Selected Exams to be Restored - Clear All
236
Figure 174 Restoring the Exam from the CD
237
Restore
237
Figure 175 Exam Restoring Progress
238
Restore Local/Network Hard Disk
239
Selecting the Local/Network HD Tool
239
Figure 176 Selecting the Local/Net Hard Disk Restore Tools
239
Figure 177 Local/Network HD Restore Tools Active
240
Selecting the Folder for Restoring Exams
241
Figure 178 Launching Select Folder (for Restoration)
241
Figure 179 Windows Browser
242
Figure 180 Locating Source Folder
242
Selecting Patient Exams
243
Figure 181 Source Folder Displayed
243
Executing Restore
244
Figure 182 Execute Restore Exams on Local/Network HD
244
Figure 183 Restore Activity
245
Additional Restore Features
246
Exams on Backup Features
246
Select All
246
Clear All
246
Figure 184 Exams on Backup Tab Active
246
Check Conflict
247
Figure 185 Overwrite Warning
247
Overwrite Old Exams
247
Total Space Needed
247
Exams on Destination
248
Select All
248
Clear All
248
Figure 186 Exams on Destination - Restored Exams Folder
248
Remove Selected Exams
249
Figure 187 Remove Selected Exams
249
Exams on System
250
DVD/CD Features
251
Free Space on the System
251
Select Folder
251
Abort
252
Eject
252
Information of Media
252
Load
252
Available Exams
253
Local/Net Hard Disk
253
Abort
253
List Exams in the Folder
253
Select Folder
253
Main Menu and Exit
253
Maintenance
255
General Maintenance
255
Specifications
257
Overview
257
Physical Specifications
257
Environmental Specifications
259
Computer Specifications
260
Operating Modes
261
Storage/Range Specifications
262
Acoustic Output
263
Warranty & Repairs
265
Warranty
265
Product Returns
266
Service and Repair
266
All Other Returns
266
Non-Returnable Merchandise
266
Replacement Parts
267
Documentation
267
Related product manuals
Accutome a-scan plus
292 pages
Accutome ACCUPEN
41 pages
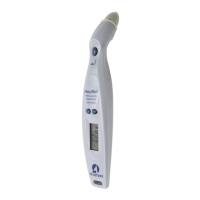
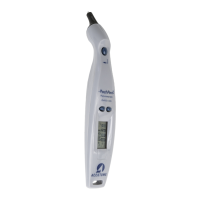
Accutome PachPen
27 pages
Accutome A-Scan Plus Connect
210 pages