19
Getting Started Installing the Software
Installation - Phase Two
Follow the steps below to install the Accutome B-Scan
Plus software.
1. Insert
the installation disk into the CDROM drive.
The installation process will automatically start and
a window with Preparing to Install ... will open.
If the installation does not automatically begin,
ope
n the My Computer window by clicking on
Start located on the bottom left corner of the
screen. Double click on the B-Scan Install icon
and double click on Setup. It will take several sec-
onds to unpack the installation programs.
Advan
ce through the windows by clicking Next.
2. Wh
en the window titled Welcome to the
InstallShield Wizard for Accutome B-Scan
appears, click on Next. Click on I Accept the
Terms in the License Agreement when the
License Agreement window appears. Click on
Next and then Install. Click Finish once
installation is complete.
3. Dou
ble click on the icon Launch DXSETUP.exe
on the computer desktop screen to install
Microsoft DirectX 9.0. Click on I Accept
Agreement, then Next and then Next again to
start installation of Microsoft DirectX 9.0. Click
Finish to complete software installation.
Installation - Phase Three
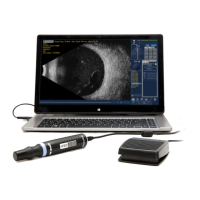
Follow the steps below to set up the Accutome B-Scan
Plus probe and USB port(s).
1. Insert the Accutome B-Sca
n Plus probe into any
USB port. Select the port that is most convenient
for you to use while taking image scans.
The Fo
und New Hardware Wizard window will
appear on the desktop. Select No, not this time
and click Next.