ADOBE AFTER EFFECTS 7.0
User Guide
429
Optics Compensation effect (Pro only)
Use the Optics Compensation effect to add or remove camera lens distortion. Elements composited with
mismatched lens distortion cause anomalies in the animation. For example, tracked objects in a distorted scene don’t
match the scene area because linear objects don’t follow the distortion of the scene.
This effect works with 8-bpc and 16-bpc color.
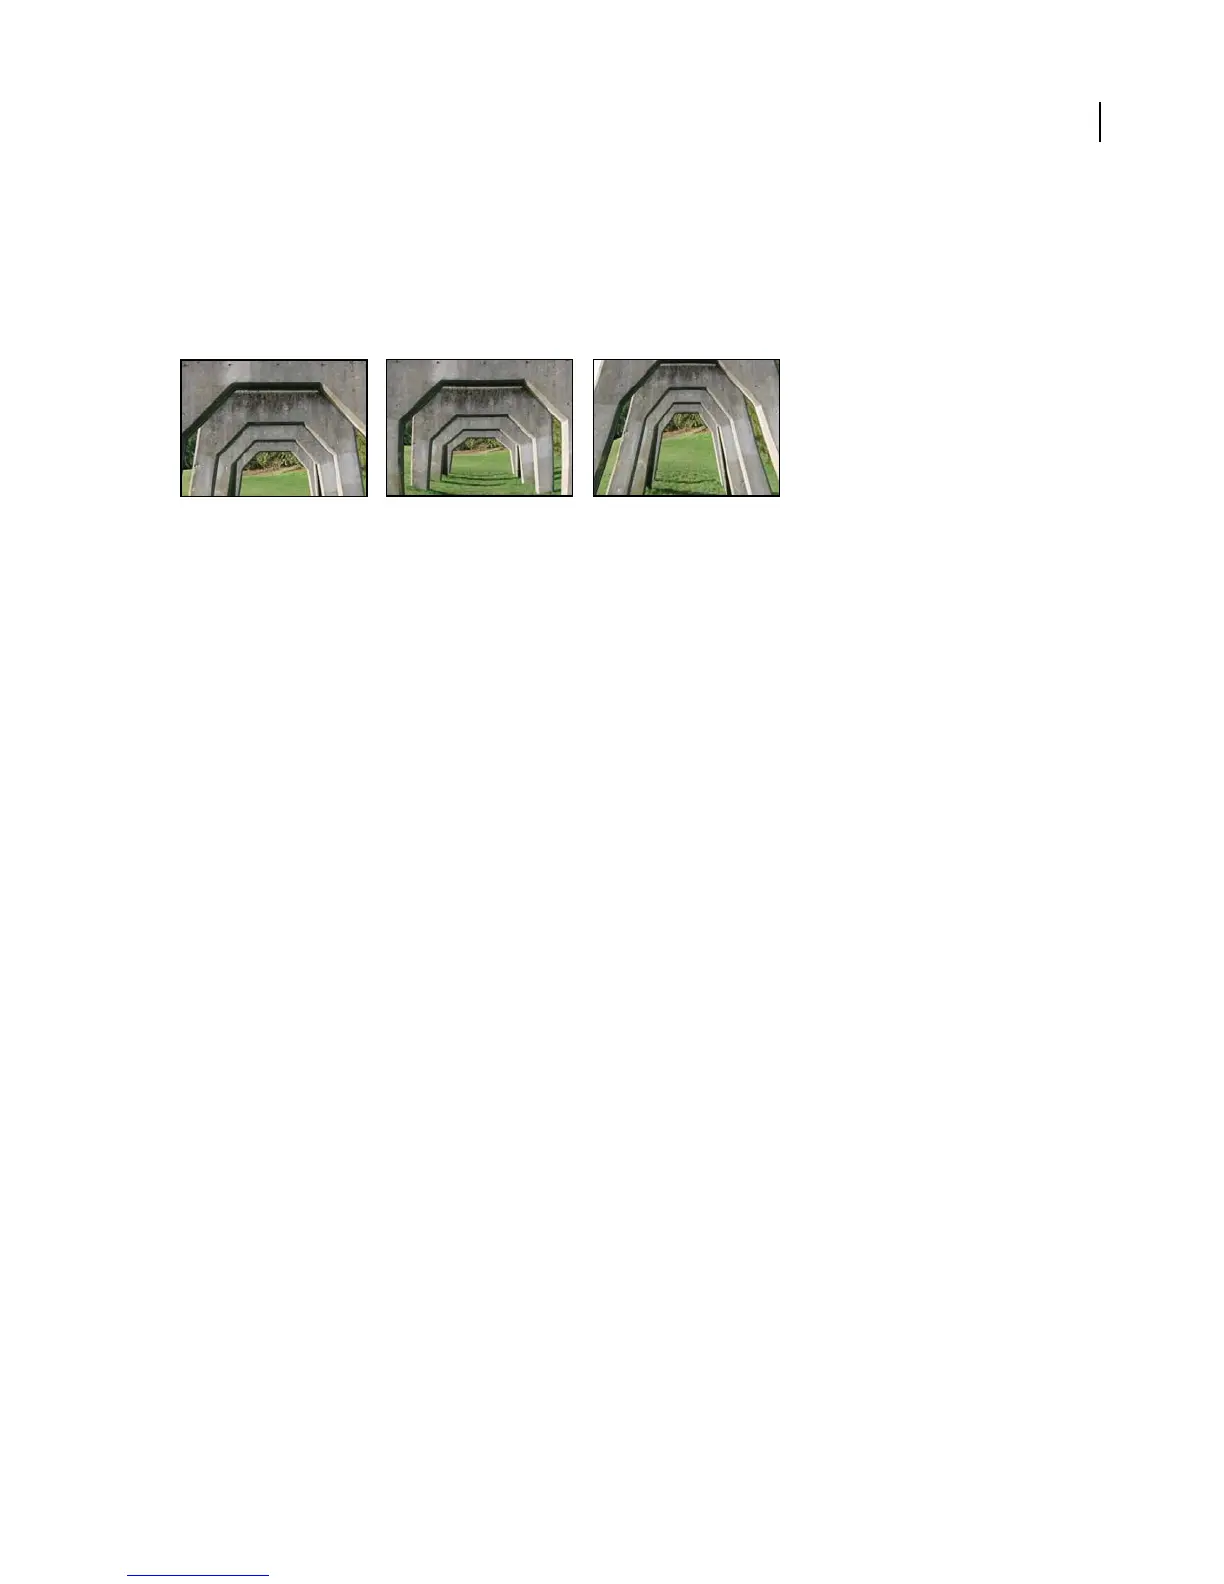
Original (left) and with variations of Optics Compensation applied (center and right)
Adjust the following controls for the Optics Compensation effect:
Field Of View (FOV) Specifies the field of view (FOV) of the distorted footage. The FOV is relative to the size of the
source layer and the selected FOV Orientation. The distortion amount is relative to FOV. There is no general rule as
to what FOV value applies to different lenses. Zooming in reduces the FOV, and zooming out increases it. Conse-
quently, if footage includes different zoom values, you’ll need to animate the FOV value.
Reverse Lens Distortion Reverses the lens distortion. For example, to remove wide-angle lens distortion, set Field Of
View to 40.0 and select Reverse Lens Distortion. Selecting Reverse Lens Distortion enables the Resize control.
FOV Orientation Specifies the axis on which the Field Of View value is based. This is useful when matching
computer-generated elements to the rendered view angle.
View Center Specifies an alternate center point of view. This is useful when using custom lenses that are not centered.
However, in most cases, this control should be left untouched.
Optimal Pixels Maintains as much pixel information as possible through the distortion. When selected, FOV values
are no longer reversible.
Resize Resizes the layer when the applied distortion stretches the layer beyond its boundaries. To use this control,
firstselectReverseLensDistortion,andthenchooseanoption.Offdoesnotresizethelayer.Max2Xresizesthelayer
to a maximum of twice the original width and height. Max 4X resizes the layer to a maximum of four times the
original width and height. Unlimited resizes as far as the layer is stretched. This option may require a large amount
of memory.
To add and match lens distortion with Optics Compensation (Pro only)
To match FOV values, layers must be the same size. However, if you select Resize, you can apply Optics Compen-
sation again and reverse the distortion using the same value (reversed). You can then apply another effect between
the two instances of Optics Compensation.
If you resize a layer using Optics Compensation and then precompose it into a larger composition, you cannot
reverse the distortion using the same value until you enlarge the precomposed layer to accommodate the expanded
layer.
1 Select the footage layer with the distortion, and choose Effect > Distort > Optics Compensation.
2 In the Effect Controls panel, adjust the FOV until a distorted edge or line appears straight. Note the FOV value.
3 Select the computer graphic layer you want to distort, and apply Optics Compensation to it using the FOV value
from step 2.