ADOBE AFTER EFFECTS 7.0
User Guide
358
4 Select Show Box if you want to outline the preview region in color. If you want to change the outline color, do one
of the following adjacent to Box Color:
• Click the color swatch to choose a color in the Color Picker dialog box.
• Click the eyedropper button, and click a color anywhere on your computer screen.
5 Use any of the following techniques to view your results:
• To view the fine detail of the noise structure, zoom into the preview region.
• To examine the noise in each channel independently, click the corresponding color channel icon in the Compo-
sition panel.
• To increase the effect’s interaction speed and RAM preview duration, use the Region Of Interest feature in the
Composition panel to reduce the area that is processed. (See “Changing the region of interest” on page 118.)
• To retain an image of the current frame in its current state, click Take Snapshot in the Composition panel. You
can subsequently click and hold down Show Last Snapshot to view the most recent snapshot instead of the
active composition, and toggle between the current and previous state of the preview region. This is extremely
useful when evaluating subtle adjustments. (See “To take or view a snapshot” on page 145.)
• To compare the preview region with and without the grain effect, click the Effect switch (small f icon) next to the
grain effect’s name in the Effect Controls panel to temporarily disable the effect. Click Take Snapshot in the
Composition panel, click the Effect switch again to re-enable the effect, and then click and hold down Show Last
Snapshot to display the snapshot of the image without the effect.
To remove noise or grain from an image
To remove grain or visual noise, use the Remove Grain effect. This effect uses sophisticated signal processing and
statistical estimation techniques in an attempt to restore the image to how it would look without the grain or noise.
While many techniques, such as applying a mild Gaussian Blur effect or the Median effect, reduce the visibility of
noise in an image, the trade-off is an unavoidable loss of sharpness and highlights. The Remove Grain effect, in
contrast, differentiates fine image detail from grain and noise and preserves the image detail as much as possible.
The Remove Grain effect provides several options to precisely balance the reduction in noise and the amount of
sharpness retained in the image. Additionally, the Remove Grain effect can analyze the differences between frames
to further improve noise reduction and sharpness; since this process operates over time, it is called temporal filtering.
Note: Good degraining depends on good noise sampling. The results of the automatic sampling depend on the image
content and noise type. You can also change the number, size, and position of the samples to get the best results for a
particular image.
To increase the speed of the Remove Grain effect preview, adjust the Remove Grain controls in order in the Effect
Controls panel. Specifically, the most efficient workflow is to find effective degraining settings first and to adjust the
last three controls last.
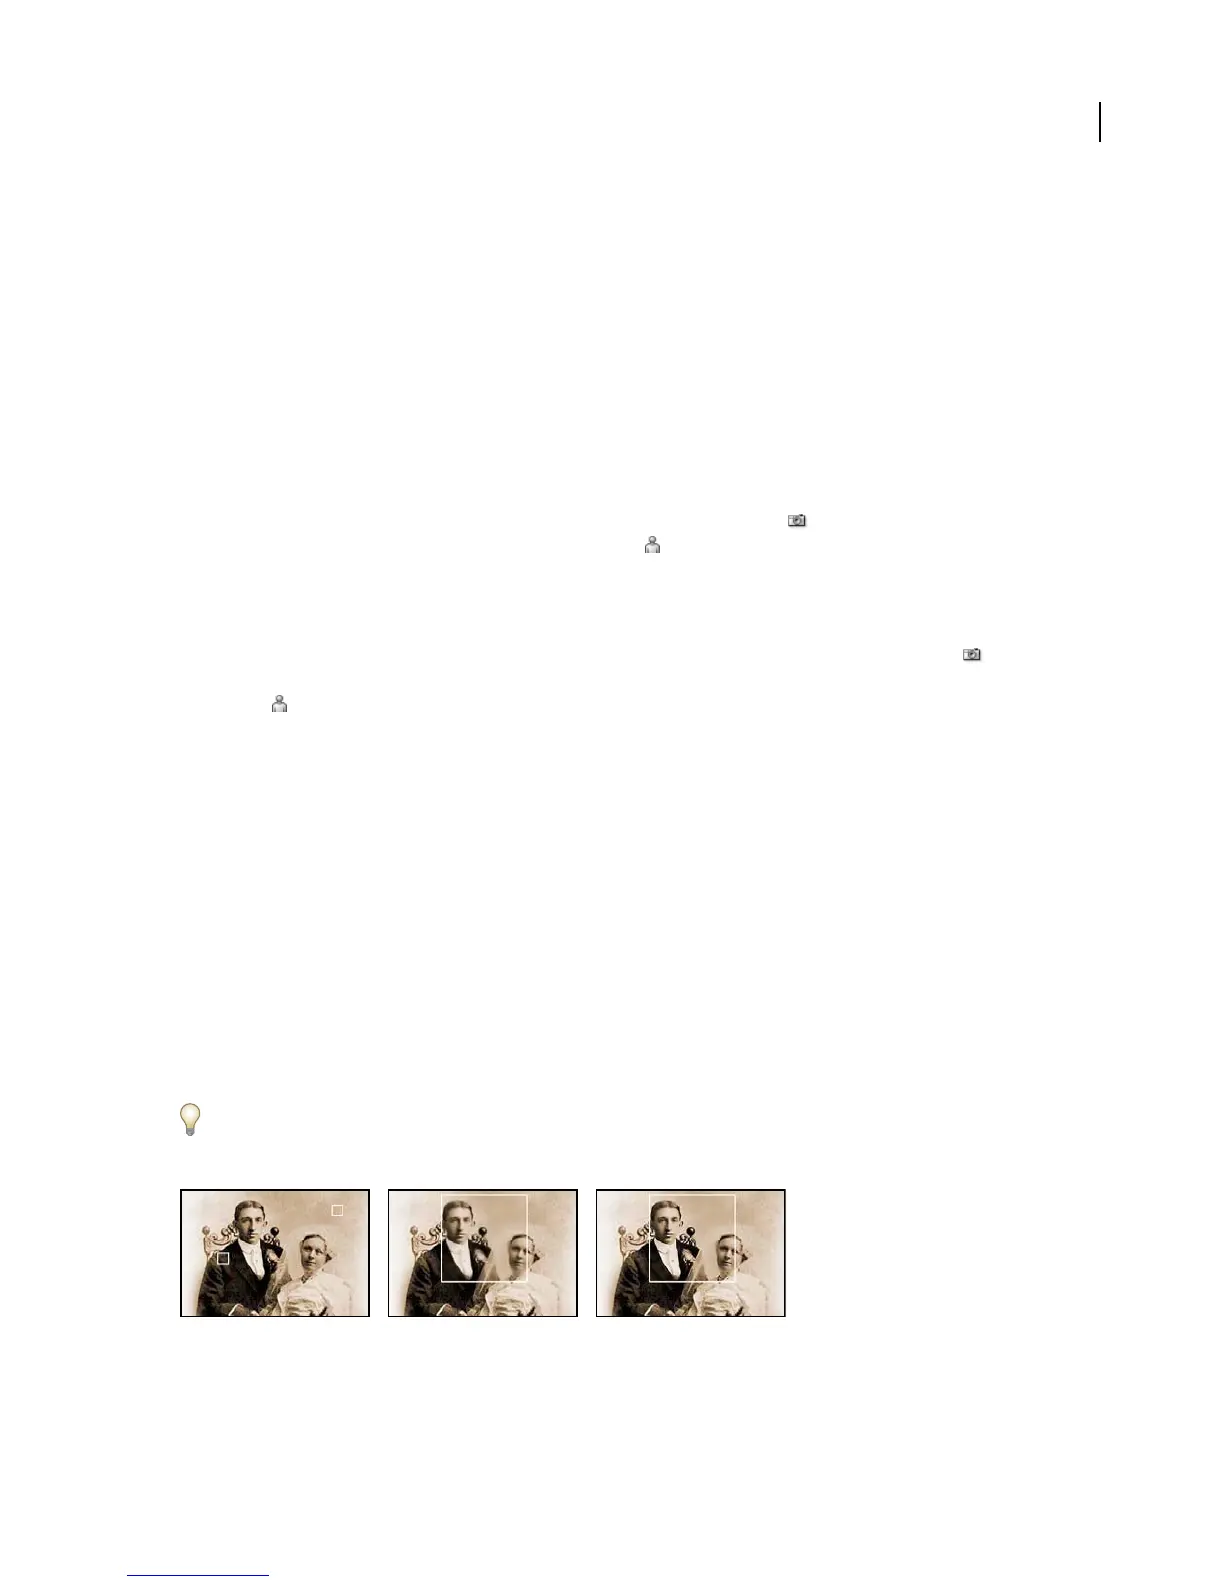
Old photo with two sample points (left), applying Remove Grain effect (center), and using Unsharp Mask controls (right)
1 Select the layer you want to affect.