ADOBE AFTER EFFECTS 7.0
User Guide
82
Tint Fine-tunes the white balance to compensate for a green or magenta tint. Move the slider to the left (negative
values) to add green to the photo; move it to the right (positive values) to add magenta.
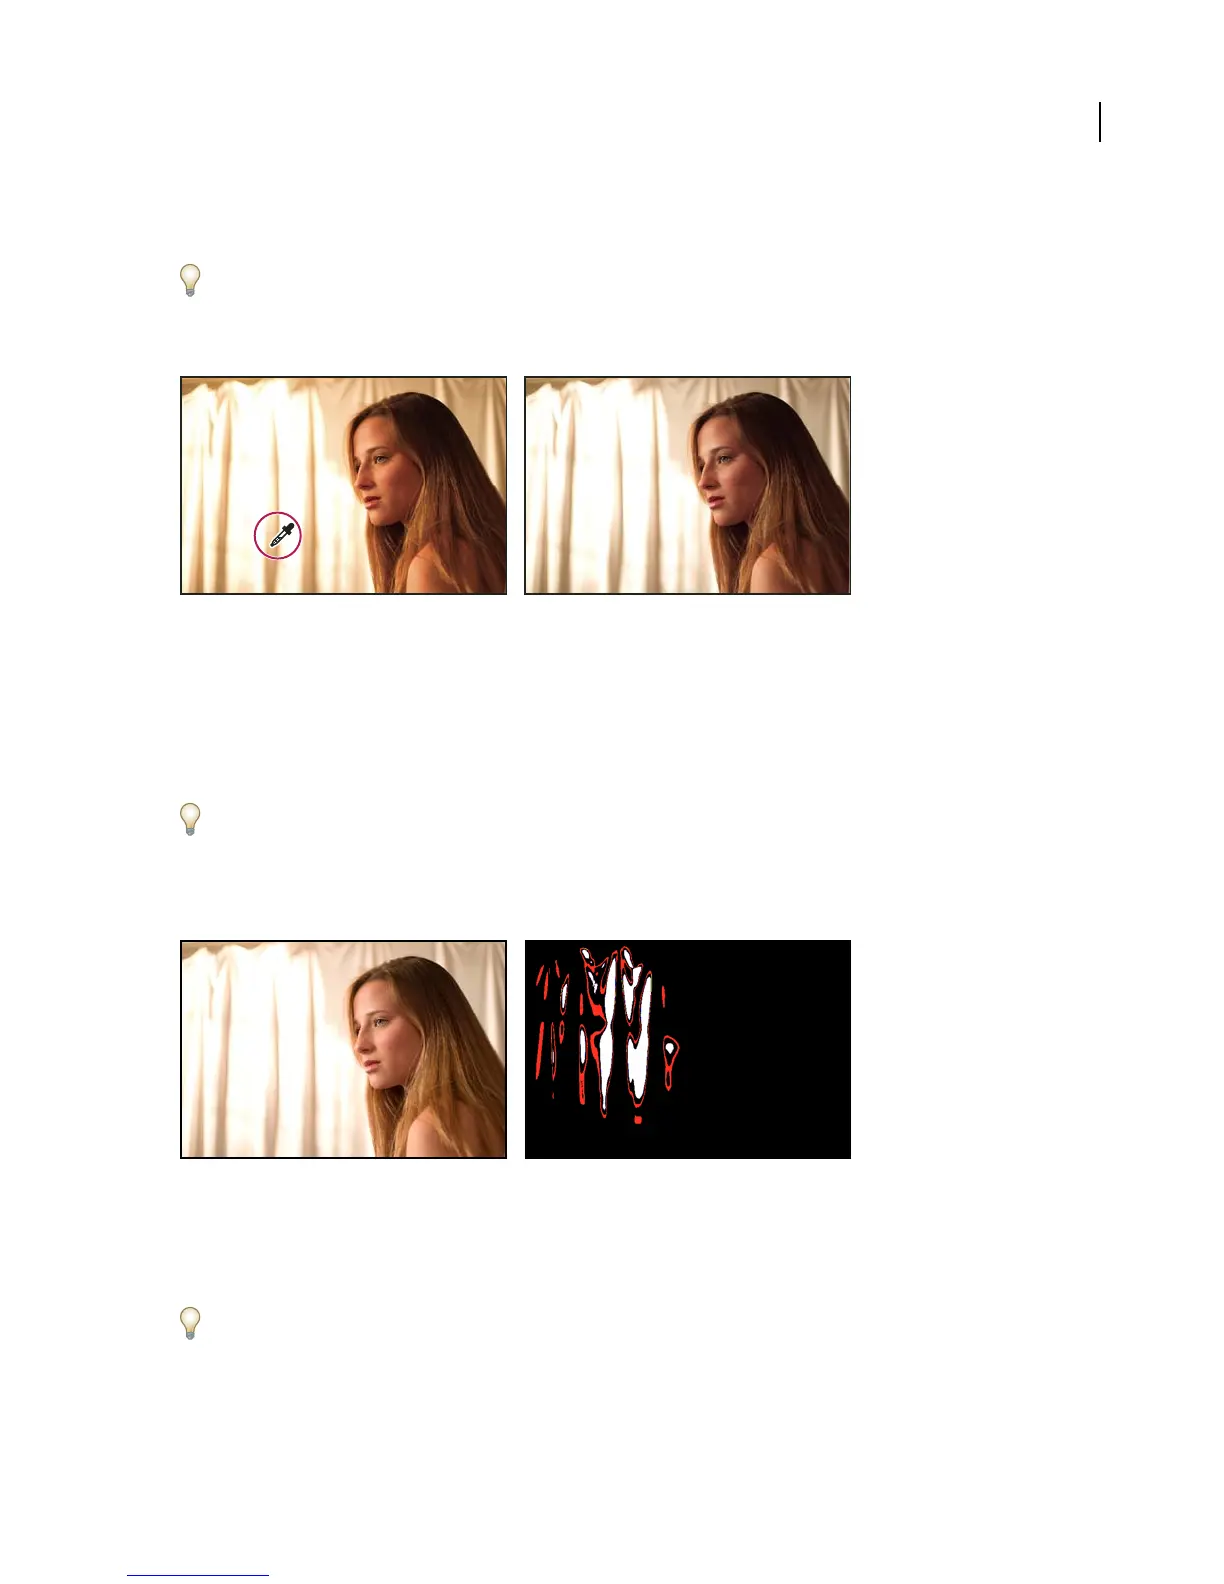
To adjust the white balance quickly, select the White Balance tool, and then click an area in the preview image that
should be a neutral gray or white. The Temperature and Tint sliders automatically adjust to make the selected color
exactly neutral (if possible). If you’re clicking whites, choose a highlight area that contains significant white detail rather
than a specular highlight.
Clicking a neutral white area with the White Balance tool (left) and resulting correction (right)
Tonal adjustment controls for camera raw files
Exposure Adjusts the brightness or darkness of the image. Move the slider to the left to darken the image; move it
to the right to brighten the image. The values are in increments equivalent to f-stops. An adjustment of +1.50 is
similar to widening the aperture one and one-half stops. Similarly, an adjustment of –1.50 is similar to reducing the
aperture one and one-half stops.
Hold down Alt (Windows) or Option (Mac OS) while moving the Exposure slider to preview where the highlights are
clipped. (Clipping is the shifting of pixel values to either the highest highlight value or the lowest shadow value.
Clipped areas are either completely white or completely black and have no image detail.) Move the slider until the
highlights (not specular highlights) are completely clipped, and then reverse the adjustment slightly. Black indicates
unclipped areas, and color indicates areas clipped in only one or two channels.
Hold down Alt (Windows) or Option (Mac OS) while moving the Exposure slider to show clipped highlights.
Shadows Specifies which input levels are mapped to black in the final image. Moving the slider to the right increases
the areas that are mapped to black. This sometimes creates the impression of increased contrast in the image. Using
the Shadows slider is similar to using the black point slider for input levels in the Auto Levels effect.
Hold down Alt (Windows) or Option (Mac OS) while moving the Shadows slider to preview where the shadows are
clipped. Move the slider until the shadows begin to get clipped, and then reverse the adjustment slightly. Color
indicates areas that are being clipped in one or two channels, and white indicates unclipped areas.