ADOBE AFTER EFFECTS 7.0
User Guide
280
Alpha Inverted Matte Opaque when alpha channel pixel value is 0%.
Luma Matte Opaque when a pixel’s luminance value is 100%.
Luma Inverted Matte Opaque when a pixel’s luminance value is 0%.
AfterEffectsconvertsthenextlayeraboveintoatrackmatte,turnsoffthevideoofthetrackmattelayer,andaddsa
track matte icon next to the track matte layer’s name in the Timeline panel. The Composition panel displays the
fill layer viewed through the alpha channel of the matte layer.
Note: Although the video is turned off for the matte layer, you can still select the layer to reposition, scale, or rotate it.
Select the layer in the Timeline panel, and then drag the center (indicated by a circle with an X) of the layer in the
Composition panel.
See also
“About alpha channels and mattes” on page 242
To preserve underlying transparency during compositing
The Preserve Underlying Transparency option causes the opaque areas of a layer to appear only when positioned
over opaque areas in underlying layers. With this option, you can make a layer visible only when it is positioned over
the layer below it. It’s useful for creating effects such as glints or light reflecting off a polished surface.
❖ Select the T option in the Modes column for the appropriate layer.
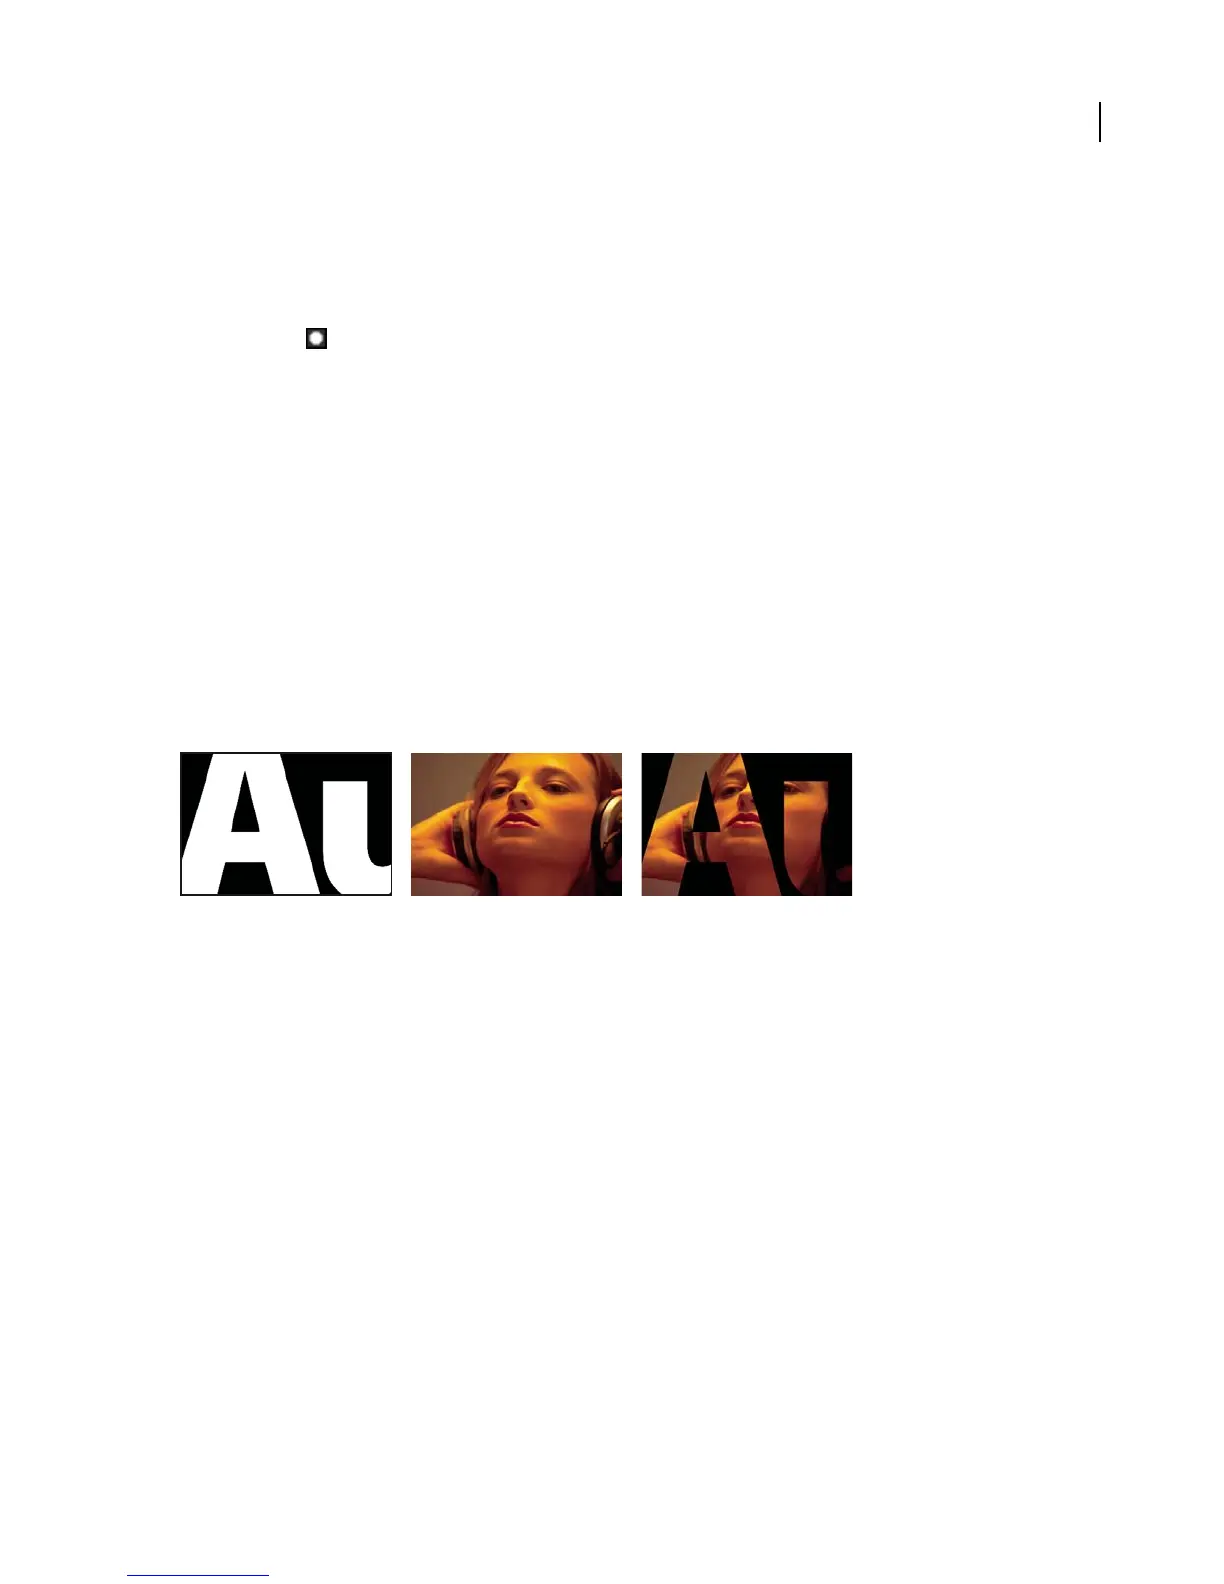
Example of using Preserve Underlying Transparency.
A. Underlying layer: White signifies opaque areas. B. Upper layer, with Preserve Underlying Transparency turned on. C. The composite.
To create a garbage matte
A garbage matte is merely a portion of a bluescreen scene that contains only the subject that you need. The remainder
of the scene, which may contain undesired objects, is not important and is masked out. The keyed subject can be
placed in another scene for still sequences or simple effects.
1 Create a mask to roughly outline a subject in bluescreen footage.
2 Apply one or more keying effects to mask out the remainder of the bluescreen scene.
3 Apply Matte effects as necessary to fine-tune the matte.
See also
“Creating masks” on page 244
“About keying” on page 270
“Matte Choker effect (Pro only)” on page 466
“Simple Choker effect (Pro only)” on page 467
A BC