l
Toggle between the 3D and the viewfinder display, described in Toggling the 3D and viewfinder display
l
Toggle between displaying a color image or a NIRI image in the viewfinder, as described in Toggling between
color and NIRI images in the viewfinder – relevant for iTero Element 5D and iTero Element 5D Plus systems
only
After scanning, you can edit the scan by:
l
Deleting a segment, as described in Deleting a segment
l
Deleting a selected area, as described in Deleting a selection
l
Capturing areas with missing anatomy, as described in Filling in missing anatomy
l
Displaying the excess tissue around the edges of the 3D model, as described in Disabling A.I. cleanup
When you have finished scanning the patient, tap on the toolbar to move to View mode, where you can
ensure that the scan is complete before sending it to the lab or storage, as described in Viewing the scan.
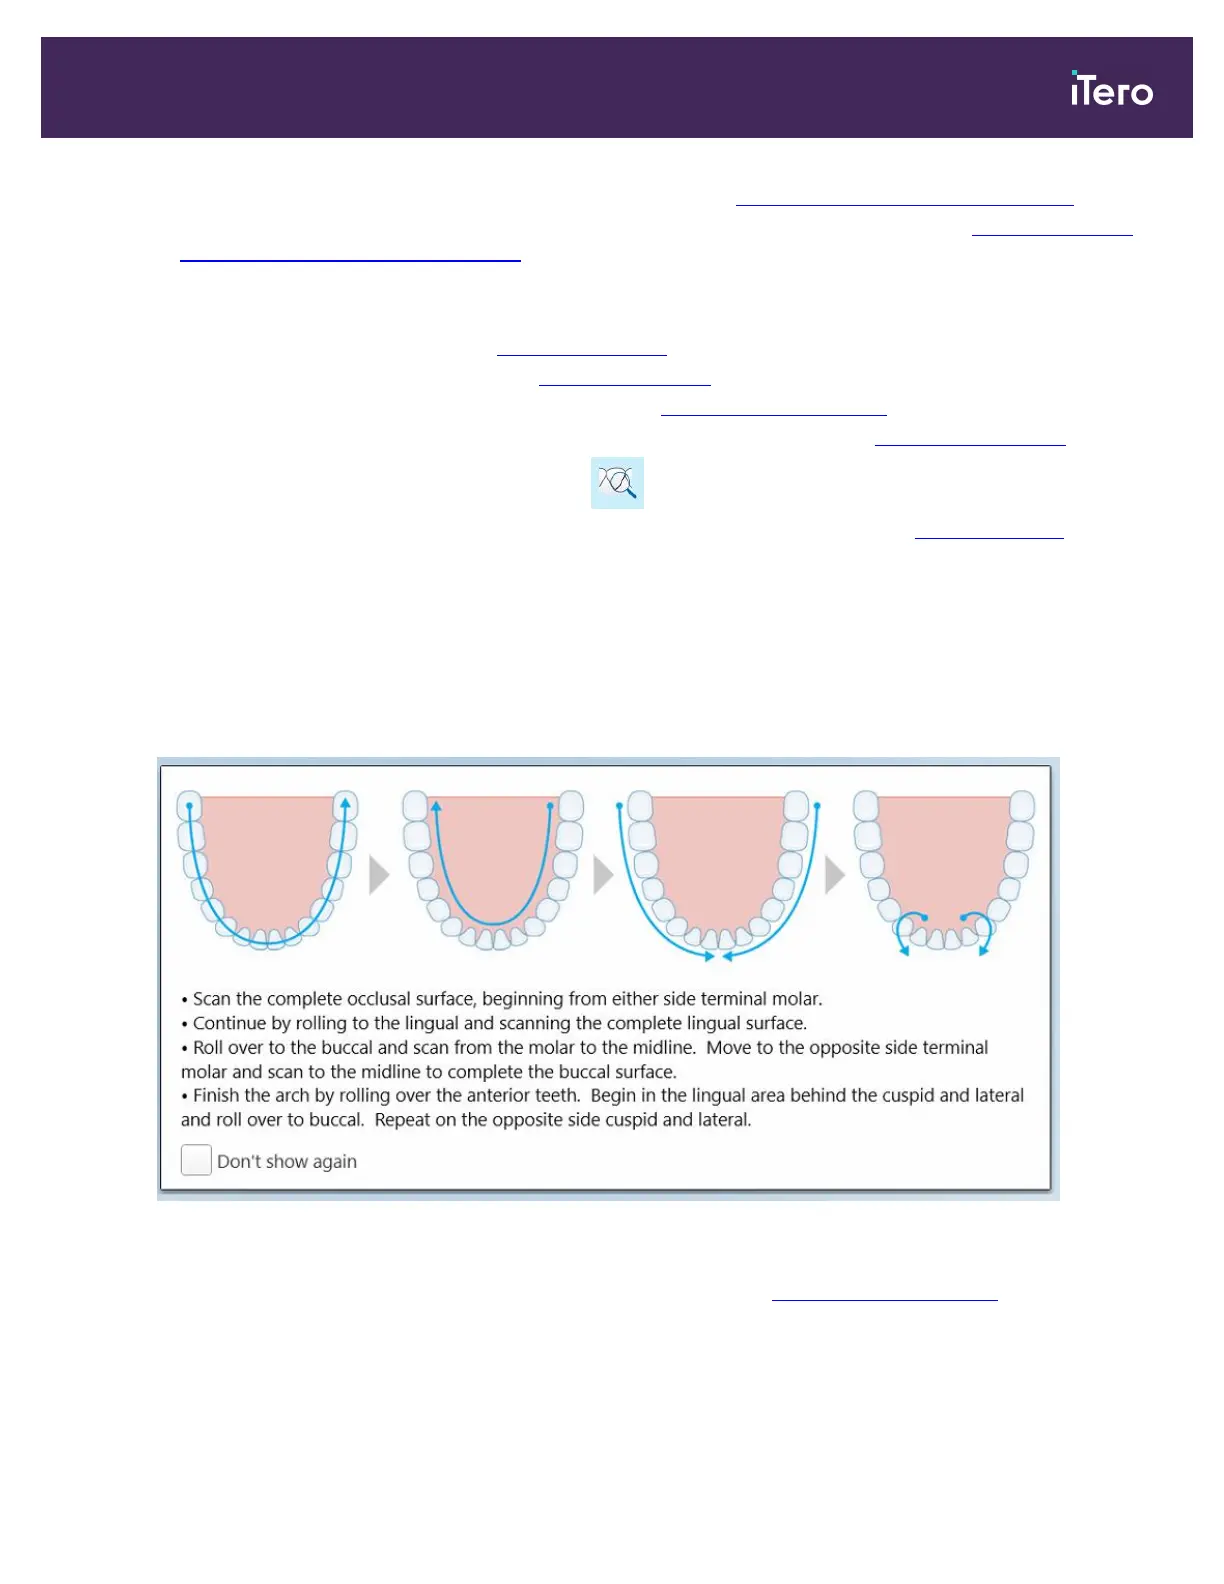
5.5.1 Scanning guidance
As soon as you move to Scan mode, the recommended scanning sequence for the selected scan segment is
displayed in the center of the scanner window. It will automatically disappear after a short while, or you can tap
anywhere on the screen to hide it.
iTero recommends you follow the scanning sequence for best results.
Figure 105: Recommended scanning sequence – lower jaw
Note: If you select the Don’t show again check box, this guidance will not be displayed in future scans. You can
return the guidance by enabling it in the Scan settings, as described in Defining the scan settings.
iTero Element 5D and iTero Element 5D Plus imaging systems User manual
© 2022 Align Technology, Inc. All rights reserved. 107