Step 3: Create a Project (cont’d)
Rung #1 (cont’d)
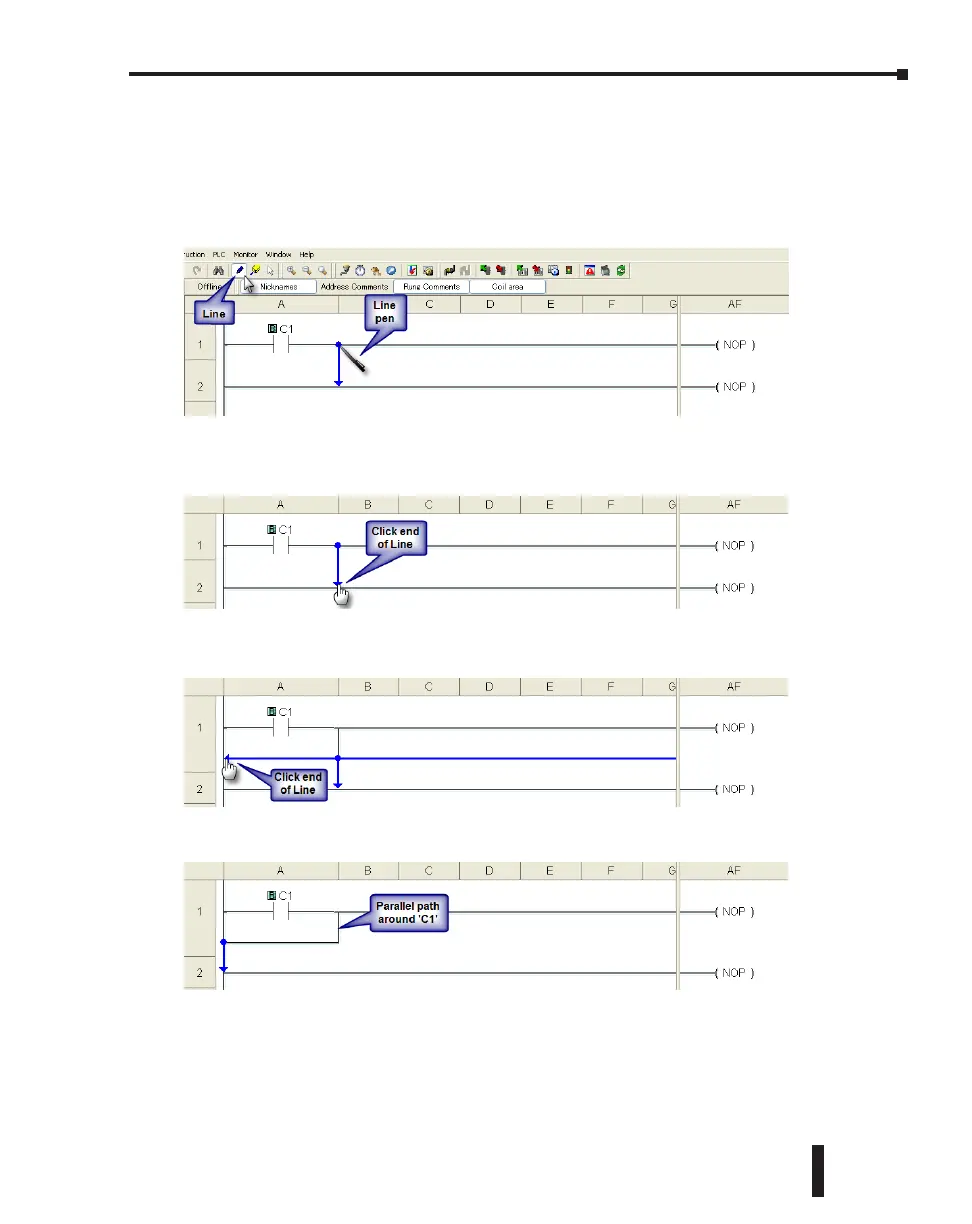
The Line creation tool is used to add a normally open contact in parallel with the C1 contact.
Click on the Line creation tool icon located on the Edit toolbar. A blue line will appear,
showing the direction of the new line. The Line pen is used to redirect the new line.
Move the mouse pointer to the end of the new line (arrow) until the mouse pointer becomes
a hand with a pointing index finger. Click on the line’s arrow.
Additional new lines are shown in blue. Move the mouse pointer to the end of the new line
that extends to the left and click.
There is now a parallel path around the C1 contact that was first entered as shown here.
Proceed to the next page to continue construction of Rung #1.
CLICK PLC Hardware User Manual, 6th Edition, Rev. G – C0-USER-M
1–9
Chapter 1: Getting Started

 Loading...