Step 6: Establish PC to PLC Communications, (cont’d)
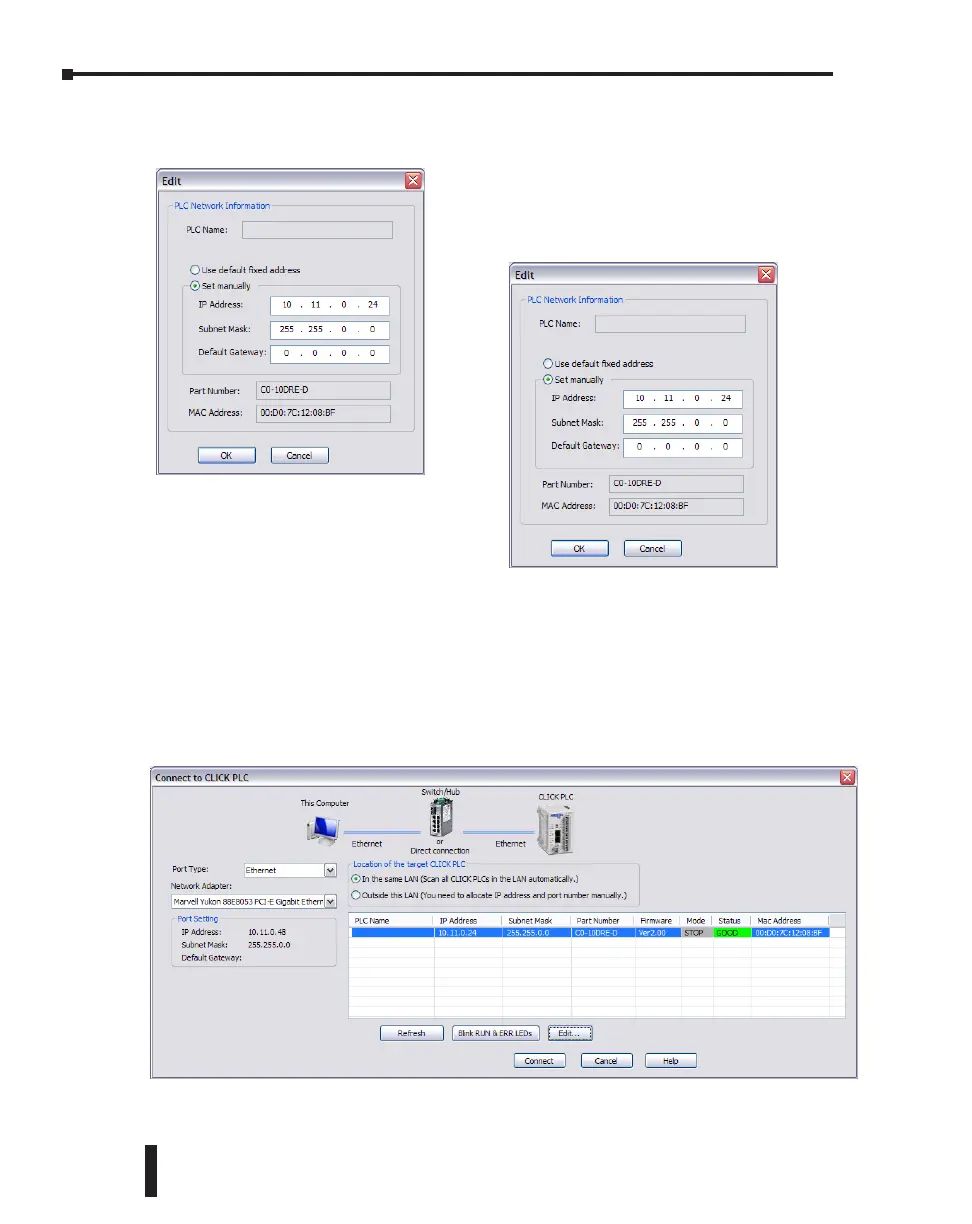
To match the subnet setup of the CLICK PLC to the
subnet that the your PC locates in, select the CLICK
PLC unit in the list and click the Edit button under the
list. The Edit window opens.
Next, the new IP Address needs to start with ‘10.11’ to match the subnet of the PC. The
following 2 numbers however, can be any number as long as the new IP Address is unique in
the LAN. In the window here, the IP Address was changed to ‘10.11.0.24’.
Click the OK button to continue. The new IP Address setup is sent to the CLICK PLC.
Your PC and the CLICK PLC locate in the same subnet now. Click the Connect button on
the bottom to connect the CLICK programming software to the CLICK PLC.
CLICK PLC Hardware User Manual, 6th Edition, Rev. G – C0-USER-M
1–22
Chapter 1: Getting Started

 Loading...