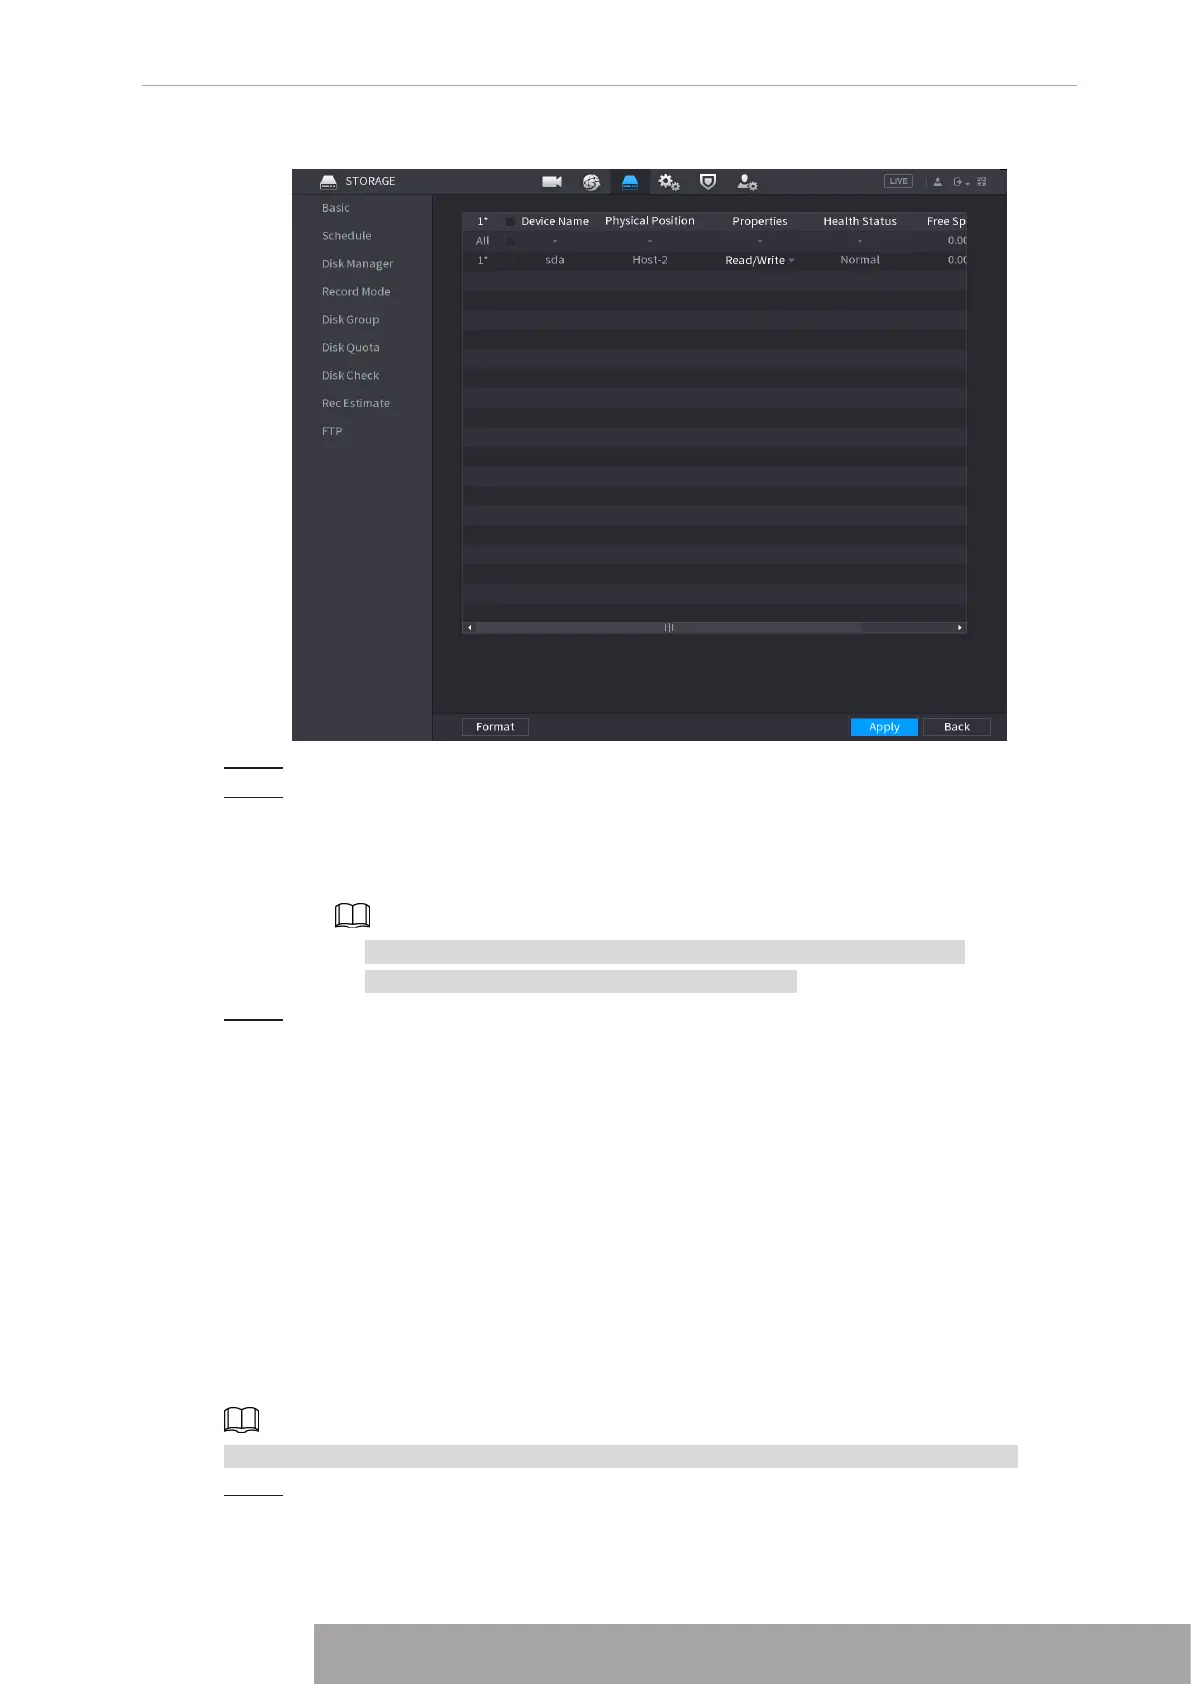
Figure 4-244
Step 2 Select a HDD and then select a time from the drop-down list.
Step 3 (Optional) Format a HDD.
1) Select a HDD and then click
Format
.
2) Click
OK
.
3) Enter the admin password and click
OK
.
● This operation will erase all data in the HDD, proceed with caution.
● If xxx is selected, database will also be cleaned.
Step 4 Click
Apply
button to complete the setup. System needs to restart to activate current
setup if you want to format the HDD.
1.12.4 Record Control
After you set schedule record or schedule snapshot function, set auto record/snapshot function
so that the NVR can automatically record or snapshot. For detailed information, refer to
"1.1.4.6.3 Record Control".
1.12.5 Disk Group
By default, the installed HDD and created RAID are in Disk Group 1. You can set HDD group,
and HDD group setup for main stream, sub stream and snapshot operation.
If
Disk Quota is selected
is shown on the interface, click
Switch to Disk Group mode.
Step 1 Select
Main Menu
>
STORAGE
>
Disk Group
.
The
Disk Group
interface is displayed. See Figure 4-245.
Copyright © NSS Sp. z o.o.
239 User‘s Manual