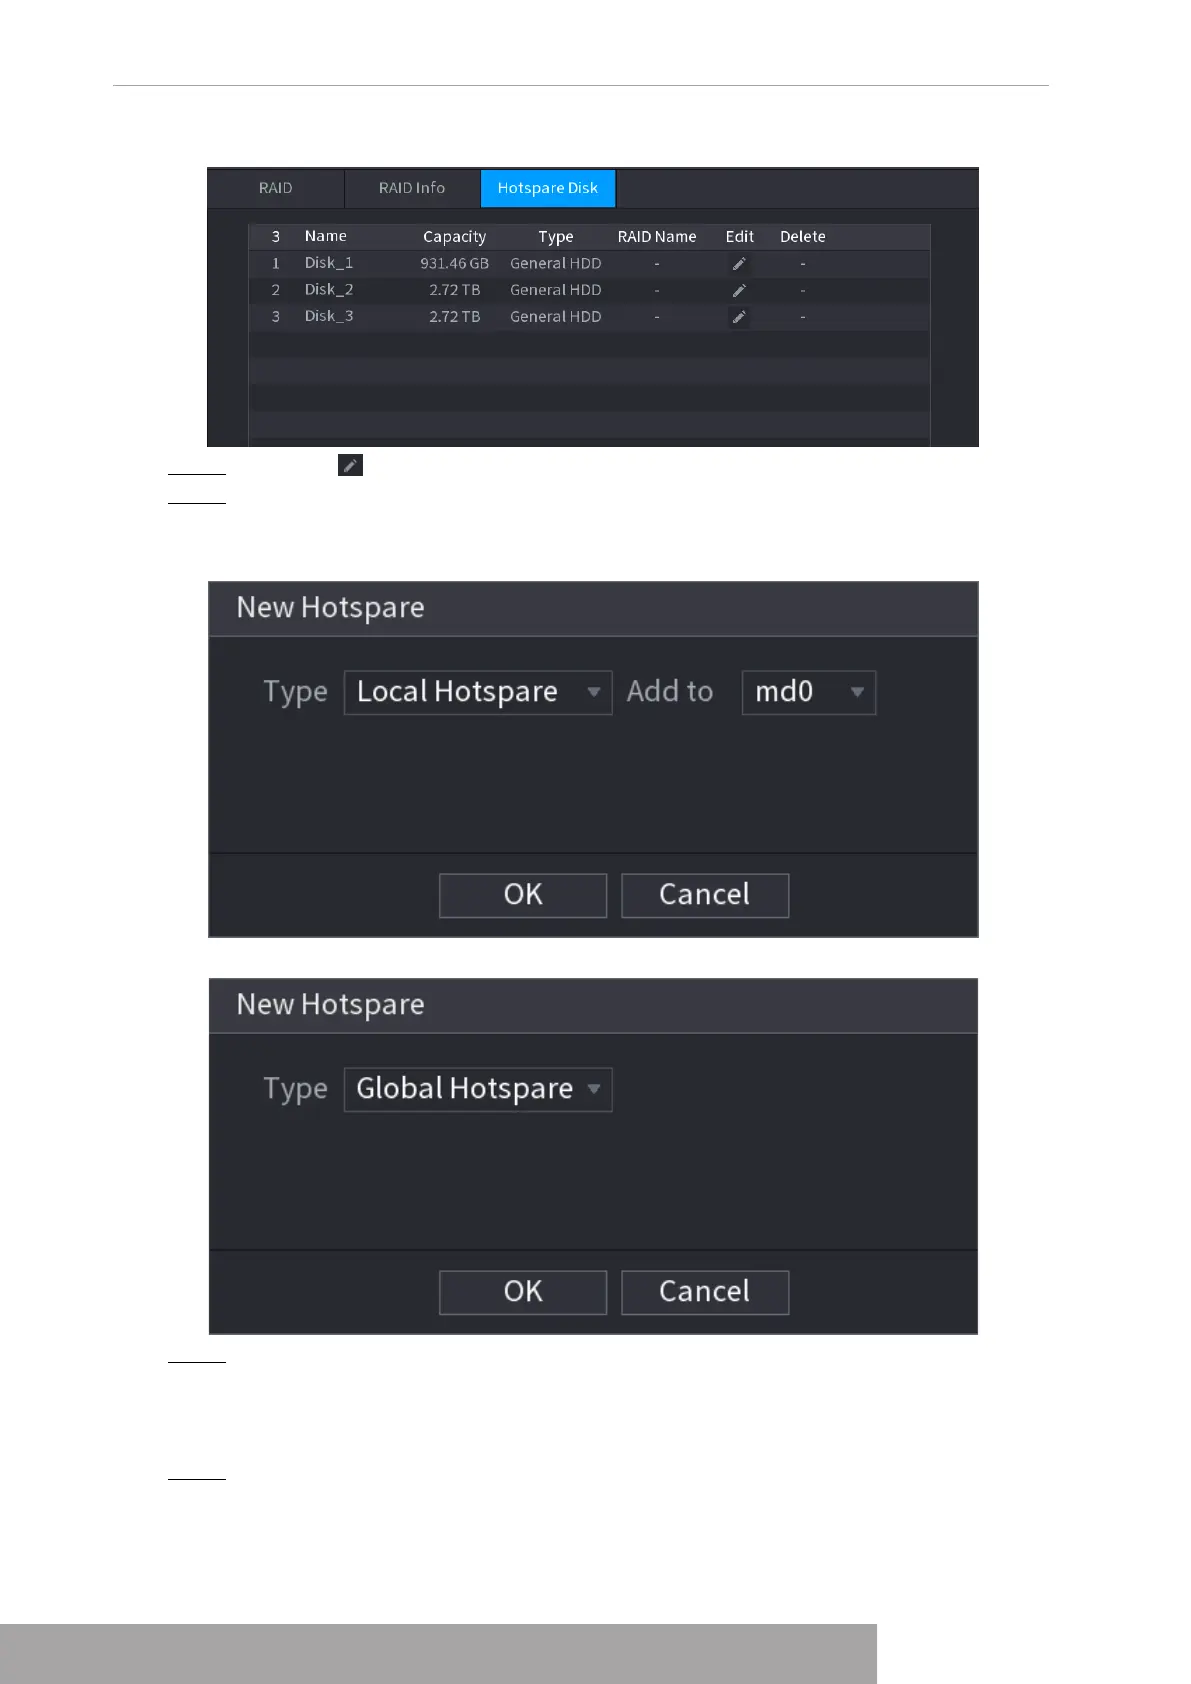
Figure 4-254
Step 2 Click the icon behind a disk.
Step 3 The
New Hotspare
interface is displayed. See Figure 4-255 (New hot spare (local) or
Figure 4-256 (New hot spare (global).
Figure 4-255
Figure 4-256
Step 4 You can select
Local Hotspare
or
Global Hotspare
.
● Local Hotspare: Select the target disk, and the new disk will serve as the hot spare
disk of the selected disk.
● Global Hotspare: the new disk will serve as the hot spare disk of the entire RAID.
Step 5 Click
OK
.
Copyright © NSS Sp. z o.o.
User‘s Manual 248