"4.1.4.6.3 Record Control" for detailed information.
1.1.4.6.2 Snapshot Schedule
You can set schedule snapshot period.
After set schedule snapshot, device can snapshot image according to the period you set here.
For example, the alarm snapshot period is from 6:00–18:00 Monday, device can snapshot
during the 6:00–18:00 when an alarm occurs.
Step 1 Click
Snapshot
, the device goes to following interface. See Figure 4-40.
Select
Main Menu
>
STORAGE
>
Schedule
>
Snapshot
, you can go to the snapshot
interface.
Figure 4-40
Step 2 Select a channel to set schedule snapshot.
Step 3 Set snapshot type as schedule. Refer to "1.2.6.2 Snapshot" for detailed information.
Step 4 Check the box to set alarm type. See Figure 4-41.
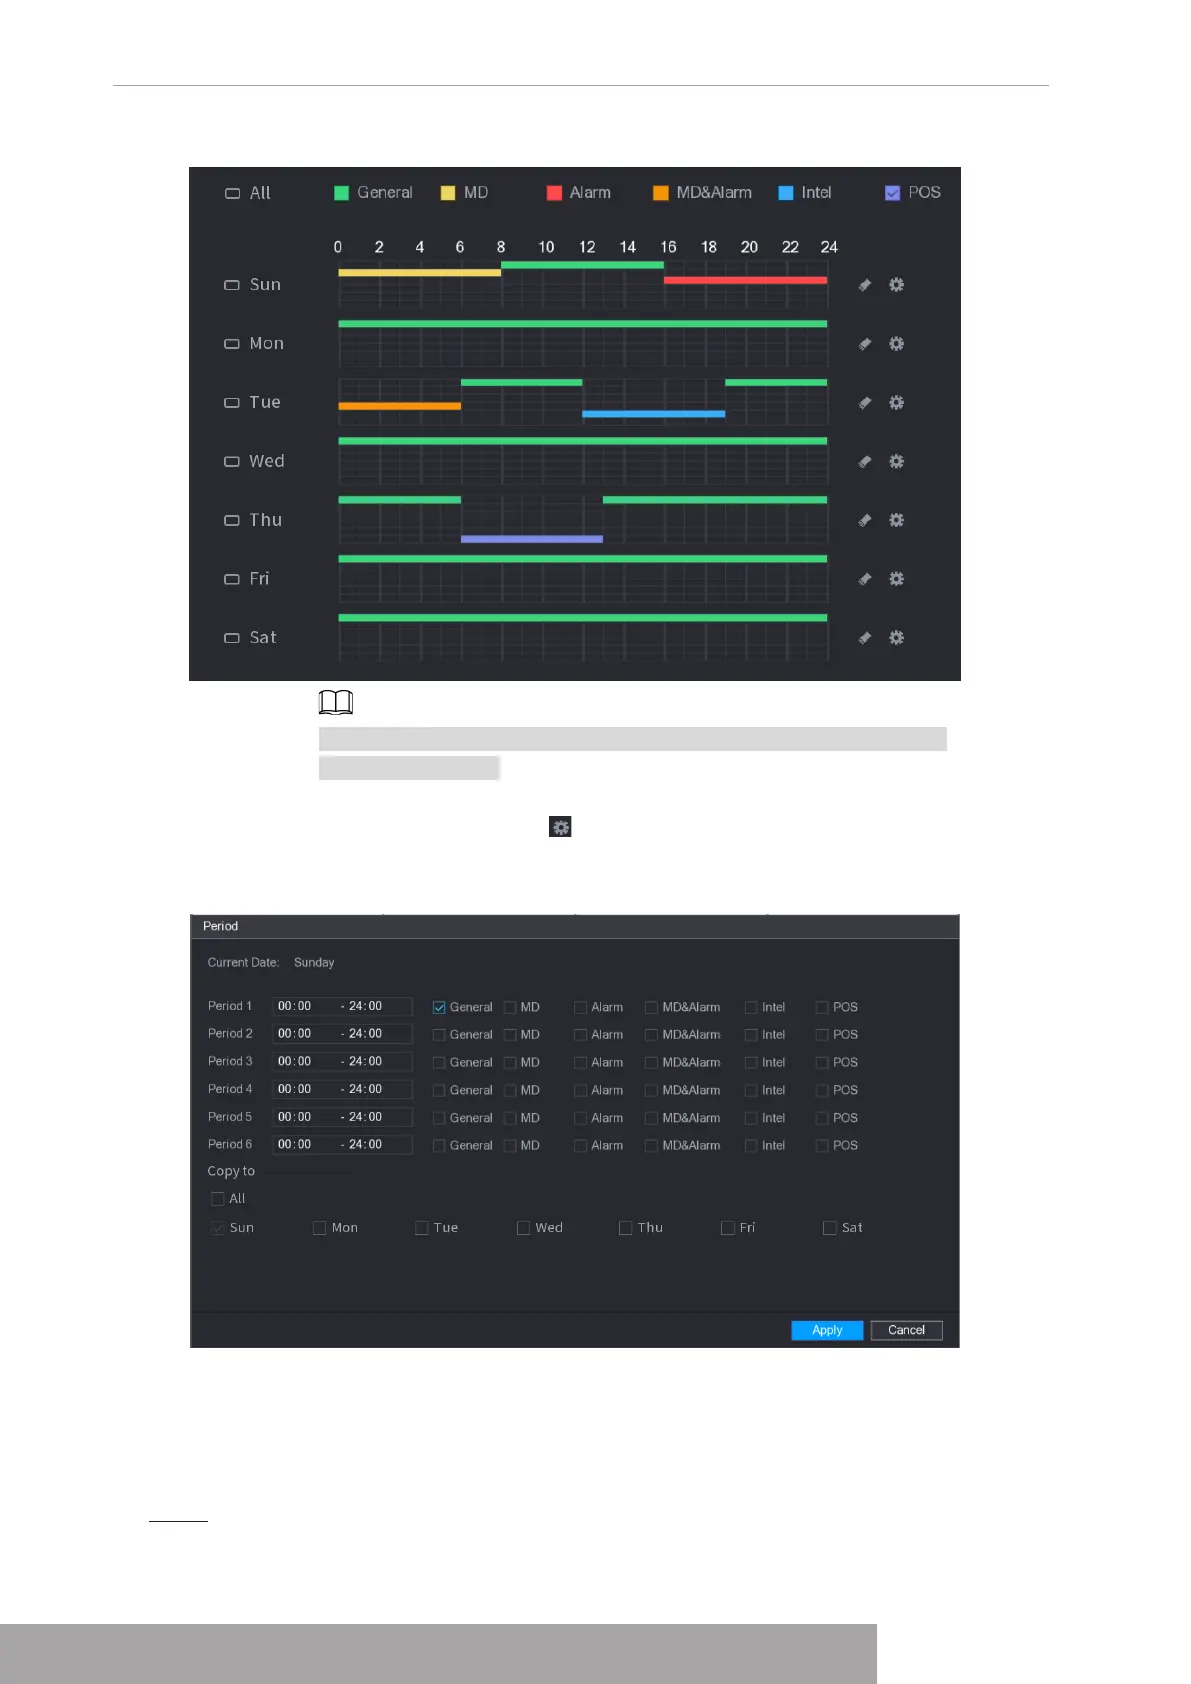
Figure 4-38
The MD record and alarm record function are both null if you enabled
MD&Alarm function.
● Define the period by editing.
1. Select a date and then click .
The
Period
interface is displayed.
Figure 4-39
2. Set record type for each period.
◇
There are six periods for you to set for each day.
◇
Under
Copy to
, select
All
to apply the settings to all the days of a week, or
select specific day(s) that you want to apply the settings to.
3. Click
Apply
to save the settings.
Step 5 Click
Apply
to complete the settings.
Enable auto record function so that the record plan can become activated. Refer to
Copyright © NSS Sp. z o.o.
User‘s Manual 36