Instructions for use Primus Infinity Empowered SW 4.5n 79
Getting started
4 Check the interlock mechanism.
Move the selector lever (D) to the left to lock the
left vaporizer. Turn the handwheel on the right
vaporizer to a position other than 0, and make
sure the left vaporizer remains locked in its
0 position. Repeat test for other vaporizer.
5 Turn both handwheels to 0 positions.
For the Dräger Auto Exclusion System
(optional):
1 Vaporizers are mounted in a level position and
seated securely on the mounts.
2 Locking levers point to the left = locked position.
3 Check the sight glass, and ensure an adequate
filling level.
4 Control dial set to 0 and button engaged.
5 Check the interlock mechanism.
Turn the hand wheel on one vaporizer to a po-
sition other than 0, and make sure the other va-
porizer remains locked in its 0 position. Repeat
test for second vaporizer.
6 Turn both handwheels to 0 positions.
After filling or changing the vaporizer:
z Perform leak test, see page 123.
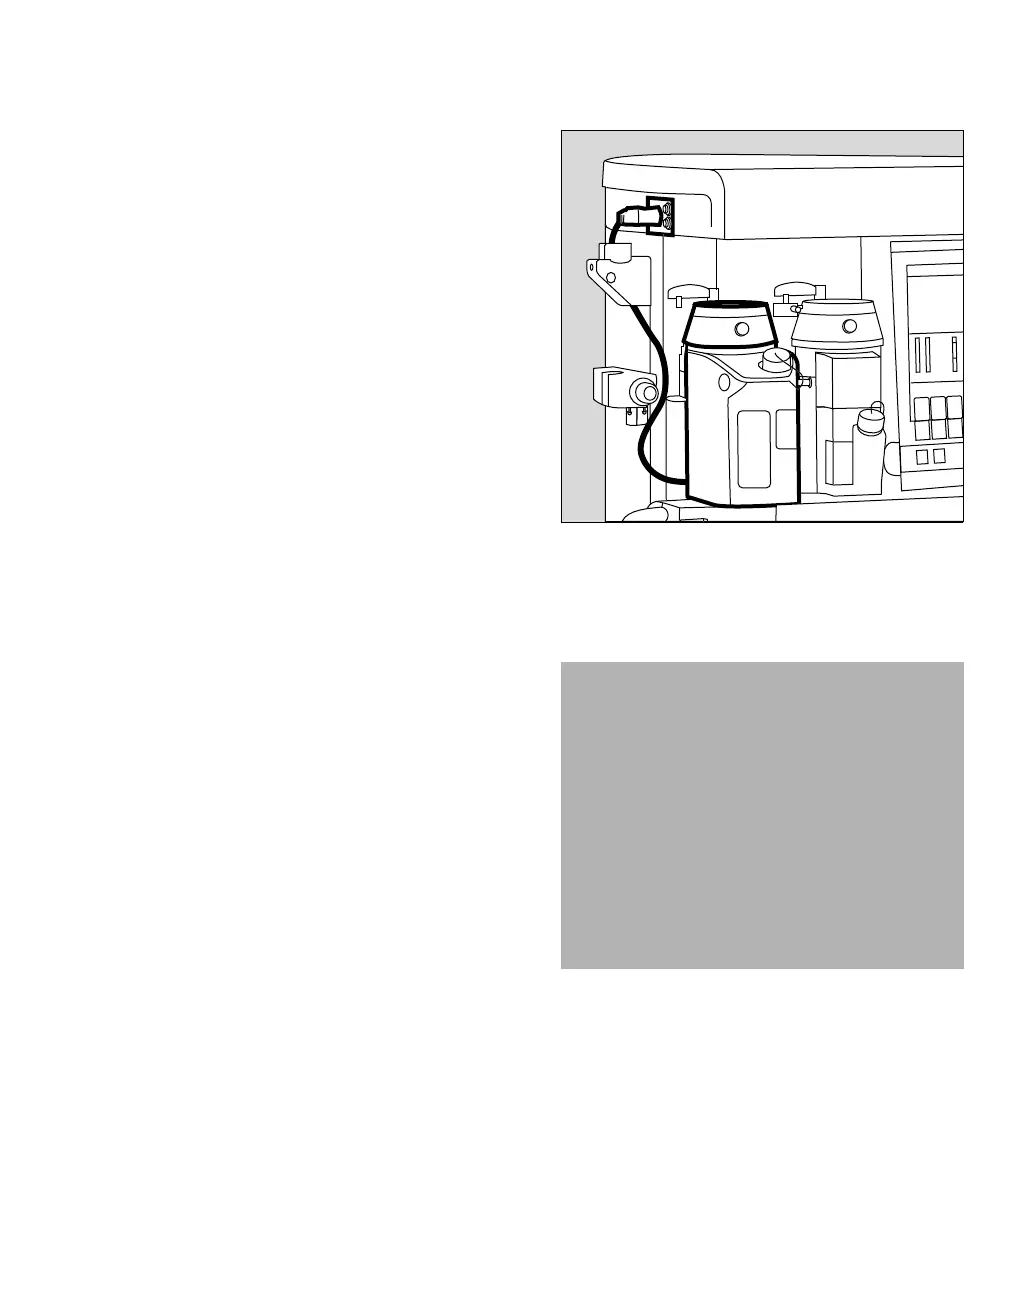
Connecting the Dräger Desflurane vaporizer
The Dräger Desflurane vaporizer D-Vapor can be
connected to the auxiliary outlet in the top shelf by
using a short cable.
1 Route the short cable (A) along the bottom of
the back of the D-Vapor (B).
2 Insert the D-Vapor at the left (outer) position.
3 Connect the power supply (C).
090
WARNING
Risk of patient injury
Risk of ambient air contamination
To prevent vaporizer leaks which may lead to
low fresh-gas delivery or prevent manual ven-
tilation or contaminate the ambient environ-
ment, the D-Vapor must be mounted very care-
fully.
Avoid catching the D-Vapor power cable be-
hind/underneath the housing. Make sure that
the D-Vapor is upright. Always perform a leak
test after mounting the vaporizer.
A
B
C