Operating manual.
CNC 8060
CNC 8065
PROFILE EDITOR
11.
Examples of how to define profiles.
·221·
(REF: 1807)
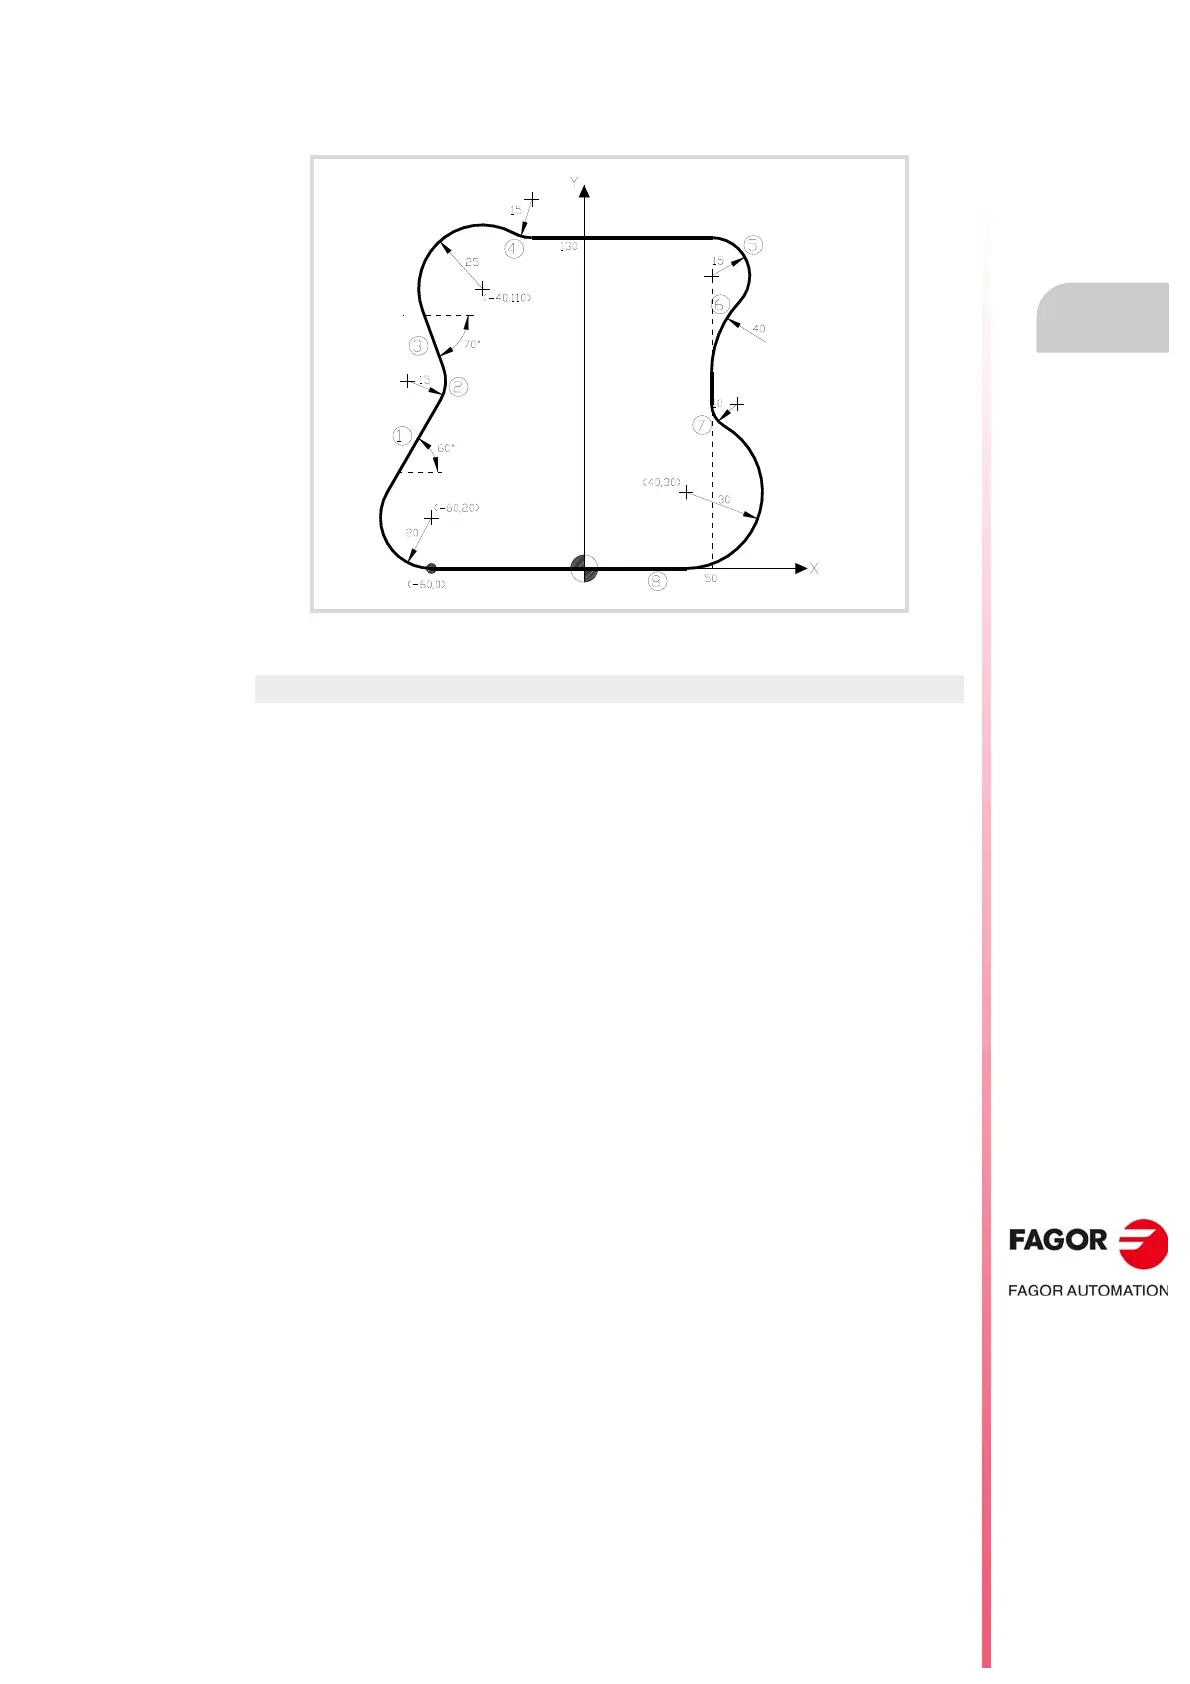
11.7.3 Profile editor. Example 3 (milling).
Profile definition.
End of editing
Select the "END" option and save the profile. The CNC quits the profile editor and inserts
the profile in the part-program.
Section. Geometry.
Starting point X = -60 Y =0
Clockwise arc Center X = -60
Center Y = 20
Radius = 20
Straight (1) Angle = 60 Tangency = Yes
• The CNC shows the options for section 1. Select the correct one.
Counterclockwise arc
(2)
Radius = 15 Tangency = Yes
Straight (3) Angle = -70 Tangency = Yes
Clockwise arc Center X = -40
Center Y = 110
Radius = 25 Tangency = Yes
• The CNC shows the options for section 3. Select the correct one.
• The CNC shows the options for section 2. Select the correct one.
Counterclockwise arc
(4)
Radius = 15 Tangency = Yes
Straight Y =130 Angle = 0 Tangency = Yes
• The CNC shows the options for section 4. Select the correct one.
Clockwise arc (5) Center X = 50 Radius = 15 Tangency = Yes
• The CNC shows the options for section 5. Select the correct one.
Counterclockwise arc
(6)
Radius = 40 Tangency = Yes
Straight X = 50 Angle = 270 Tangency = Yes
• The CNC shows the options for section 6. Select the correct one.
Counterclockwise arc
(7)
Radius = 10 Tangency = Yes
Clockwise arc Center X = 40
Center Y = 30
Radius = 30 Tangency = Yes
• The CNC shows the options for section 7. Select the correct one.
Straight (8) X = -60 Y =0 Tangency = Yes
• The CNC shows the options for section 8. Select the correct one.