Exposure advance unit
1/2
2. Replacement and adjustment of parts
25810
25810
Expo sure advance unit
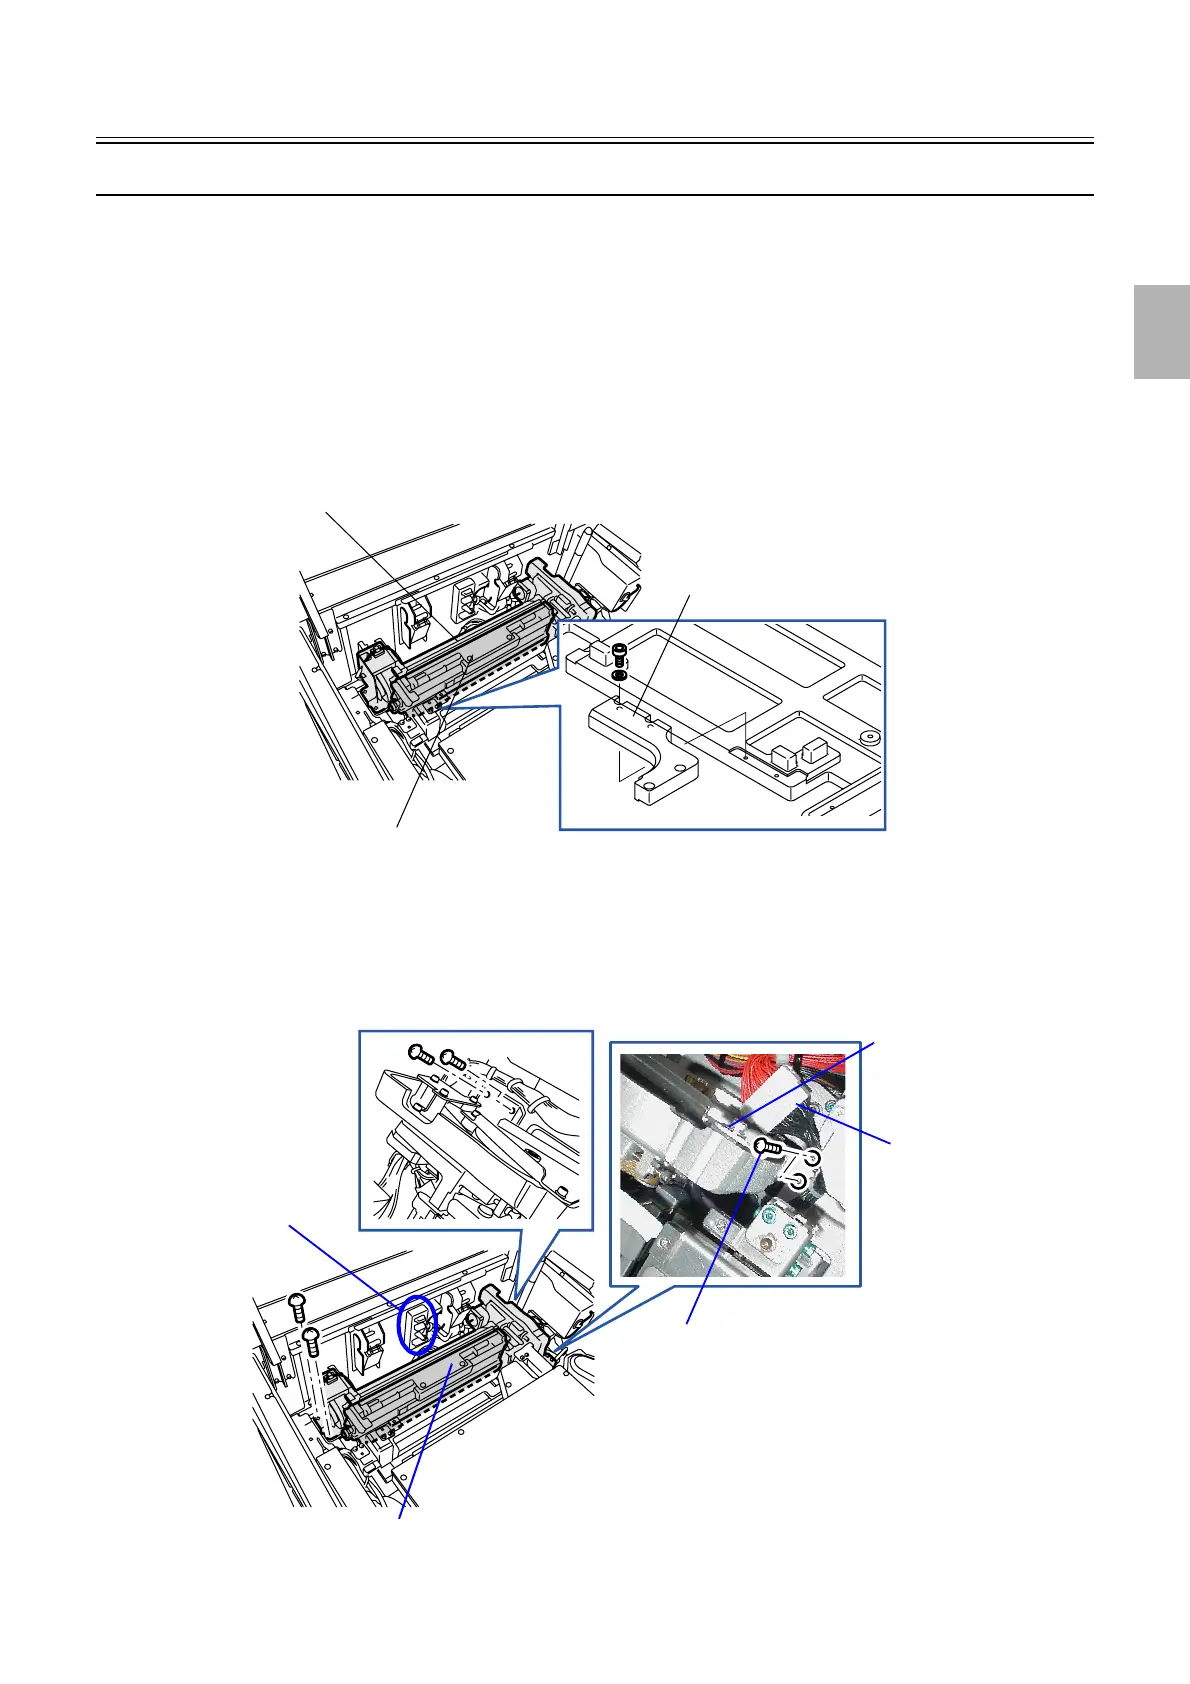
Removing the exposure advance unit
!
!!
! Procedure
1. Open the printer top cover.
2. Remove paper advance unit 1.
☞26510
3. Open paper advance unit 2.
4. Remove the pressure guide.
5. Remove the reinforcement angle bracket from the exposure advance unit. (four screws)
6. Disconnect the connector(s).
J/P342 (Relay connector)
J/P385 (Relay connector)
7. Remove the exposure advance unit. (six screws)
The number of screws may be four depending on the system.
Exposure advance unit
Reinforcement angle bracket
Pressure guide
G085235
Exposure advance unit
J/P342
J/P385
These screws may not be attached depending on the
system.
Reinforcement angle bracket of
the exposure advance unit
G090942
Distributed by: minilablaser.com