GE
P
ART NUMBER FN091065, REVISION 2 VS5 N AND VS6 N SERVICE MANUAL
Chapter 8 - Replacement Procedures 8-213
PRELIMINARY
8-8-3 Software Upgrade/Installation/Reinstallation - BT10 to BT12
NOTE: A minimum of 1 hour is required to complete the Software Upgrade/Installation Procedure (excluding
preparation time, backup etc. and performing functional tests following the software upgrade/installation).
Throughout the installation/upgrade processes, the Vivid S5 N / Vivid S6 N system will be
unavailable for scanning.
NOTE: The following upgrade procedure is based on the Vivid S6 N system. The procedure is the same
for the Vivid S5 N system (displayed screens will of course reflect Vivid S5 N information).
NOTE: During the software installation procedure, it is important to observe the USB Flash Drive connected to the
front of the Operator Panel and make sure the LED is blinking.
Table 8-2 Step-by-Step Software Upgrade/Installation/Reinstallation Procedure 1 of 9
Step Instruction Expected Result
1. Perform a complete shutdown of the system.
2. Remove the battery and remove all external
devices/ peripherals currently connected to the system.
3. Insert the USB Flash Drive containing the full software
version and supporting documentation into a USB port
at the front of the Operator Panel.
4. On the console, hold down the <ON/OFF> button for
three seconds.
The system powers ON and when system boot-up from the USB Flash Drive is
complete, the following message is displayed prompting you to select the
required option:
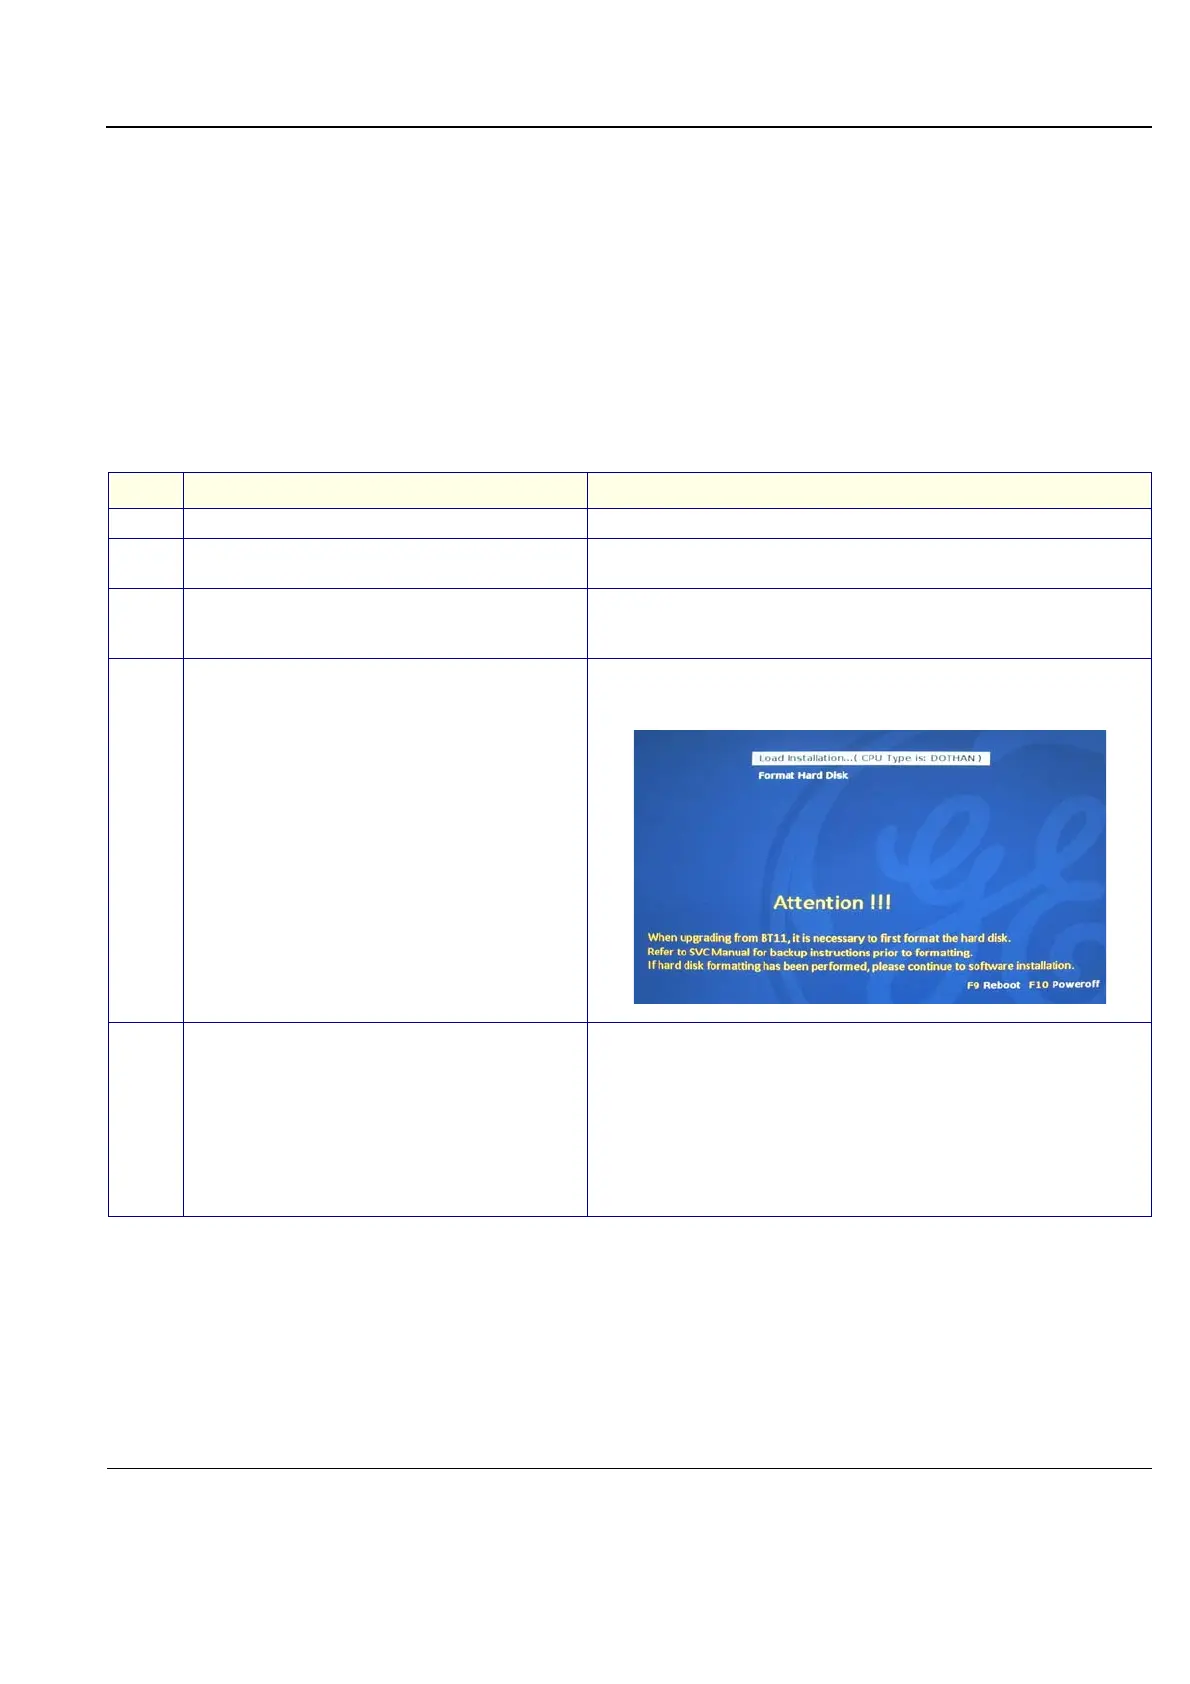
5. For a Software Upgrade procedure:
Make sure the Format Hard Disk procedure has been
performed as part of preparation for software loading.
(Refer to “Formatting and Partitioning the Hard Disk -
Automatic Procedure” on page 8-230).
Note:
For a Software Reinstallation procedure, Hard Disk
Formatting is optional.

 Loading...


