3
PANEL DESCRIPTION
3-4
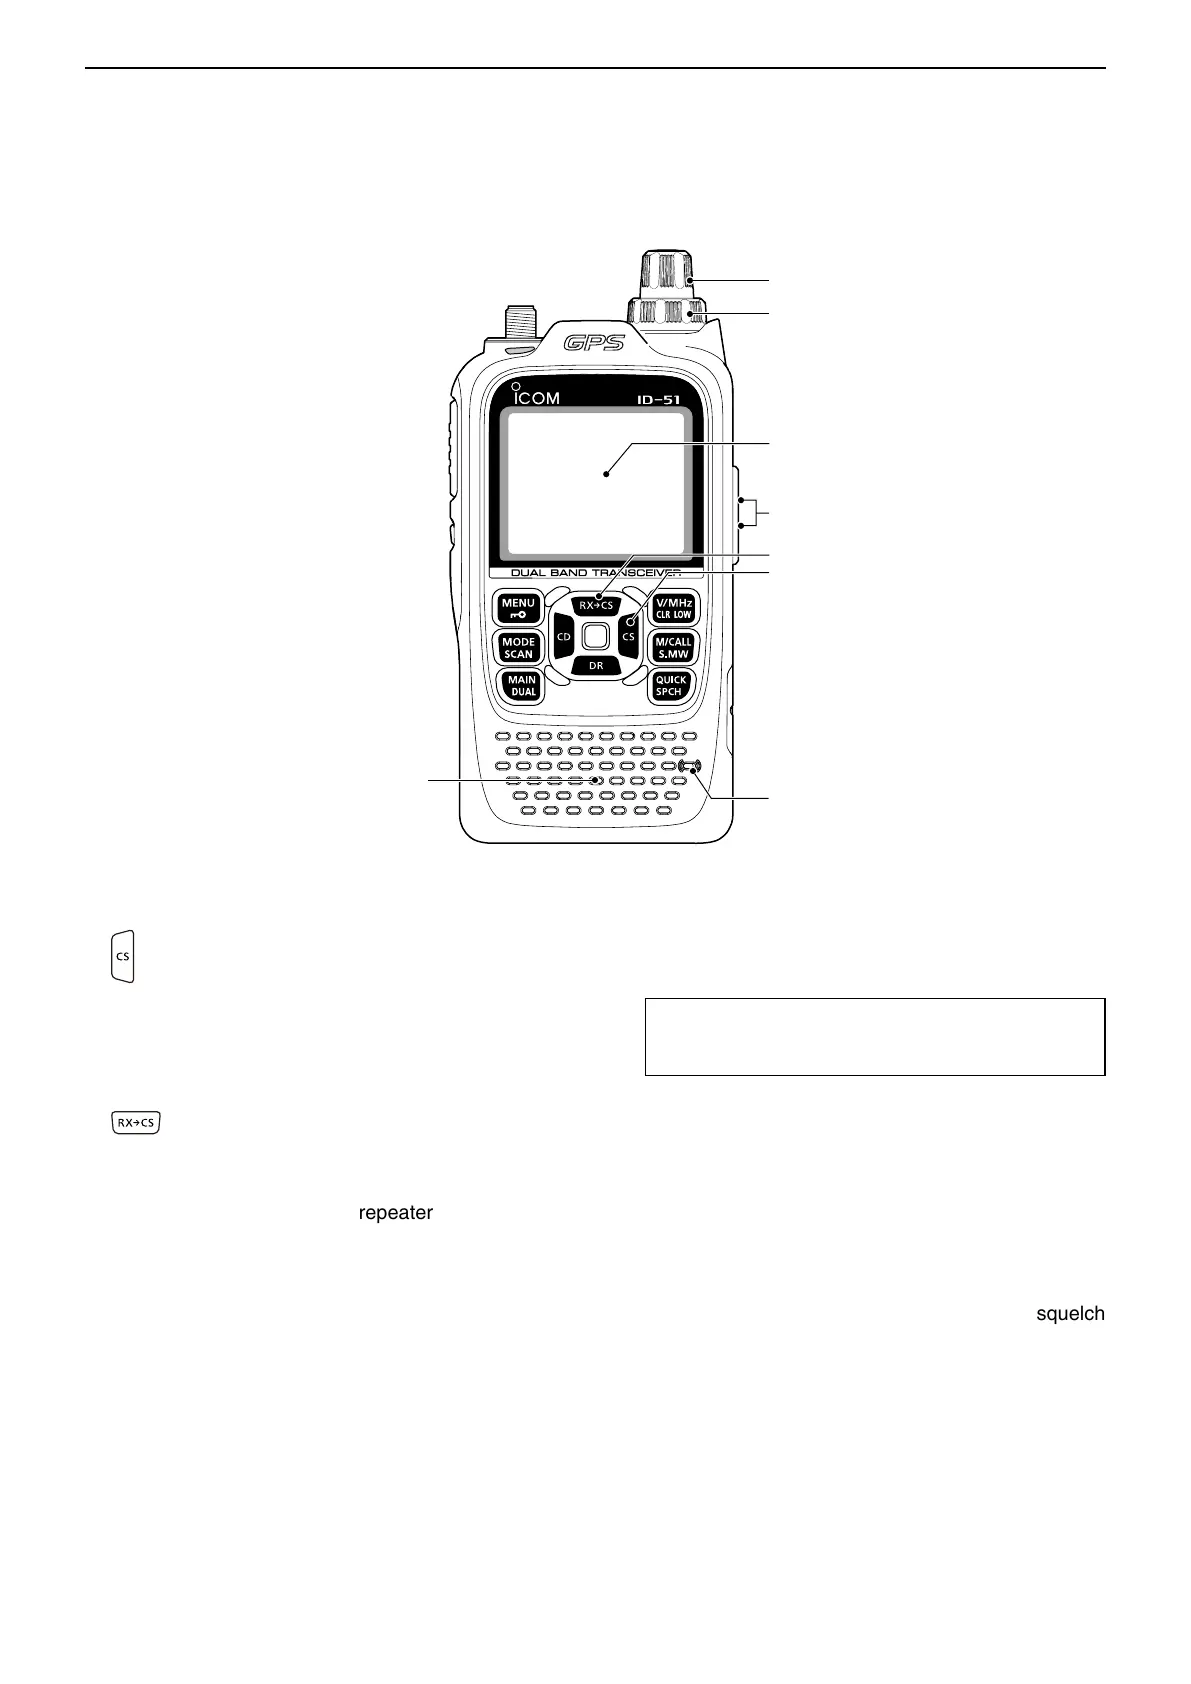
!8 CS (CALL SIGN SELECT)/D-PAD (RIGHT) KEY
[CS]/D-pad()
➥ Hold down for 1 second to enter the oper-
ating call sign select mode.
➥ While in the DR screen, or with the Menu
screen or Quick Menu screen open, push
to select a lower tier menu. (p. 16-2)
!9 RXÚCS (RX CALL SIGN CAPTURE)/D-PAD (UP)
KEY [RXÚCS]/D-pad()
➥ While in the DV mode, hold down for
1 second to display the RX History list.
When “[RX>CS] Key” item is set to “Call
Sign Capture,” the latest received call
signs (station and repeaters) is set as the
operating call signs after releasing this key.
(p. 16-64)
• While holding down this key, rotate [DIAL] to
select another call sign in RX History.
When “[RX>CS] Key” item is set to “RX>CS
List,” you can select a call sign (station and
repeaters) from the RX History list.
➥ While in the DR screen, or with the Menu
screen or Quick Menu screen open, push
to move the value or option selector bar up.
(p. 16-2)
@0 EXTERNAL MICROPHONE/SPEAKER JACK
[MIC/SP]
Connect a cloning cable, optional speaker micro-
phone or headset, if desired.
See Section 18 for a list of available options.
TIP: Be sure to turn OFF the power before connect-
ing or disconnecting optional equipment to or from
the [MIC/SP] jack.
@1 VOLUME CONTROL [VOL]
Rotate to adjust the audio volume level. (p. 5-2)
@2 CONTROL DIAL [DIAL]
➥ Rotate to select the operating frequency. (p. 5-8)
➥ While in the Memory mode, rotate to select a
memory channel. (p. 12-3)
➥ While scanning, rotate to change the scanning
direction. (p. 13-3)
➥ Hold down [SQL], and rotate to adjust the squelch
level. (p. 5-8)
➥ While in the DR screen, or with the Menu screen
or Quick Menu screen open, rotate to select a de-
sired option or value.
■
Front, top and side panels (Continued)
Speaker
Function
display (p. 3-5)
Internal
microphone
!8
!9
@0
@1
@2
 Loading...


