17
OTHER FUNCTIONS
17-21
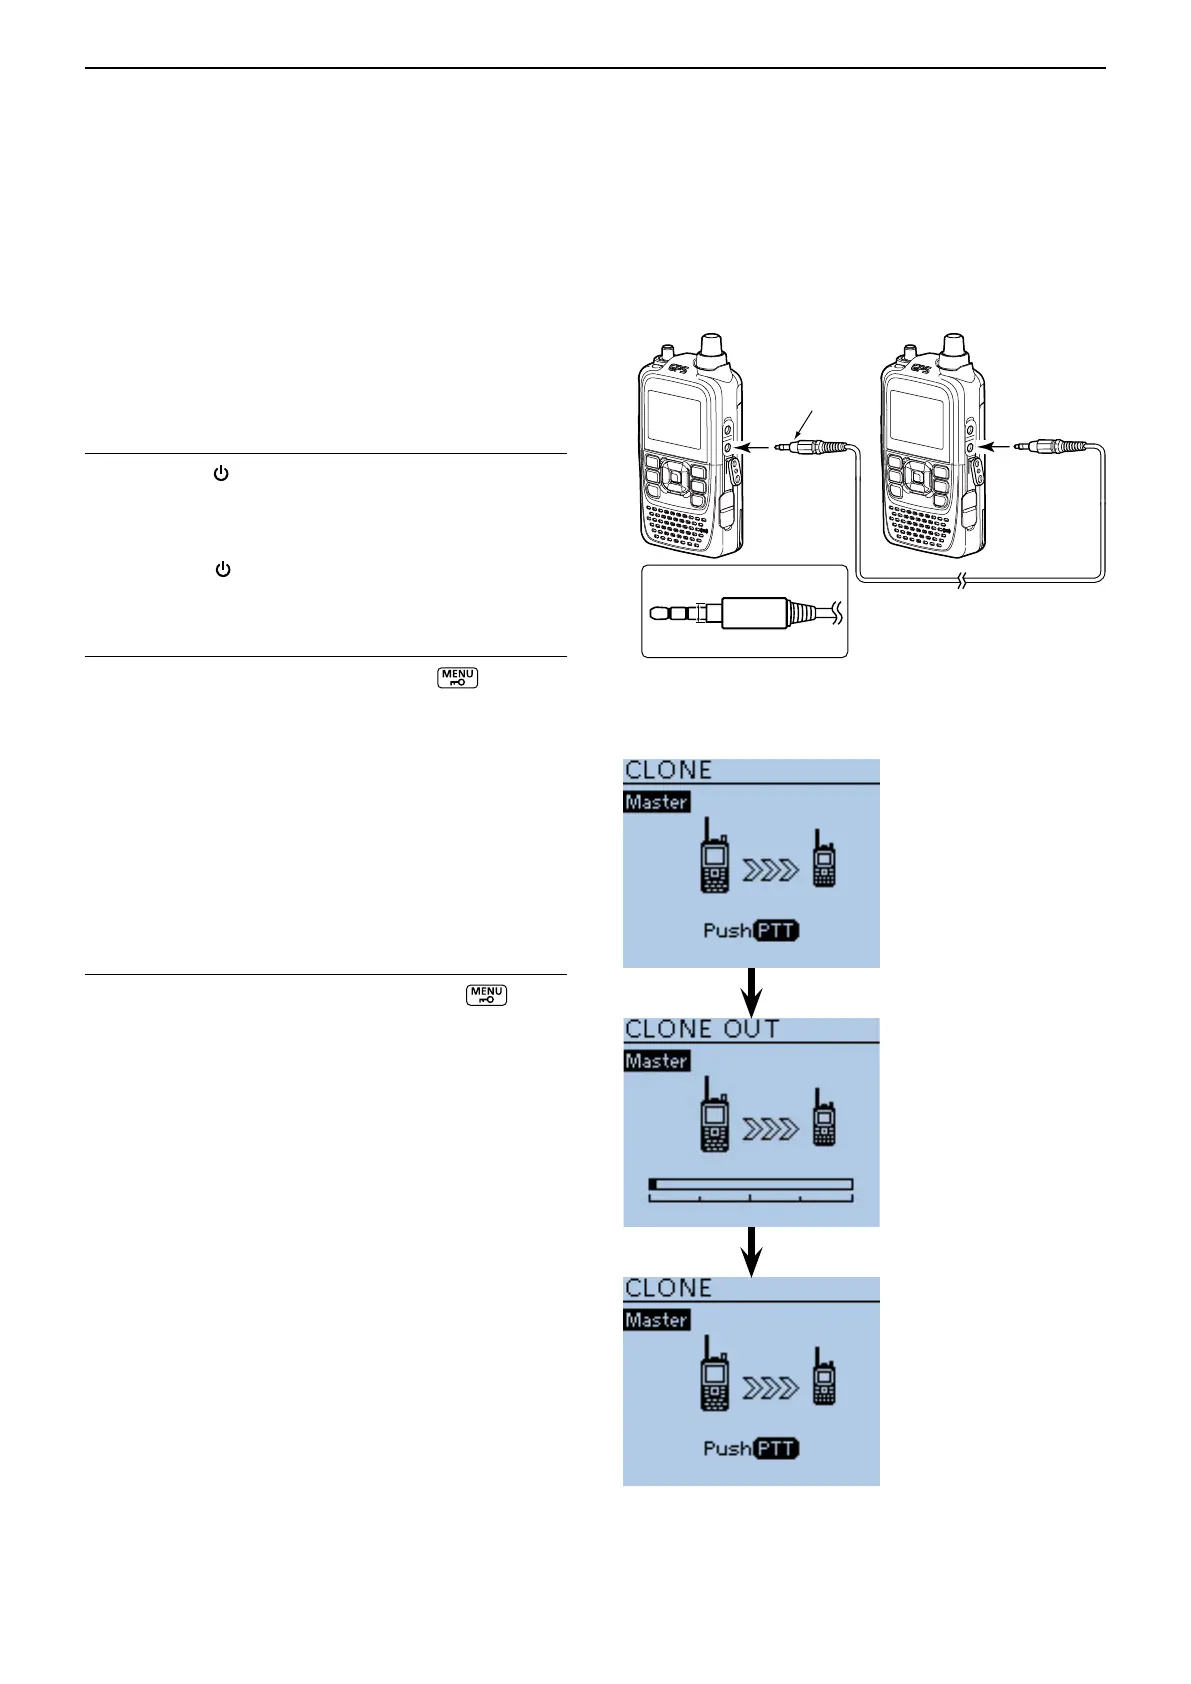
“CLONE” screen
“CLONE-OUT” screen
(While sending data)
Return to the
“CLONE” screen
• Connections
Master transceiver
(sends the cloning data)
Sub transceiver
(receives the cloning data)
• Screen of the master transceiver
■ Cloning function (Continued)
D Transceiver-to-Transceiver cloning using a cable
Connects two transceivers (master and sub transceiv-
er) using a stereo audio cable (purchase separately).
Use the stereo audio cable (3.5 (d) mm;
1
⁄8″), purchase
separately.
* Depending on the stereo audio cable, it may not be used for
cloning.
1. Transceiver connection
q Hold down [
] to turn OFF the both master and sub
transceivers.
w Connect a stereo audio cable between master and
sub transceiver, as shown to the right.
e Hold down [ ] to turn ON the both master and sub
transceivers.
2. Setting the Sub transceiver
r On the sub transceiver, push [MENU]
.
t Push D-pad() to select the root item (“Others”),
and then push D-pad(Ent) to go to the next screen.
y Push D-pad() to select “Clone,” and then push D-
pad(Ent).
u Push D-pad() to select “Clone Mode,” and then
push D-pad(Ent).
• “Go to the Clone Mode?” appears.
i Push D-pad() to select “Yes,” and then push D-
pad(Ent).
• The clone mode screen appears.
3. Setting the Master transceiver
o On the master transceiver, push [MENU]
.
!0 Push D-pad() to select the root item (“Others”),
and then push D-pad(Ent) to go to the next screen.
!1 Push D-pad() to select “Clone,” and then push D-
pad(Ent).
!2 Push D-pad() to select “Clone Master Mode,” and
then push D-pad(Ent).
• “Go to the Clone Master Mode?” appears.
!3 Push D-pad() to select “Yes,” and then push D-
pad(Ent).
• The clone master mode screen appears.
!4 Push [PTT] on the master transceiver.
• On the sub transceiver, the “CLONE-IN” screen ap-
pears.
• On the master transceiver, the “CLONE-OUT” screen ap-
pears.
!5 When cloning is completed, the master transceiver
returns to the clone master mode screen.
• The sub transceiver displays the “CLONE End” screen.
• If you have another transceiver to clone, connect it and
then push [PTT] of the master transceiver.
!6 Reboot the sub transceiver to enable the cloned set-
tings.
to [SP] jack to [SP] jack
3.5 mm (d);
1
⁄8″
Stereo plug
• Stereo plug (purchase locally)
Less than 4.5 mm; 0.17
″