EasyManuals Logo

Lexmark CX310 Service Manual

Lexmark CX310
430 pages
To Next Page IconTo Next Page
To Previous Page IconTo Previous Page
Page #233 background imageLoading...
Page #233 background image
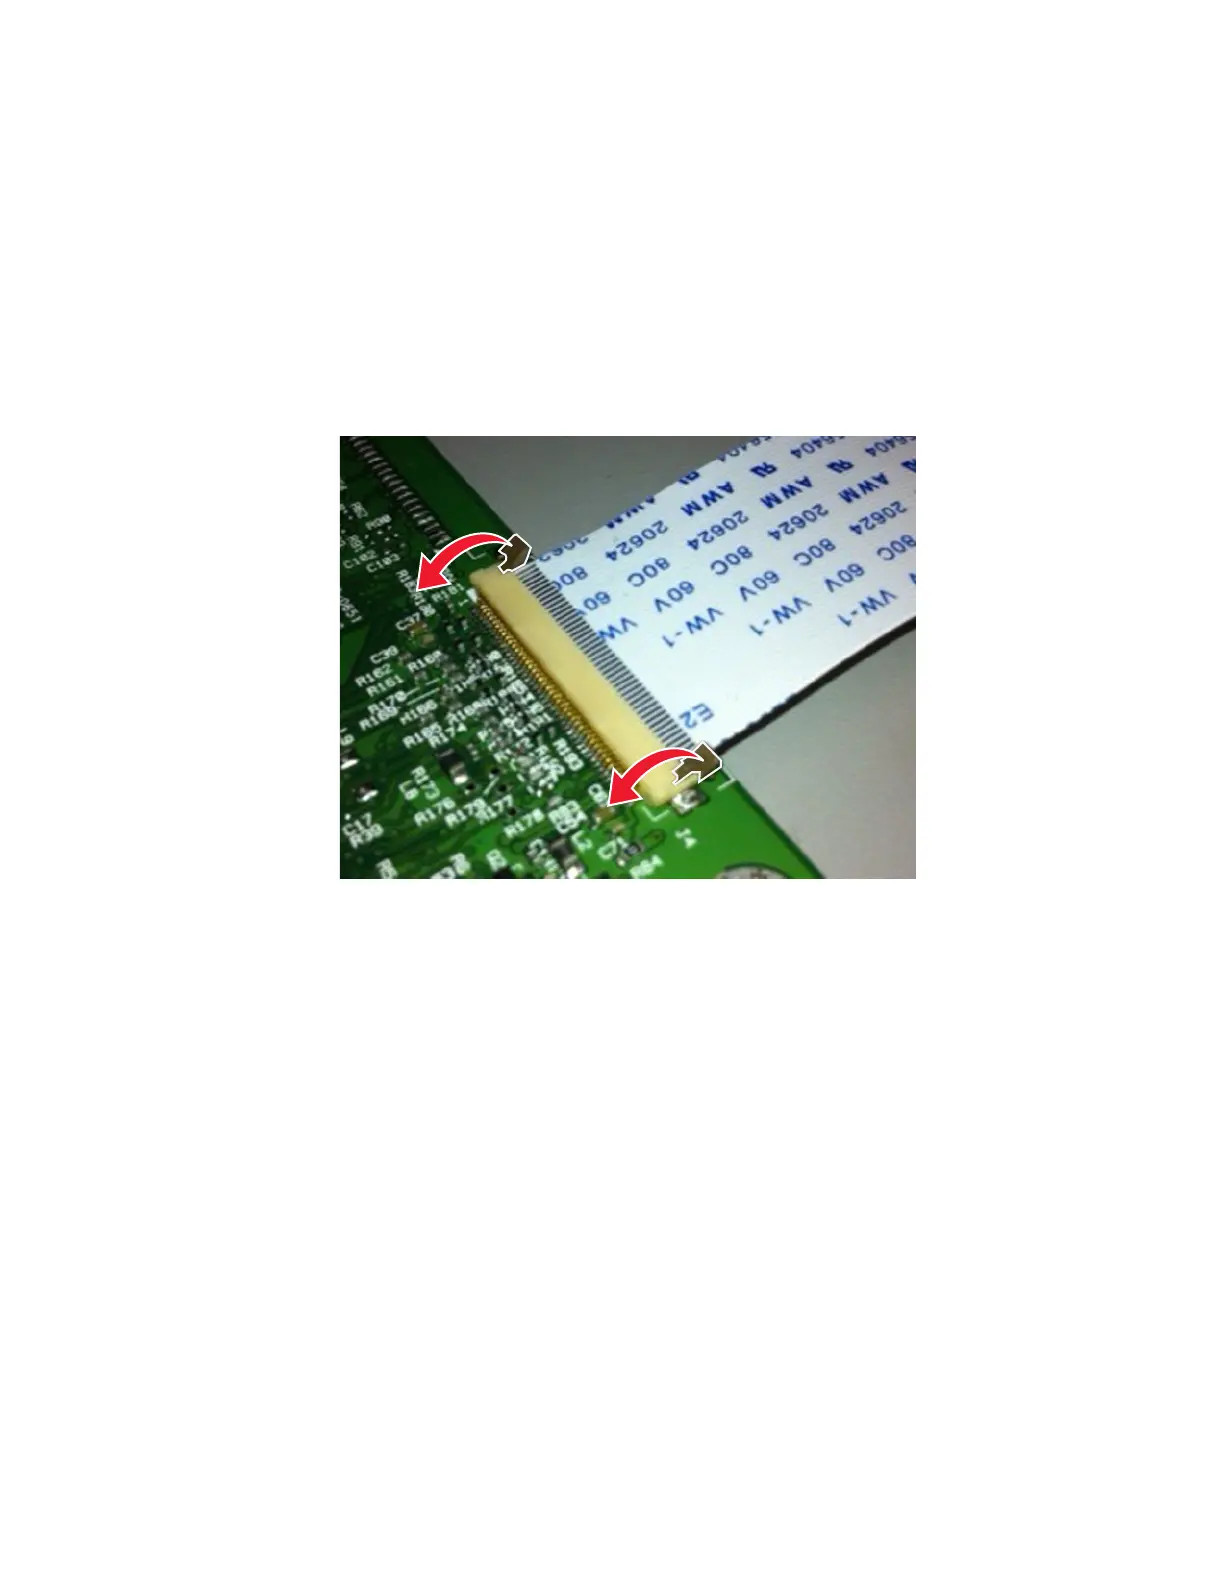
Horizontal top contact connector
This FRU contains a horizontal top contact cable connector. Read the instructions before proceeding.
The horizontal top contact connector uses a back flip locking actuator to lock the ribbon cable into the Zero Insertion
Force (ZIF) connector. The cable is inserted horizontally into the connector.
Warning—Potential Damage: When opening or closing this type of actuator, gently lift or close the two tabs located
on each end of the actuator. The two tabs should be moved simultaneously. Do not close the actuator from the
center of the actuator.
Removing a cable from the horizontal top contact connector
1 Place a finger at each end of the locking actuator, and then gently lift the actuator to the unlocked position.
2 Slide the cable out of the connector.
7527
Repair information
233

Table of Contents

Other manuals for Lexmark CX310

Questions and Answers:

Question and Answer IconNeed help?

Do you have a question about the Lexmark CX310 and is the answer not in the manual?

Lexmark CX310 Specifications

General IconGeneral
Print TechnologyLaser
Scan TechnologyCIS
Scan ResolutionUp to 600 x 600 dpi
Duplex PrintingManual
Display2.4-inch color LCD
Processor Speed800 MHz
Standard Memory256 MB
Fax Speed33.6 Kbps
Operating System CompatibilityWindows, Mac OS, Linux
Print ResolutionUp to 600 x 600 dpi
ConnectivityUSB, Ethernet
Standard Paper Input250 sheets
Scanner TypeFlatbed, ADF
Fax Resolution300 x 300 dpi
Paper Capacity250 sheets
Network ConnectivityEthernet
Copy SpeedUp to 22 cpm (black), Up to 18 cpm (color)

Related product manuals