EasyManuals Logo

Lexmark CX310 Service Manual

Lexmark CX310
430 pages
To Next Page IconTo Next Page
To Previous Page IconTo Previous Page
Page #67 background imageLoading...
Page #67 background image
Actions Yes No
Step 8
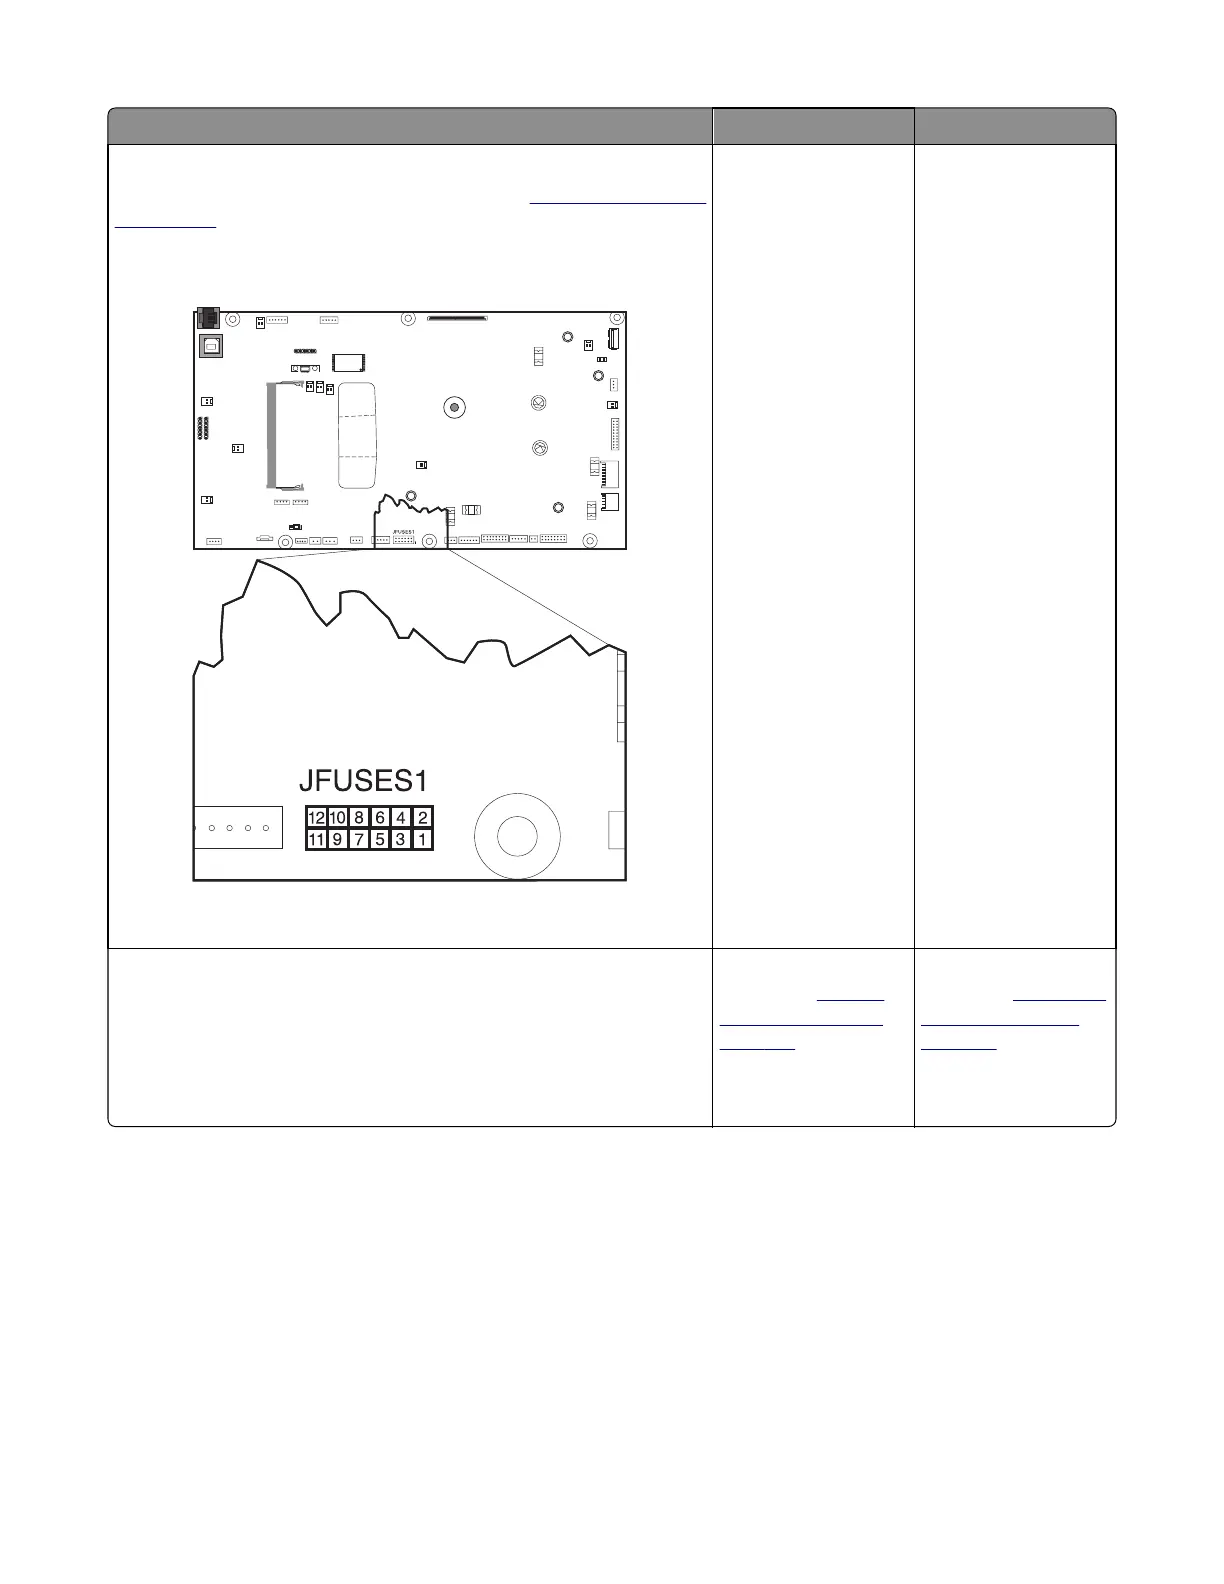
Turn the printer off, and remove the rear shield. See
“Rear cover removal”
on page 307.
Verify the cable is correctly connected to JFUSES1 on the controller board
and to the sensor.
Is the sensor cable properly connected?
Go to step 9. Reconnect the cable. If
the problem persists,
then go to step 8.
Step 9
Turn the printer on, and check the values at JFUSES1:
Pin 8: Ground
Pin 9: +3.3 V dc
Are the values approximately correct?
Replace the duplex
sensor. See
“Duplex
sensor removal” on
page 302.
Replace the controller
board. See
“Controller
board removal” on
page 309.
24y paper jams
[x]page jam, open tray [x] [24y.xx]
1 Pull out the tray completely.
Note: The message on the printer display determines in which tray the paper jam is located.
7527
Diagnostic information
67

Table of Contents

Other manuals for Lexmark CX310

Questions and Answers:

Question and Answer IconNeed help?

Do you have a question about the Lexmark CX310 and is the answer not in the manual?

Lexmark CX310 Specifications

General IconGeneral
Print TechnologyLaser
Scan TechnologyCIS
Scan ResolutionUp to 600 x 600 dpi
Duplex PrintingManual
Display2.4-inch color LCD
Processor Speed800 MHz
Standard Memory256 MB
Fax Speed33.6 Kbps
Operating System CompatibilityWindows, Mac OS, Linux
Print ResolutionUp to 600 x 600 dpi
ConnectivityUSB, Ethernet
Standard Paper Input250 sheets
Scanner TypeFlatbed, ADF
Fax Resolution300 x 300 dpi
Paper Capacity250 sheets
Network ConnectivityEthernet
Copy SpeedUp to 22 cpm (black), Up to 18 cpm (color)

Related product manuals