Low‑voltage power supply (LVPS) assembly removal
1 Remove the left cover assembly. See “Left cover assembly removal” on page 246.
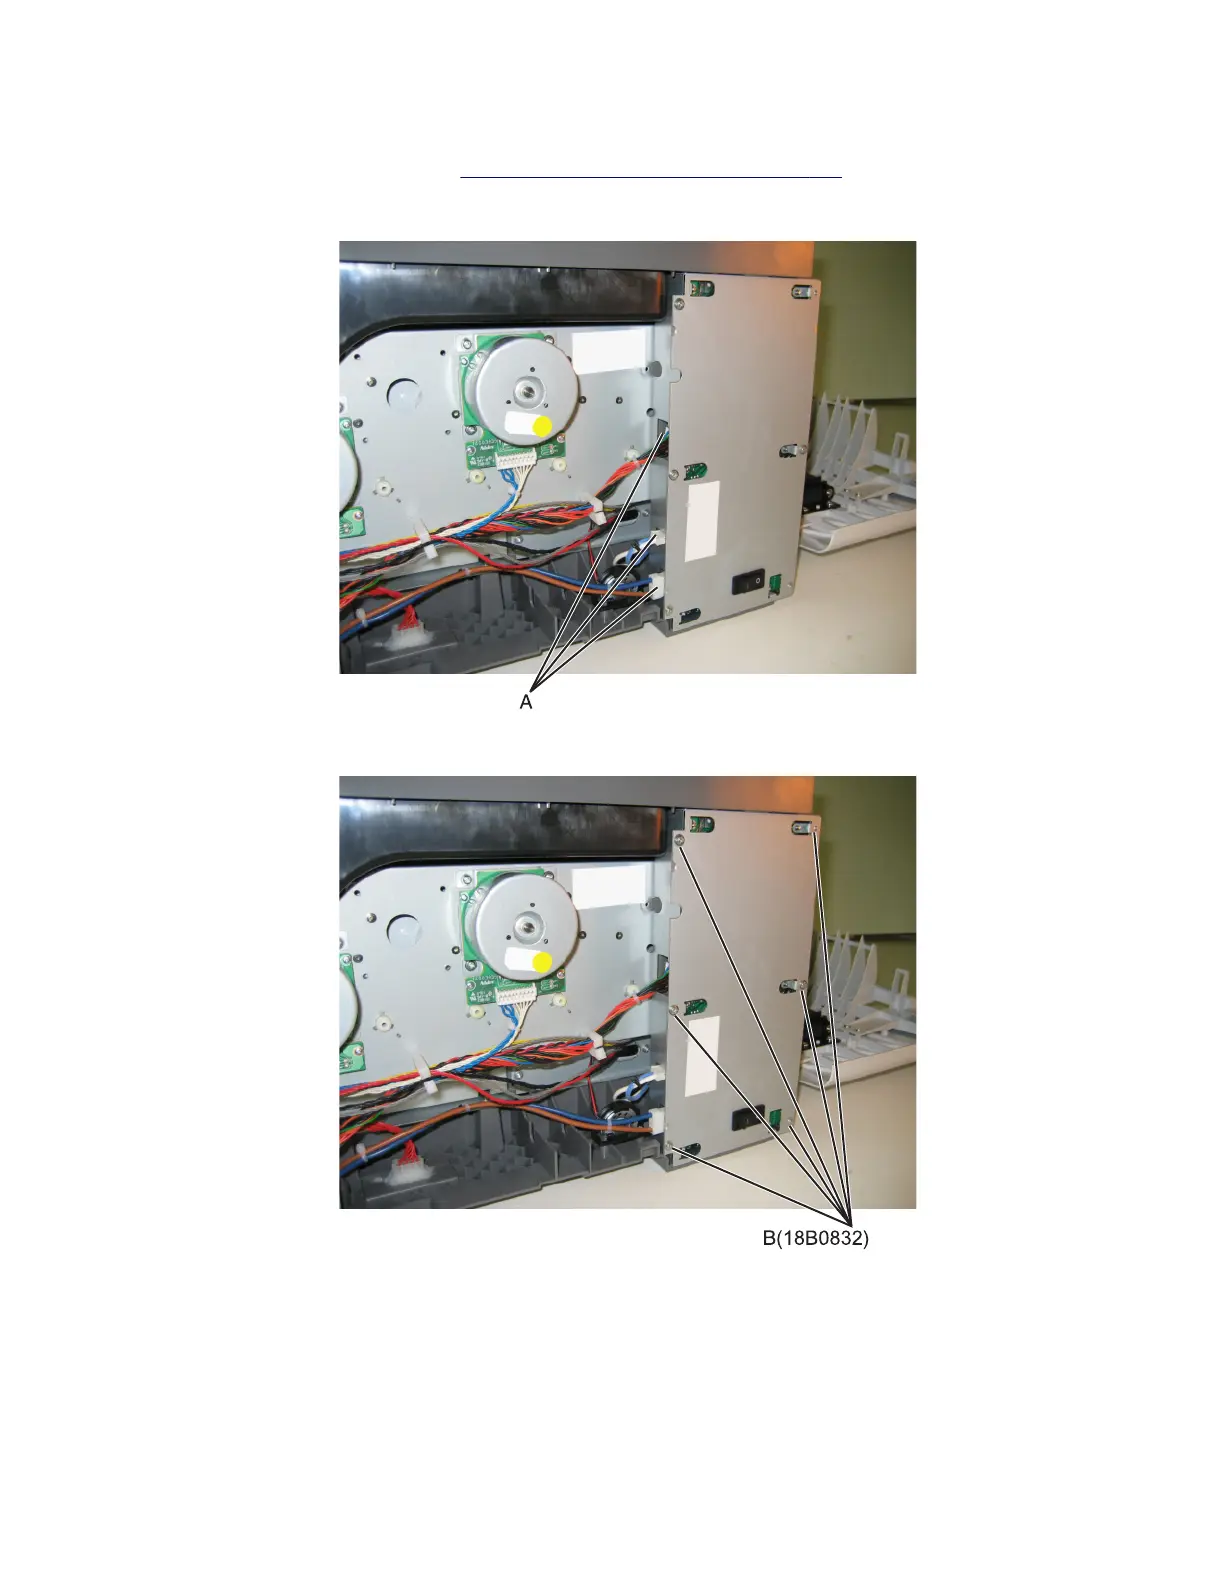
2 Press in on the latches to disconnect the three cables (A) from the LVPS.
3 Remove the six screws (B).
4 Remove the LVPS.
Warning—Potential Damage: If you receive a new low-voltage power supply with a voltage selector switch (C), then
be sure to set the switch to the correct setting for your voltage requirements before installing the low-voltage power
supply. The switch can be set for either 115 V or 230 V. Failure to do so could result in damage to the power supply.
Note: If there is no switch, the LVPS automatically senses the line voltage.
7527
Repair information
253