12 Lift the fuser, and remove.
13 Remove the redrive pulley from the fuser exit shaft. The pulley and e-clip will be used on the new fuser.
Warning—Potential Damage: Be careful to not interfere with or damage the fuser exit sensor to the left of the
fuser when rotating.
Installation notes:
a Replace the redrive pulley on the shaft.
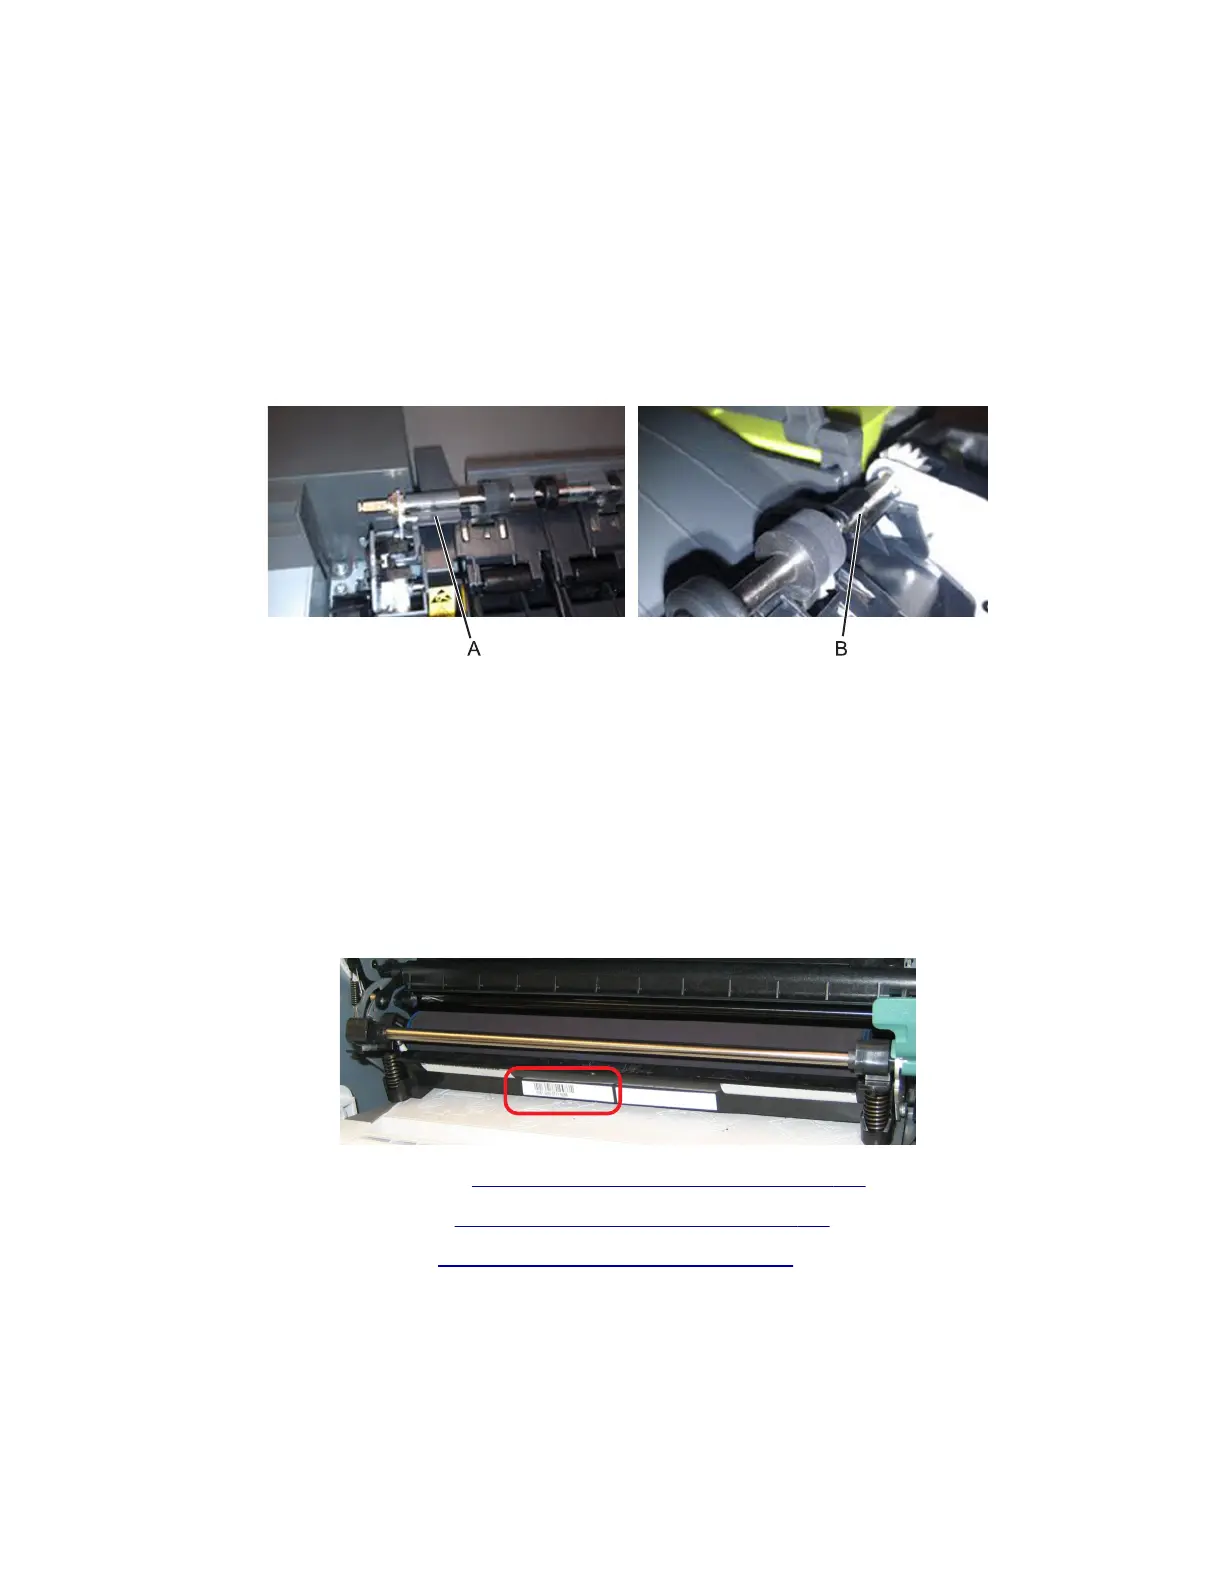
b Install the new fuser, and then replace the narrow media flag (A) and the fuser deflector flag (B) on the fuser exit
shaft. Make sure the flags do not stick and can move freely on the shaft.
c Loop the redrive belt around the pulley.
Bottom removals
Transfer module removal
1 Write down the number of the new transfer module before installing it. You will need the 16-digit numeric value
from the barcode after the installation, and it is easier to see at this point.
2 Remove the right cover assembly. See “Right cover assembly removal” on page 256.
3 Remove the waste toner bottle. See “Waste toner bottle removal” on page 271.
4 Remove the imaging unit (IU). See “Imaging unit (IU) removal” on page 267.
7527
Repair information
290