EasyManuals Logo

Lexmark CX310 Service Manual

Lexmark CX310
430 pages
To Next Page IconTo Next Page
To Previous Page IconTo Previous Page
Page #303 background imageLoading...
Page #303 background image
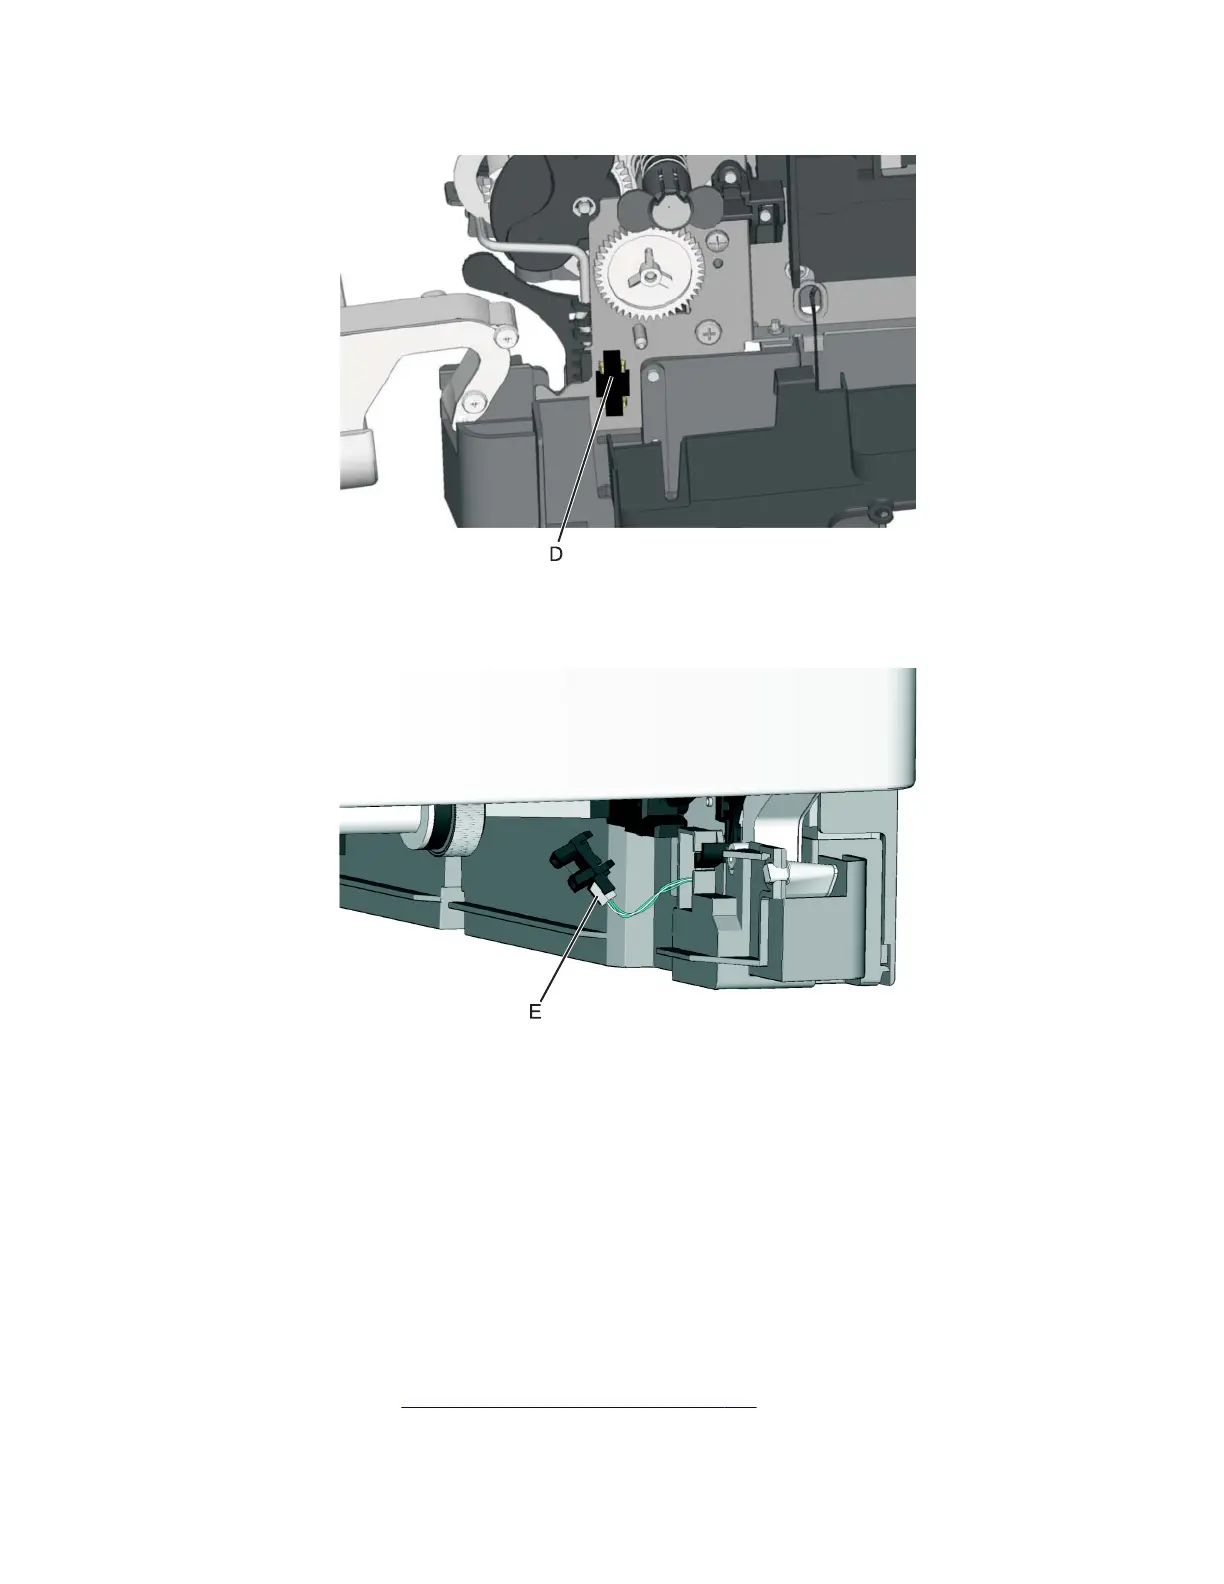
4 Remove the sensor plate (D).
5 Push in on the latches to disconnect the duplex sensor from the printer.
6 Disconnect the cable (E) from the duplex sensor.
Installation notes:
a Clean the contact surface where you removed the sensor retaining plate, or where you need to install the new
one.
b Install the new sensor.
Note: Make sure the clamps on the legs of the sensor latch to the metal frame.
c Remove the backing from the new plate, and place the plate on the surface between the sensor mounting
latches.
Tray present sensor removal
1 Remove the media tray.
2 Remove the imaging unit. See “Imaging unit (IU) removal” on page 267.
7527
Repair information
303

Table of Contents

Other manuals for Lexmark CX310

Questions and Answers:

Question and Answer IconNeed help?

Do you have a question about the Lexmark CX310 and is the answer not in the manual?

Lexmark CX310 Specifications

General IconGeneral
Print TechnologyLaser
Scan TechnologyCIS
Scan ResolutionUp to 600 x 600 dpi
Duplex PrintingManual
Display2.4-inch color LCD
Processor Speed800 MHz
Standard Memory256 MB
Fax Speed33.6 Kbps
Operating System CompatibilityWindows, Mac OS, Linux
Print ResolutionUp to 600 x 600 dpi
ConnectivityUSB, Ethernet
Standard Paper Input250 sheets
Scanner TypeFlatbed, ADF
Fax Resolution300 x 300 dpi
Paper Capacity250 sheets
Network ConnectivityEthernet
Copy SpeedUp to 22 cpm (black), Up to 18 cpm (color)

Related product manuals