EasyManuals Logo

Lexmark CX310 Service Manual

Lexmark CX310
430 pages
To Next Page IconTo Next Page
To Previous Page IconTo Previous Page
Page #304 background imageLoading...
Page #304 background image
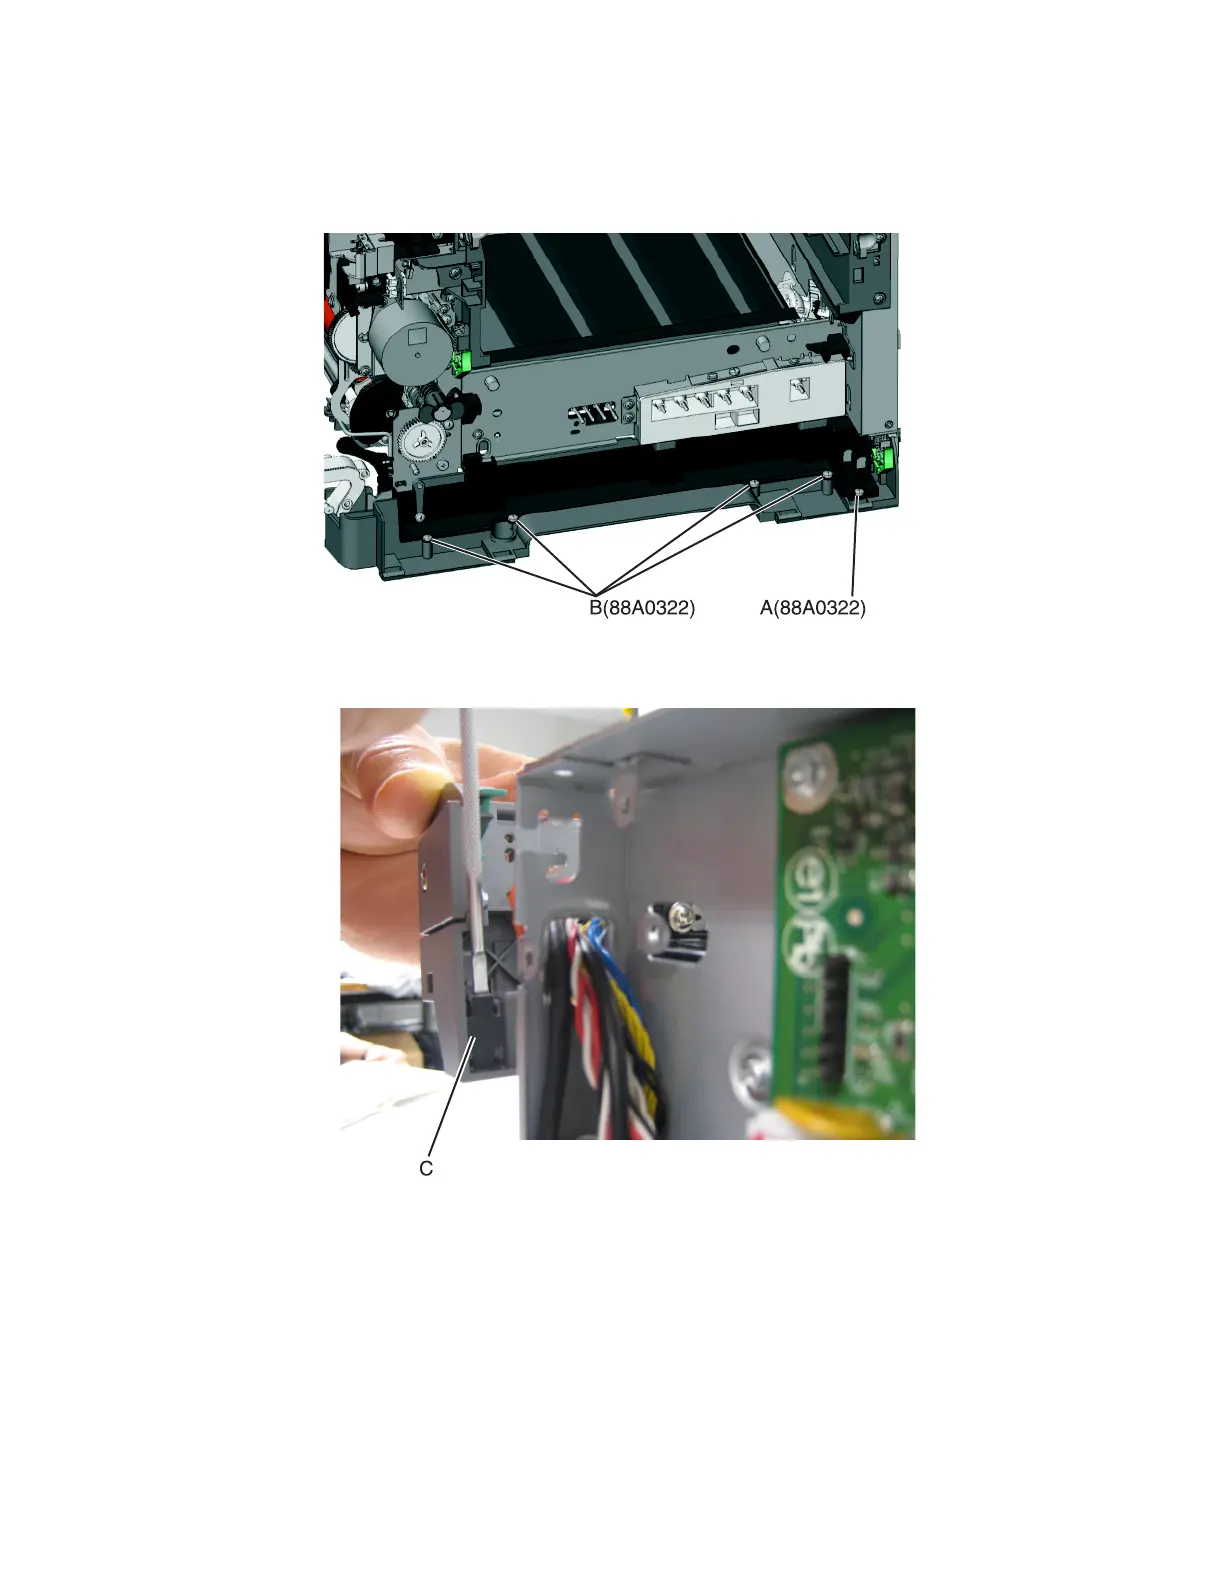
3 Remove the rear screw (A) in the waste toner bottle sensor contact to allow access to the cable cover.
Note: The waste toner bottle sensor contact does not need to be unplugged or removed.
4 Remove the four screws (B) from the cable cover, and remove the cable cover.
5 Remove the sensor retaining plate (C), and then pinch the latches together to remove the tray present sensor.
6 Disconnect the tray present sensor cable.
Installation notes:
a Clean the contact surface where you removed the sensor retaining plate, or where you need to install the new
one.
Install the sensor.
b Remove the backing from the new plate, and place the plate on the surface between the sensor mounting posts.
7527
Repair information
304

Table of Contents

Other manuals for Lexmark CX310

Questions and Answers:

Question and Answer IconNeed help?

Do you have a question about the Lexmark CX310 and is the answer not in the manual?

Lexmark CX310 Specifications

General IconGeneral
Print TechnologyLaser
Scan TechnologyCIS
Scan ResolutionUp to 600 x 600 dpi
Duplex PrintingManual
Display2.4-inch color LCD
Processor Speed800 MHz
Standard Memory256 MB
Fax Speed33.6 Kbps
Operating System CompatibilityWindows, Mac OS, Linux
Print ResolutionUp to 600 x 600 dpi
ConnectivityUSB, Ethernet
Standard Paper Input250 sheets
Scanner TypeFlatbed, ADF
Fax Resolution300 x 300 dpi
Paper Capacity250 sheets
Network ConnectivityEthernet
Copy SpeedUp to 22 cpm (black), Up to 18 cpm (color)

Related product manuals