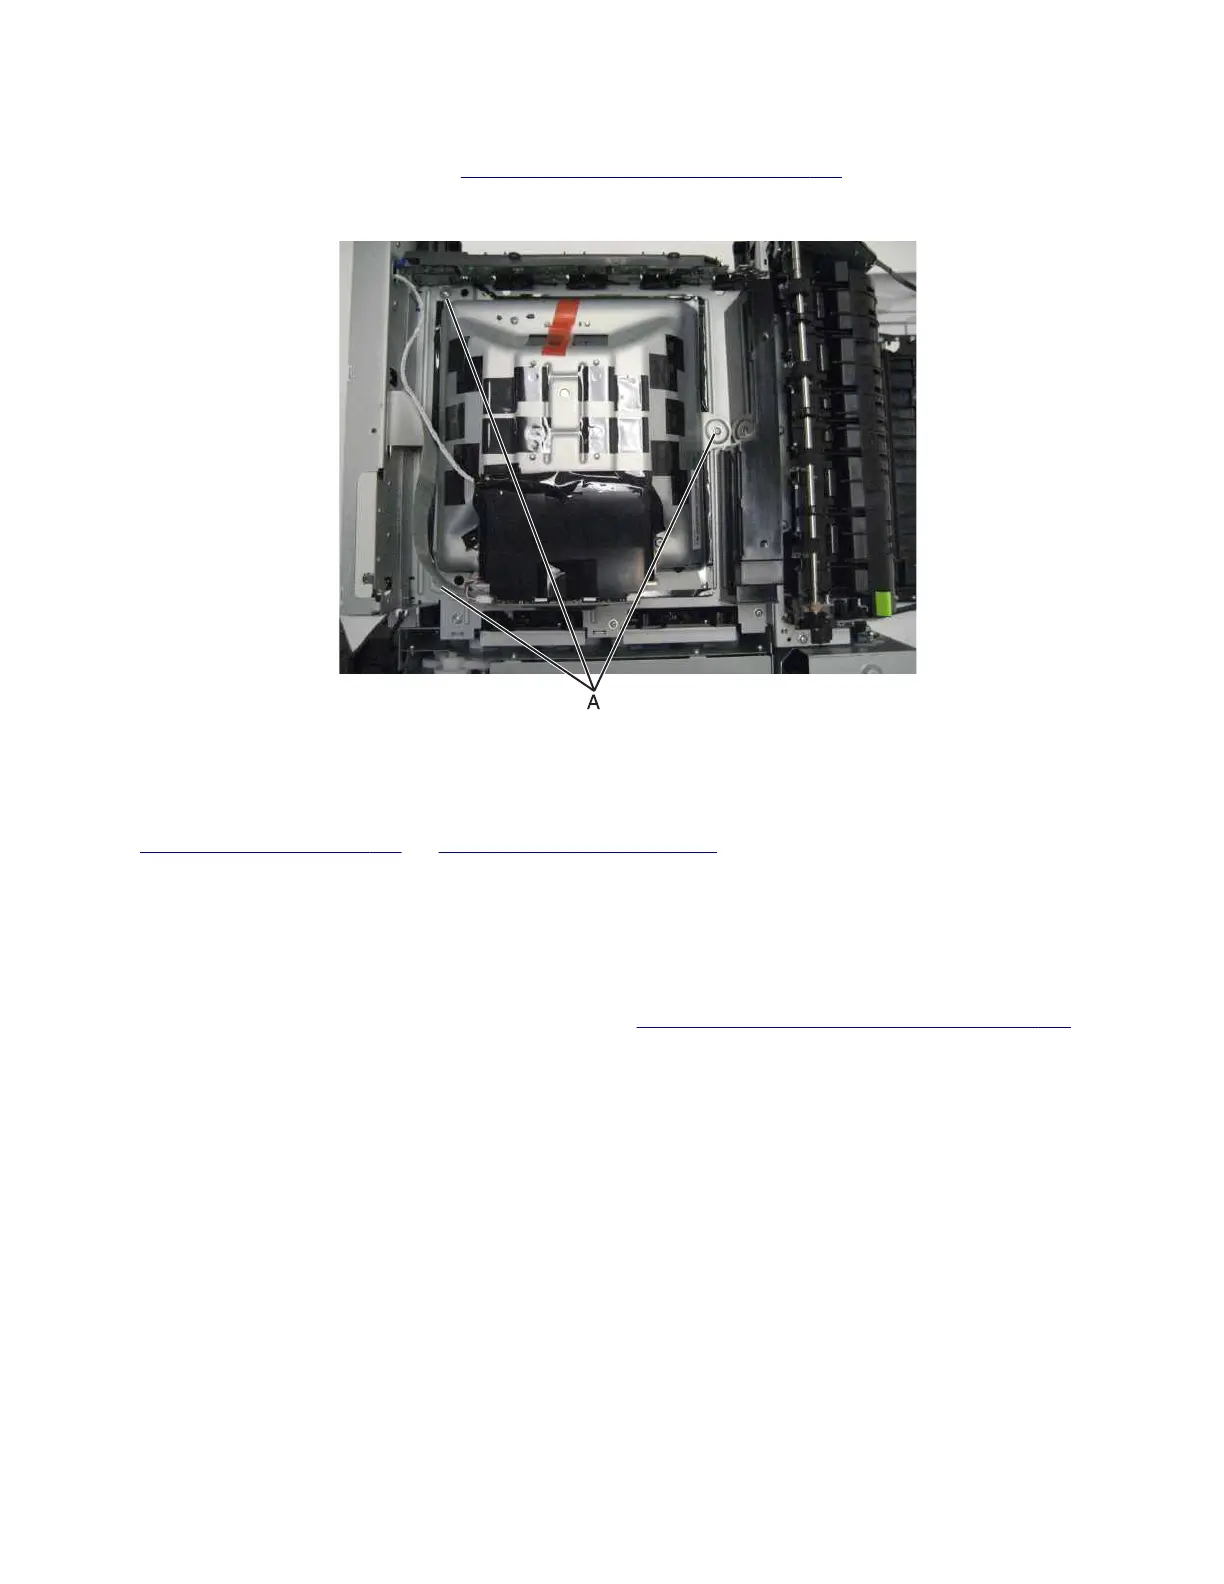
Printhead removal
1 Remove the top cover assembly. See “Top cover assembly removal” on page 312.
2 Remove the four screws (A).
3 Remove the printhead.
Installation notes:
• When the printhead is replaced, perform the registration (black planes) and alignment (color planes). See
“REGISTRATION” on page 193and “Alignment Menu” on page 196.
• Be sure to replace the toroid on the cable when you reinstall the printhead, and push the toriod between the
connector and the top frame so that the weight is not supported by the cable.
Redrive unit removal
1 Remove the flatbed scanner assembly from the MFP. See “Flatbed scanner assembly removal” on page 333.
2 Place the flatbed facedown on a soft surface to avoid scratching the glass or marring the covers.
7527
Repair information
324